Description
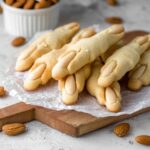
Witches Fingers are spooky, buttery cookies perfect for Halloween. These almond-topped, knuckle-detailed cookies have a delicate texture made from a simple dough of flour, powdered sugar, butter, and salt. Shaped and decorated to resemble creepy witch fingers, they’re a fun and festive treat that will delight guests at any Halloween gathering.
Ingredients
Scale
Dry Ingredients
- 3 cups (375 grams) all purpose flour
- 1 cup (110 grams) powdered sugar
- ½ teaspoon salt
Wet Ingredients
- 1 cup (2 sticks/227 grams) unsalted butter, softened
Decoration
- 20 blanched almonds, halved
Instructions
- Prepare the Dough: In a food processor, combine the all purpose flour, powdered sugar, softened unsalted butter, and salt. Process the ingredients until they come together into a dough.
- Knead the Dough: Scrape the dough onto a clean work surface. Gently press and knead it until a smooth dough forms from the initially crumbly mixture.
- Chill the Dough: Flatten the dough into a disk, wrap it in plastic wrap, and refrigerate for 1 hour to firm up.
- Prepare the Almonds: While the dough is chilling, carefully split the blanched almonds in half lengthwise using a small pointed knife to create fingernail decorations. Have extra almonds ready in case some do not split cleanly.
- Preheat Oven and Line Baking Sheets: Preheat your oven to 320ºF (160ºC) and line two large baking sheets with non-stick parchment paper.
- Soften Dough Slightly: Allow the chilled dough to soften a bit at room temperature before shaping to make it easier to handle.
- Shape the Fingers: Cut off small portions of dough and roll each into finger-sized logs. Cut into finger-length pieces. Since the cookies will spread a little during baking, roll them thinner than the desired final thickness.
- Add Details: Shape the ends of each “finger” to be slightly rounded. Press a halved almond flat side down onto one end to represent a fingernail. Use a knife to gently press three knuckle indentations: one set close to the almond nail, another set further down the dough finger, using your own finger as a guide.
- Bake the Cookies: Place the shaped and decorated fingers onto the prepared baking sheets. Bake in the preheated oven for 12 to 15 minutes, or until the cookies are lightly colored and set.
- Cool the Cookies: Allow the cookies to cool on the baking sheet for 5 minutes, then transfer them to a wire rack to cool completely before serving.
Notes
- Note 1: For best texture, use all-purpose flour as specified.
- The dough can be crumbly initially, so gentle kneading helps it form properly.
- Be patient when splitting almonds to avoid breaking.
- Rolling the dough thinner than desired is important because cookies tend to spread in the oven.
- Use a knife and your fingers as guides to create realistic knuckle lines.