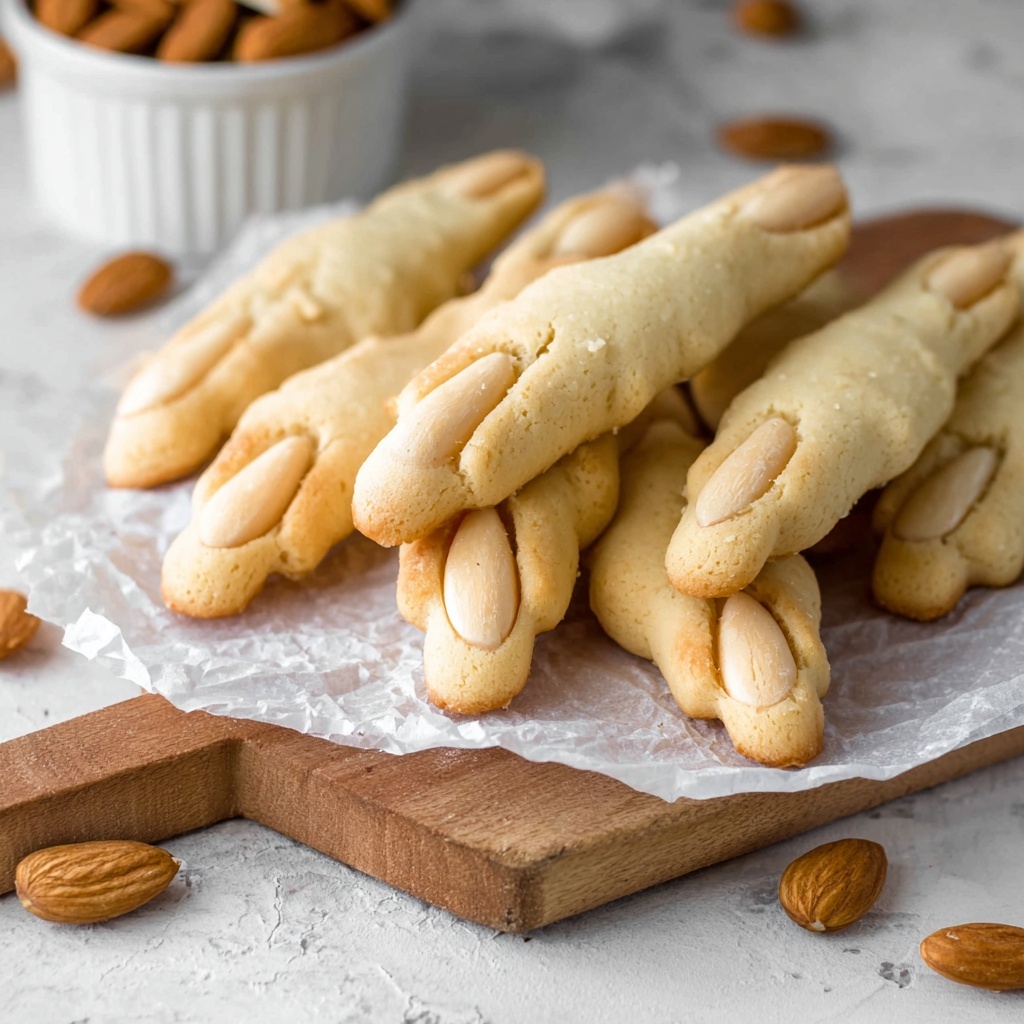
If you are looking to add a spooky yet delicious treat to your Halloween festivities, the Witches Fingers Cookies Recipe is an absolute must-try! These eerie, almond-tipped cookies look just like creepy witch fingers but taste buttery, tender, and delightfully sweet. Each bite is a perfect balance of crumbly texture and subtle sweetness, making it impossible to stop at just one. Whether you’re baking for a party or treating yourself, this recipe brings fun and flavor to your kitchen in a wonderfully simple way.
Ingredients You’ll Need
The beauty of this recipe lies in its simplicity. Each ingredient is straightforward but plays a crucial role in crafting the perfect witches fingers cookies that are both visually striking and deliciously satisfying.
- All-purpose flour (3 cups / 375 grams): Provides the structure and foundation for the cookie dough, giving it that tender crumb.
- Powdered sugar (1 cup / 110 grams): Adds a smooth, sweet touch that blends seamlessly into the dough for melt-in-your-mouth sweetness.
- Unsalted butter (1 cup / 2 sticks / 227 grams, softened): Brings a rich, creamy texture and helps create that signature buttery flavor.
- Salt (½ teaspoon): Enhances all the flavors and balances the sweetness perfectly.
- Blanched almonds (20, for decorating): These become the creepy fingernails and add a nice crunch contrast.
How to Make Witches Fingers Cookies Recipe
Step 1: Combine the dough ingredients
Begin by putting the all-purpose flour, powdered sugar, softened unsalted butter, and salt into a food processor. Pulse until the mixture comes together in a crumbly dough. This quick method ensures that the dough is well mixed but not overworked, which keeps your cookies tender.
Step 2: Form the dough
Transfer the dough onto a clean work surface and gently press and knead it just until smooth. This step helps bring the crumbles together. Be careful not to over-knead, or the dough may become tough.
Step 3: Chill the dough
Shape the dough into a disk and wrap it tightly with plastic wrap. Refrigerate for 1 hour to allow it to firm up. This chilling helps with easier handling and gives you those perfect finger shapes.
Step 4: Prepare the almond fingernails
While the dough chills, carefully split the blanched almonds in half using a small, pointed knife. Insert the knife at the rounded end of the almond and gently wiggle until it splits cleanly. It’s a bit delicate, so have extra almonds ready just in case some don’t split well.
Step 5: Preheat and prep baking sheets
Preheat your oven to 320ºF (160ºC) and line two large baking sheets with non-stick parchment paper. This step ensures your witches fingers won’t stick and bake evenly.
Step 6: Soften the dough for shaping
Let the dough come to room temperature for a few minutes so it softens slightly. This makes it easier to roll and shape without cracking.
Step 7: Shape the fingers
Take a small portion of dough and roll it into a log about the thickness of your finger. Cut into finger-length pieces, keeping in mind they will spread slightly when baked—so make them a tad thinner than you’d like the final result to be.
Step 8: Add details to each witch’s finger
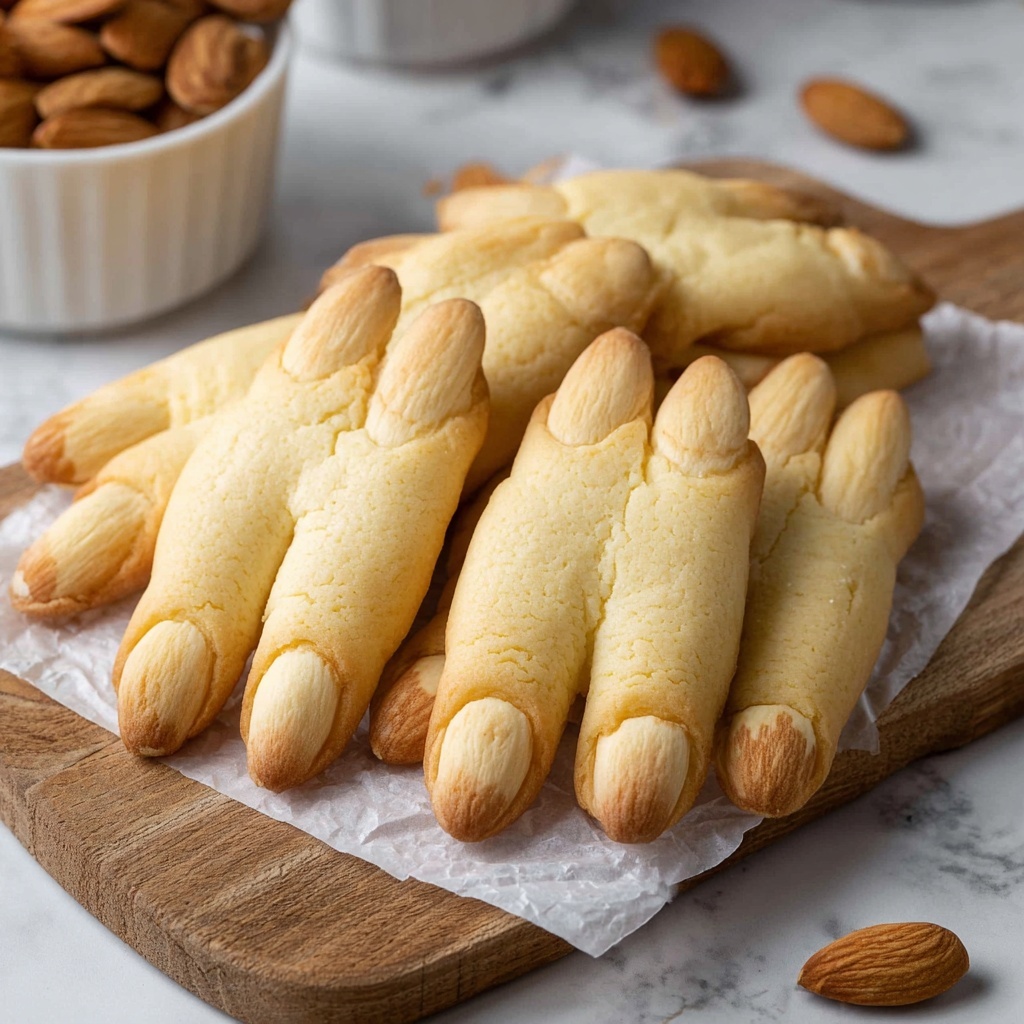
Shape the end of each finger to be slightly rounded, then press a split almond firmly onto this end to mimic a fingernail. Using a knife, score three little indentations to mark knuckles. Place one set of three closer to the almond “nail” and another set further down the finger. Fun tip: use your own finger as a sizing guide for the knuckle marks to make them look just right!
Step 9: Bake the cookies
Arrange the fingers on the prepared baking sheets and bake for 12 to 15 minutes or until they begin to take on a light golden hue. Keep an eye on them to avoid over-baking, ensuring a tender cookie.
Step 10: Cool completely
Allow the freshly baked witches fingers to cool on the cookie sheet for about 5 minutes before transferring them to a wire rack to cool fully. This prevents breakage and helps the cookies set perfectly.
How to Serve Witches Fingers Cookies Recipe
Garnishes
To enhance the eerie look, consider adding a touch of red food coloring or berry jam around the almond nails to resemble creepy nail polish or blood. A light dusting of cinnamon sugar can also give a subtle spicy sweetness and visual texture.
Side Dishes
Serve your witches fingers cookies alongside a cup of warm apple cider, hot cocoa, or a rich pumpkin spice latte to complement the buttery sweetness with cozy autumn flavors. They also pair beautifully with creamy vanilla ice cream for a fun dessert mashup.
Creative Ways to Present
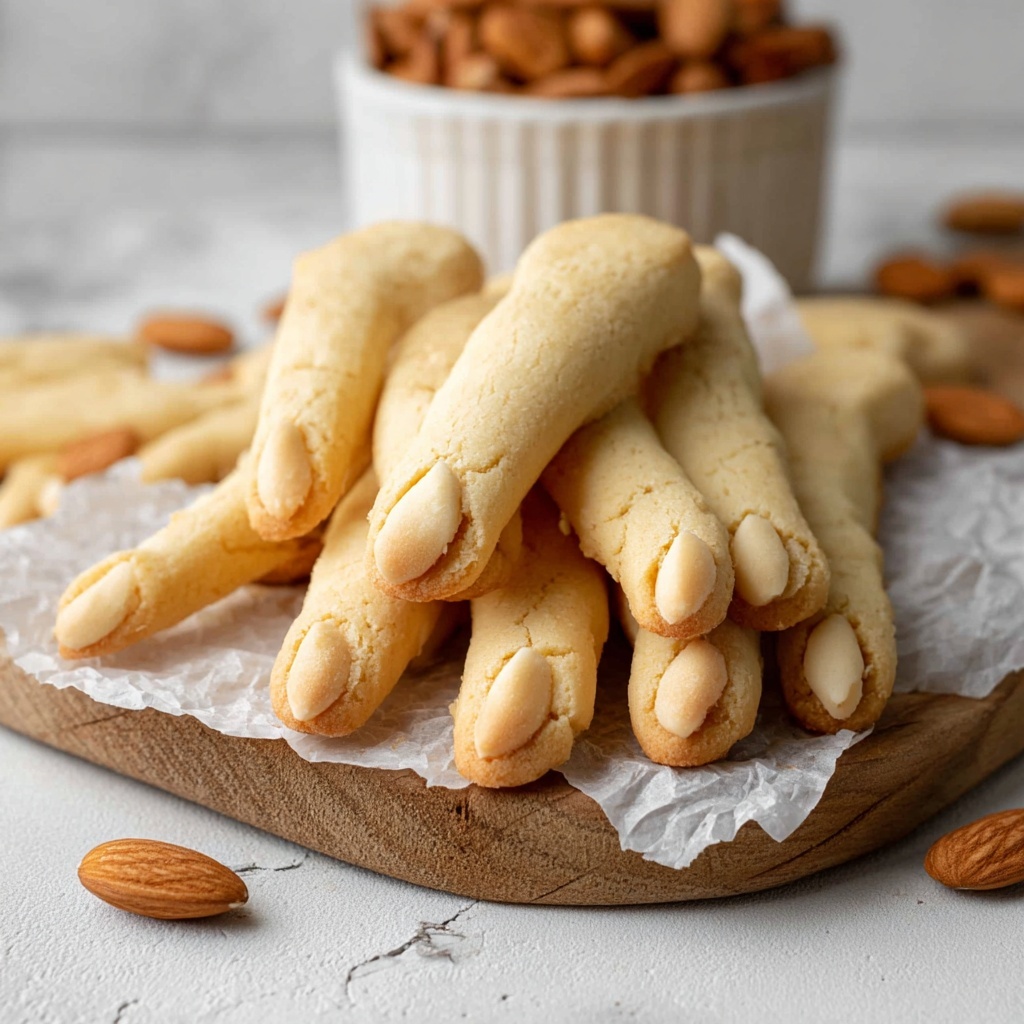
Display these cookies in a “witch’s hand” on a platter lined with black lace or spider webs for a chilling effect. You can also stand them upright in a glass jar filled with red-colored sugar or edible “dirt” (crushed chocolate cookies) to make your Halloween table instantly spooky and inviting.
Make Ahead and Storage
Storing Leftovers
Store any leftover witches fingers cookies in an airtight container at room temperature. They should stay fresh and maintain their delightful texture for up to 5 days, making them perfect for early Halloween prep.
Freezing
If you want to prepare in advance, these cookies freeze beautifully. Place them in a single layer on a baking sheet to freeze individually, then transfer into a freezer-safe container. They can stay frozen for up to 3 months without losing flavor or texture.
Reheating
To enjoy your cookies warm, simply let them come to room temperature or heat them gently in a low oven for 5 minutes. Avoid microwaving, as it can make the cookies overly soft and lose their signature crumbly texture.
FAQs
Can I use almond extract for more almond flavor?
Absolutely! Adding a teaspoon of almond extract to the dough can enhance the nutty flavor and make those almond nails stand out even more. Just be careful not to overpower the buttery sweetness.
What if I don’t have a food processor?
No worries! You can mix the dough by hand using a pastry cutter or two forks to blend the butter into the dry ingredients. It will take a bit more elbow grease, but the results will be just as delightful.
Can I use other nuts instead of almonds?
Yes, but keep in mind that almonds are ideal because of their shape and texture. You could try slivered cashews or pecan halves if you want a different look, but the traditional effect might change.
How do I keep the cookies from spreading too much?
Chilling the dough is key! Make sure the dough is cold enough before shaping and try rolling the fingers thinner than you want the final size. Also, avoid using too much butter, and bake at the recommended temperature to control spreading.
Are these cookies gluten-free?
This specific recipe uses all-purpose flour, which contains gluten. However, you can experiment with gluten-free flour blends designed for baking. Just note that it might slightly affect the texture, so adjustments like adding xanthan gum could be necessary.
Final Thoughts
There is something incredibly fun and satisfying about baking up a batch of spooky yet scrumptious witches fingers cookies. Whether you’re making them with kids, friends, or just because you love that festive vibe, this Witches Fingers Cookies Recipe is sure to become a seasonal favorite. So roll up your sleeves, get creative with your almond nails, and enjoy the magic that happens when spooky meets sweet in the kitchen!
Print
Witches Fingers Cookies Recipe
- Prep Time: 20 minutes
- Cook Time: 15 minutes
- Total Time: 1 hour 35 minutes
- Yield: 40 cookies
- Category: Dessert
- Method: Baking
- Cuisine: American
Description
Witches Fingers are spooky, buttery cookies perfect for Halloween. These almond-topped, knuckle-detailed cookies have a delicate texture made from a simple dough of flour, powdered sugar, butter, and salt. Shaped and decorated to resemble creepy witch fingers, they’re a fun and festive treat that will delight guests at any Halloween gathering.
Ingredients
Dry Ingredients
- 3 cups (375 grams) all purpose flour
- 1 cup (110 grams) powdered sugar
- ½ teaspoon salt
Wet Ingredients
- 1 cup (2 sticks/227 grams) unsalted butter, softened
Decoration
- 20 blanched almonds, halved
Instructions
- Prepare the Dough: In a food processor, combine the all purpose flour, powdered sugar, softened unsalted butter, and salt. Process the ingredients until they come together into a dough.
- Knead the Dough: Scrape the dough onto a clean work surface. Gently press and knead it until a smooth dough forms from the initially crumbly mixture.
- Chill the Dough: Flatten the dough into a disk, wrap it in plastic wrap, and refrigerate for 1 hour to firm up.
- Prepare the Almonds: While the dough is chilling, carefully split the blanched almonds in half lengthwise using a small pointed knife to create fingernail decorations. Have extra almonds ready in case some do not split cleanly.
- Preheat Oven and Line Baking Sheets: Preheat your oven to 320ºF (160ºC) and line two large baking sheets with non-stick parchment paper.
- Soften Dough Slightly: Allow the chilled dough to soften a bit at room temperature before shaping to make it easier to handle.
- Shape the Fingers: Cut off small portions of dough and roll each into finger-sized logs. Cut into finger-length pieces. Since the cookies will spread a little during baking, roll them thinner than the desired final thickness.
- Add Details: Shape the ends of each “finger” to be slightly rounded. Press a halved almond flat side down onto one end to represent a fingernail. Use a knife to gently press three knuckle indentations: one set close to the almond nail, another set further down the dough finger, using your own finger as a guide.
- Bake the Cookies: Place the shaped and decorated fingers onto the prepared baking sheets. Bake in the preheated oven for 12 to 15 minutes, or until the cookies are lightly colored and set.
- Cool the Cookies: Allow the cookies to cool on the baking sheet for 5 minutes, then transfer them to a wire rack to cool completely before serving.
Notes
- Note 1: For best texture, use all-purpose flour as specified.
- The dough can be crumbly initially, so gentle kneading helps it form properly.
- Be patient when splitting almonds to avoid breaking.
- Rolling the dough thinner than desired is important because cookies tend to spread in the oven.
- Use a knife and your fingers as guides to create realistic knuckle lines.


