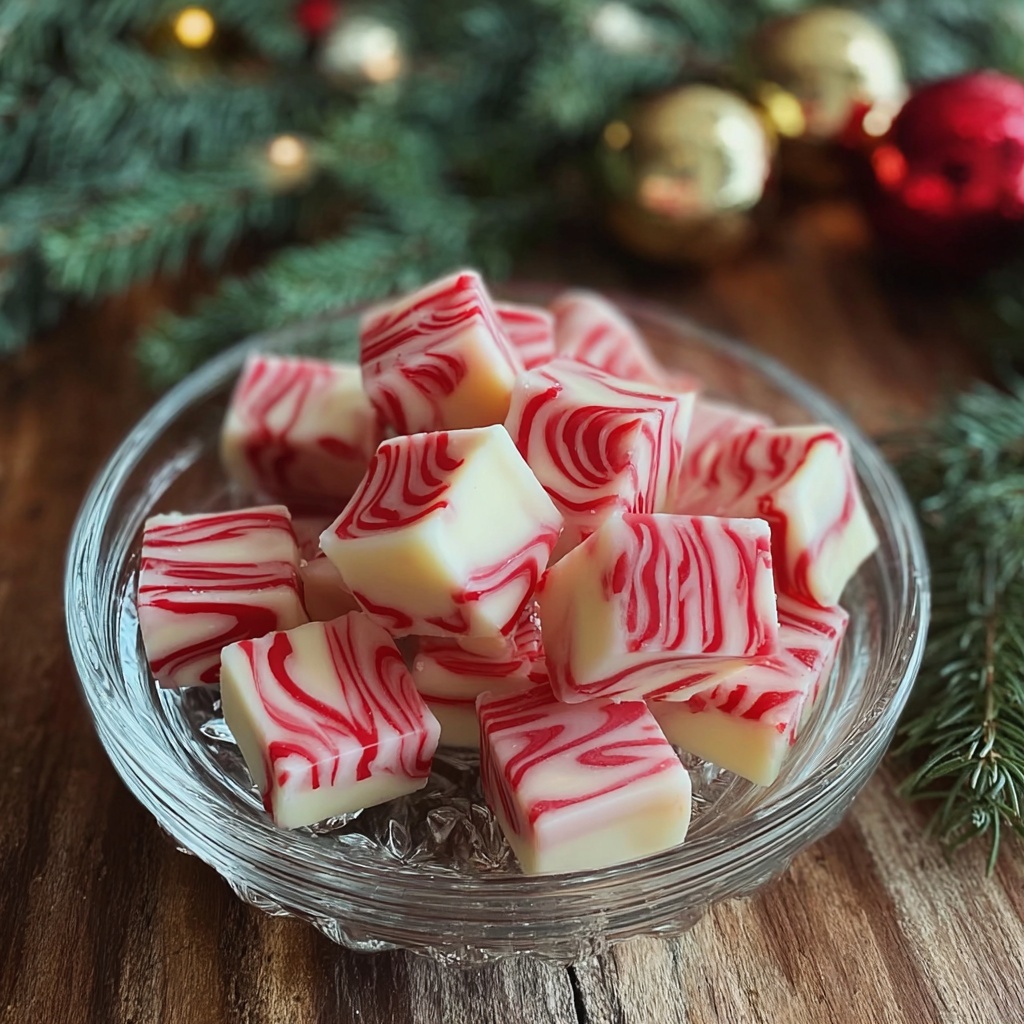
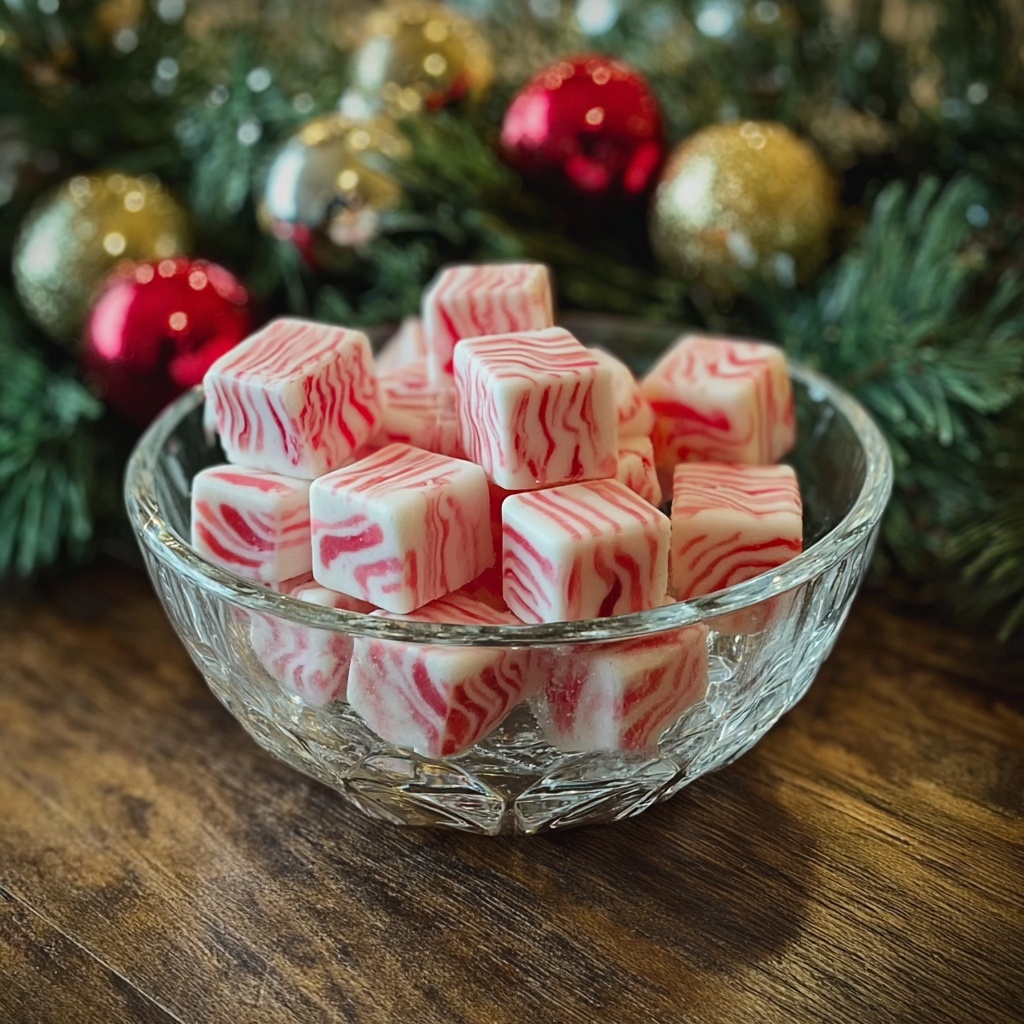
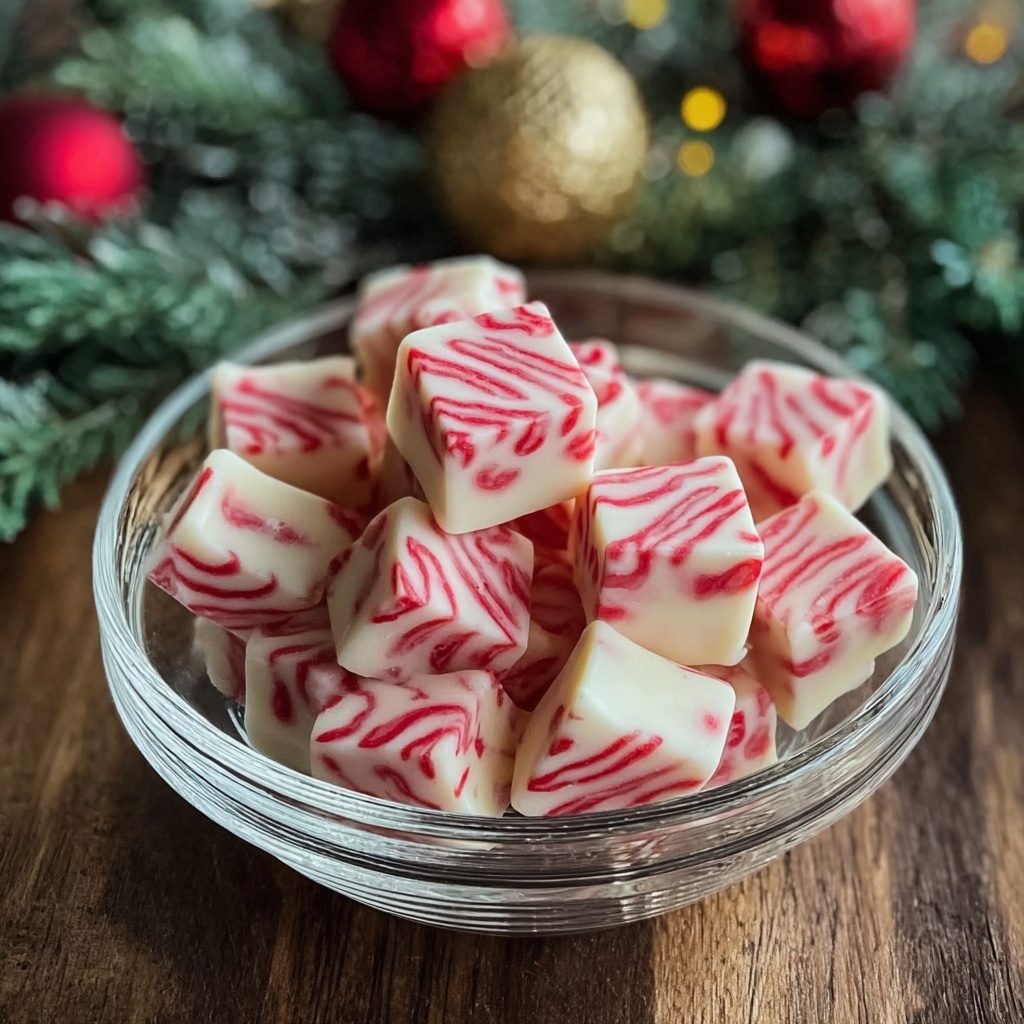
If you’re on the hunt for a delightful holiday treat that embodies nostalgia and festive cheer, look no further than this Soft Christmas Peppermints Old-Fashioned Butter Mints Recipe. These buttery, melt-in-your-mouth morsels are bursting with refreshing peppermint flavor and come dressed in classic red and white swirls, making them a perfect addition to any holiday celebration. With just a handful of simple ingredients and a little patience for drying time, you’ll create an irresistible batch of soft mints that taste just like grandma used to make.
Ingredients You’ll Need
Gathering the right ingredients is the key to achieving that perfect balance of creamy texture and bright peppermint flavor in this vintage favorite. Each component plays an essential role, whether it’s lending richness, sweetness, or that signature peppermint kick.
- Butter (½ cup, room temperature): Provides the creamy base and richness that make these mints so soft and luscious.
- Powdered sugar (4 cups): Adds sweetness while ensuring the mints have the ideal smooth, melt-in-your-mouth texture.
- Heavy whipping cream (2 tbsp): Helps bind the mixture together and keeps the mints tender rather than hard and brittle.
- Peppermint extract (¼ tsp): Infuses the candies with that unmistakably fresh and festive peppermint flavor.
- Red gel food coloring: Gives one half of the dough a vibrant hue to create those classic holiday swirls.
How to Make Soft Christmas Peppermints Old-Fashioned Butter Mints Recipe
Step 1: Prepare Your Workspace
Start by laying out parchment or wax paper on a clean surface. This will keep your candies from sticking and makes cleanup a breeze. Trust me, having this ready beforehand sets the tone for a smooth and joyful candy-making session.
Step 2: Cream the Butter
Beat the butter until it turns pale and fluffy. This step is crucial because it incorporates air, lending a lightness to the mints and ensuring they aren’t dense or heavy.
Step 3: Mix in the Dry Ingredients and Flavor
Gradually add the powdered sugar, heavy whipping cream, and peppermint extract to your fluffy butter. Mix everything together until you get a firm dough that’s pliable but not sticky. This is where your candy starts to take shape and soak up that wonderful peppermint aroma.
Step 4: Divide and Color the Dough
Split your dough in half, then gently knead red gel food coloring into one portion until the color is vibrant and even. This is how you get those beautiful traditional red and white peppermint stripes.
Step 5: Roll, Twist, and Smooth
Roll each colored dough half into long ropes about ½ inch thick. Then twist one red and one white rope together, working gently to preserve the color contrast. Smooth any rough spots with your fingers to create the perfect candy cane swirl effect.
Step 6: Dry, Cut, and Cure
Let your twisted ropes rest for 1 to 2 hours to firm up slightly—this makes cutting easier. Slice them into bite-sized mints, then lay them out to dry for 24 hours. This slow drying process ensures the mints set soft but firm, giving them that classic butter mint texture you’ll adore.
How to Serve Soft Christmas Peppermints Old-Fashioned Butter Mints Recipe
Garnishes
These charming Soft Christmas Peppermints can be dressed up with sprinkles or edible glitter for extra sparkle. Just lightly brush them with a bit of water before adding your garnish so it sticks perfectly without compromising the mint’s buttery softness.
Side Dishes
Pair your mints with a warm cup of cocoa or peppermint tea to intensify the festive flavors. They also make a delightful accompaniment to holiday cookie platters or a rich fruitcake, balancing out sweetness with their fresh peppermint coolness.
Creative Ways to Present
For an extra-special holiday touch, arrange your Soft Christmas Peppermints Old-Fashioned Butter Mints Recipe in a glass jar tied with a red ribbon or nestle them among fresh pine sprigs on a decorative tray. Gift boxes, candy dishes, or even as edible place cards will undoubtedly impress guests and loved ones alike.
Make Ahead and Storage
Storing Leftovers
Keep your mints fresh by storing them in an airtight container at room temperature. This preserves their soft texture for up to two weeks while maintaining their classic peppermint flavor.
Freezing
You can freeze these butter mints if you want to prepare well in advance. Wrap them tightly in plastic wrap and pop them into a freezer-safe container. When ready, thaw them overnight at room temperature for perfectly preserved softness and flavor.
Reheating
Since these are soft mints, there’s no need to reheat them. Enjoy them straight from storage or thaw, as reheating could affect their delicate texture and melt the butter component.
FAQs
Can I use different extracts for flavor?
Absolutely! While peppermint is traditional, you can experiment with vanilla, almond, or even orange extract—just remember to adjust the amount to keep the flavor balanced and not overpowering.
Is it okay to substitute the butter with margarine?
Butter is essential for that rich, creamy texture and flavor in this recipe. Margarine might alter the taste and consistency, so it’s best to stick to real butter for authentic results.
How long does drying take before storing?
The candies should dry for a full 24 hours after slicing. This drying time lets them firm up slightly without hardening, ensuring they remain soft but stable.
Can I make these mints without food coloring?
Definitely! The red swirl is traditional and festive, but the mints will taste just as delicious without coloring—they’ll simply be a lovely creamy white shade.
What’s the best way to prevent sticking during rolling and cutting?
Use a light dusting of powdered sugar on your workspace or parchment paper to keep the dough from sticking. Also, ensure your hands are clean and dry when rolling and twisting the dough ropes.
Final Thoughts
Nothing quite says holiday warmth like the sweet, soothing flavors of peppermint combined with creamy butter, especially in this Soft Christmas Peppermints Old-Fashioned Butter Mints Recipe. Whether you’re making them to share with friends, gift to neighbors, or simply enjoy with a cozy cup of tea, these mints bring a touch of old-fashioned joy to modern celebrations. So grab your mixing bowl and get ready to whip up your new favorite holiday tradition—trust me, your taste buds will thank you!
Print
Soft Christmas Peppermints Old-Fashioned Butter Mints Recipe
- Prep Time: 30 minutes
- Cook Time: 0 minutes
- Total Time: 24 hours 30 minutes
- Yield: 100 servings
- Category: Candy
- Method: No-Cook
- Cuisine: American
Description
These Soft Christmas Peppermints Old-Fashioned Butter Mints are a nostalgic holiday treat featuring a delicate peppermint flavor wrapped in buttery sweetness. With a tender, melt-in-your-mouth texture, these festive mints are easy to make and perfect for sharing at holiday gatherings or gifting to loved ones.
Ingredients
Ingredients
- ½ cup unsalted butter, room temperature
- 4 cups powdered sugar, sifted
- 2 tbsp heavy whipping cream
- ¼ tsp peppermint extract
- Red gel food coloring (as needed)
Instructions
- Prepare workspace: Line a clean surface or baking sheet with parchment or wax paper to prevent sticking while shaping the mints.
- Beat butter: Using an electric mixer, beat the room temperature butter until it becomes fluffy and pale, creating a smooth base for the mints.
- Mix dough: Add the heavy whipping cream, sifted powdered sugar, and peppermint extract to the butter. Mix thoroughly until a firm dough forms that can be handled easily.
- Dye dough: Divide the dough into two parts. Add red gel food coloring to one part and knead until the color is evenly distributed.
- Form ropes and twist: Roll each dough portion into long ropes about ½ inch thick. Twist the red and white ropes gently together to create a striped effect, then smooth the twists by rolling lightly.
- Dry and cut: Let the twisted ropes dry on parchment paper for 1 to 2 hours until slightly firm. Then, cut into small mint-sized pieces. Allow the cut mints to dry uncovered for 24 hours to reach the perfect soft, yet firm texture.
Notes
- Use unsalted butter to control the salt level in the mints.
- Sift powdered sugar to avoid lumps and ensure a smooth dough.
- Adjust the amount of peppermint extract for a stronger or milder flavor.
- If the dough is too sticky, refrigerate it briefly before rolling.
- The 24-hour drying time is essential for the mints to set properly without becoming hard.


