
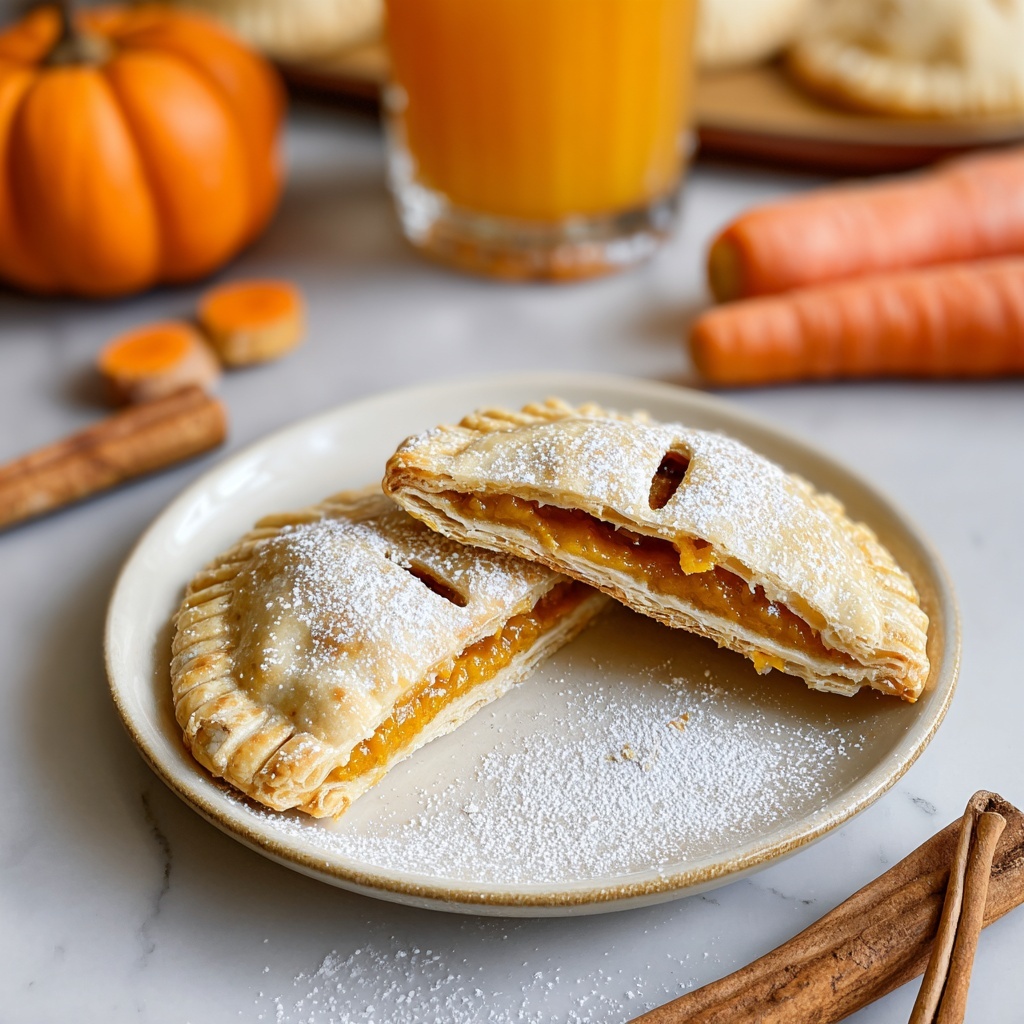
If you’re looking for a cozy, comforting treat that captures the essence of fall in each bite, this Pumpkin Hand Pies Recipe is an absolute must-make. Imagine flaky, buttery pastry enveloping a warmly spiced pumpkin filling that’s perfectly sweetened and aromatic. These hand pies are just the right size to hold in your hand, making them perfect for sharing at gatherings or enjoying as a delightful snack. Easy to prepare and utterly irresistible, this recipe brings together simple ingredients to create a memorable, homemade autumn dessert you’ll want to make again and again.
Ingredients You’ll Need
Gathering the right ingredients for these hand pies is straightforward, and each one plays a vital role in the final flavor, texture, and look of the dish. From the rich, tender crust to the luscious, spiced pumpkin filling, these elements come together beautifully with just a bit of care and love.
- All-purpose flour: The base of our flaky pie crust, providing structure and just the right chew.
- Salt: Enhances all the flavors and balances the sweetness in the filling and dough.
- Granulated sugar: Adds a touch of sweetness to the crust for subtle contrast against the spices.
- Unsalted butter: Cold and cubed, it creates those coveted buttery layers and flakiness in the pastry.
- Ice water: Helps bring the dough together without melting the butter, ensuring a tender crust.
- Pumpkin puree: The star ingredient—its smooth texture and natural sweetness make these pies irresistible.
- Brown sugar: Adds depth and richness, complementing the earthiness of the pumpkin perfectly.
- Ground cinnamon: Provides warm, comforting spice that’s classic for pumpkin treats.
- Ground ginger: Adds a zesty undertone that livens up the filling.
- Ground cloves: A little goes a long way—this spice gives a lovely aromatic touch.
- Ground nutmeg: Enhances the warm spice profile and rounds out the flavor.
- Vanilla extract: Adds subtle sweetness and depth to the pumpkin mixture.
- Egg (for egg wash): Brushed on top for that gorgeous golden sheen and helps the sugar stick.
- Granulated sugar (for sprinkling): Creates a delightful crunchy, sparkling top on your pies.
How to Make Pumpkin Hand Pies Recipe
Step 1: Prepare the Dough
Start by whisking together the flour, salt, and granulated sugar in a large mixing bowl. The dry ingredients form the foundation of your pie crust. Next, cut the cold, cubed butter into the flour mixture using a pastry cutter or your fingers until it resembles coarse crumbs. This step is key to getting that flaky texture we all love. Slowly drizzle the ice water in, just enough for the dough to hold together when squeezed. Once combined, divide the dough into two discs, wrap them in plastic wrap, and chill in the fridge for 30 minutes. This resting time helps the gluten relax and keeps the butter cold for the best flaky crust.
Step 2: Make the Pumpkin Filling
While the dough chills, whip up the luscious pumpkin filling. In a medium bowl, combine the pumpkin puree with brown sugar and all your warm spices—cinnamon, ginger, cloves, nutmeg—and finish with a splash of vanilla extract. Stir everything together until smooth and fragrant. This mixture carries the perfect balance of spice and sweetness that will fill each hand pie with cozy goodness.
Step 3: Roll Out and Cut the Dough
Preheat your oven to 375°F (190°C). On a lightly floured surface, roll one chilled dough disc out to about 1/8-inch thickness. Use a round cutter or a glass to cut out circles roughly 4 to 5 inches in diameter. These circles will become your hand pies, so choose a size that’s easy to hold but deliciously filling. Keep working in batches with the other dough disc.
Step 4: Assemble the Hand Pies
Place a generous tablespoon of pumpkin filling in the center of each dough circle, leaving space around the edges to seal. Fold the dough over the filling to create a half-moon shape. Press the edges with a fork to seal tightly so none of that heavenly filling leaks out during baking. For a beautiful finish, brush the tops with beaten egg and sprinkle with a little granulated sugar to add sparkle and a satisfying crunch.
Step 5: Bake to Perfection
Before popping your pies in the oven, cut two or three small slits on the top of each pie. These allow steam to escape and help keep the filling from getting soggy. Then, bake the pies on a parchment-lined baking sheet for 20 to 25 minutes or until golden brown and crisp. The aroma as they bake is intoxicating—warm spices mingling with rich butter and sweet pumpkin.
Step 6: Cool and Enjoy
After baking, let the hand pies cool on a wire rack for a few minutes. This helps the filling set so they hold together beautifully when you bite in. Serve them warm or at room temperature, either way is scrumptious.
How to Serve Pumpkin Hand Pies Recipe
Garnishes
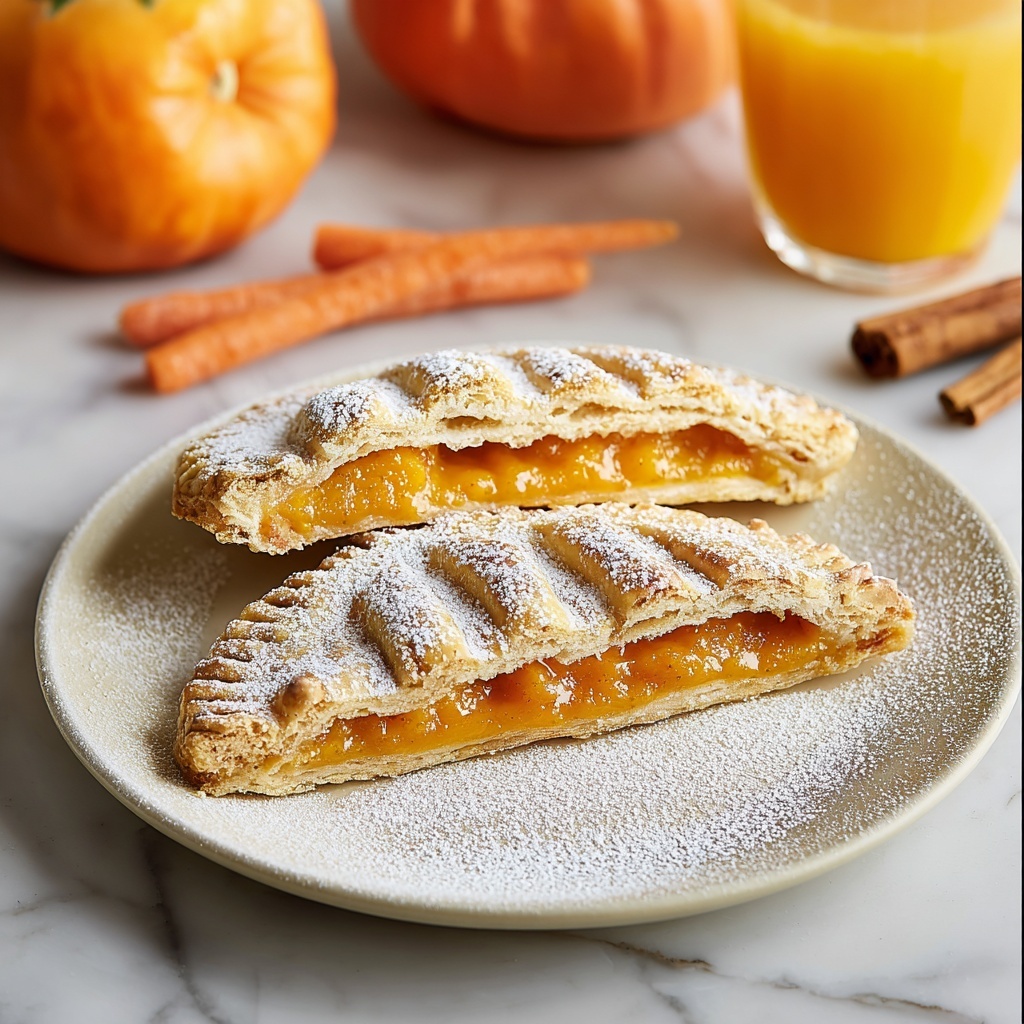
Sprinkle a light dusting of powdered sugar over the warm pies for an elegant touch. If you want to be extra festive, a dollop of whipped cream or a drizzle of caramel sauce complements the pumpkin filling beautifully, adding layers of flavor and texture that make every bite a little celebration.
Side Dishes
While these hand pies shine as a standalone treat, pairing them with a hot cup of spiced chai or your favorite latte takes the experience to another level. For a brunch or dessert spread, consider fresh fruit or cinnamon-spiced nuts to complement their warm flavors.
Creative Ways to Present
Serve these hand pies on a rustic wooden board or a charming vintage plate to evoke cozy fall vibes. You can wrap each pie in parchment paper tied with a festive ribbon for gifting or a party favor that guests will love. They’re as delightful to look at as they are to eat.
Make Ahead and Storage
Storing Leftovers
Any leftover Pumpkin Hand Pies Recipe treats can be stored in an airtight container at room temperature for up to two days or refrigerated for up to five days. Just make sure they’re fully cooled before sealing to prevent sogginess. When stored right, they keep their flakiness and flavorful filling wonderfully intact.
Freezing
This recipe freezes beautifully! To freeze, bake the hand pies completely, then cool them on a wire rack. Once cool, place them in a freezer-safe bag or container with parchment between layers to prevent sticking. They can be frozen for up to three months, making them perfect for enjoying long after pumpkin season.
Reheating
To bring back that fresh-baked taste and crisp pastry, reheat your pies in a preheated oven at 350°F (175°C) for about 10 minutes or until warmed through. Avoid microwaving as it tends to make the crust soggy. This method revives the pie’s texture and aroma just like when first baked.
FAQs
Can I use canned pumpkin puree for this Pumpkin Hand Pies Recipe?
Absolutely! Canned pumpkin puree is convenient and works just as well as homemade. Just make sure it’s pure pumpkin and not pumpkin pie filling, which contains added spices and sugars.
Is it possible to make the dough gluten-free?
Yes, with some adjustments. You can substitute the all-purpose flour for a gluten-free flour blend designed for baking. Keep in mind the texture might be slightly different, but you’ll still enjoy delicious hand pies.
How do I prevent the pies from leaking during baking?
Sealing the edges firmly with a fork and not overfilling the pies are key. Also, chilling the dough before baking helps maintain the structure and prevents leakage.
Can I prepare the pies in advance and bake later?
Definitely! You can assemble the hand pies and refrigerate them on the baking sheet, covered tightly with plastic wrap, for up to 24 hours before baking. This makes them perfect for busy days or entertaining.
What other fillings can I try with this pastry dough?
This versatile pastry dough works great with other fruit fillings like apple-cinnamon or blueberry, as well as savory options such as spinach and feta. The possibilities are endless and fun to explore!
Final Thoughts
There’s something truly special about homemade treats like this Pumpkin Hand Pies Recipe that warms the heart and delights the senses. Whether you’re baking for family, friends, or just yourself, these hand pies bring a sense of comfort and celebration to any occasion. I can’t wait for you to try this recipe and make it a cherished part of your seasonal baking tradition.
Print
Pumpkin Hand Pies Recipe
- Prep Time: 35 minutes
- Cook Time: 25 minutes
- Total Time: 60 minutes
- Yield: 12 servings
- Category: Dessert
- Method: Baking
- Cuisine: American
Description
These Pumpkin Hand Pies are delightful individual pastries filled with a spiced pumpkin puree, perfect for fall gatherings or cozy treats. The flaky, buttery crust pairs beautifully with the warm cinnamon and ginger-spiced filling, making them a seasonal favorite that’s easy to prepare and bake to golden perfection.
Ingredients
Dough
- 2 cups all-purpose flour
- 1 teaspoon salt
- 1 tablespoon granulated sugar
- 1 cup unsalted butter, cold and cut into small cubes
- 1/4 to 1/2 cup ice water
Filling
- 1 cup pumpkin puree
- 1/3 cup brown sugar
- 1 teaspoon ground cinnamon
- 1/2 teaspoon ground ginger
- 1/4 teaspoon ground cloves
- 1/4 teaspoon ground nutmeg
- 1/2 teaspoon vanilla extract
Topping
- 1 egg, beaten (for egg wash)
- Granulated sugar (for sprinkling)
Instructions
- Prepare the Dough: In a large bowl, whisk together the all-purpose flour, salt, and granulated sugar. Add the cold, cubed unsalted butter and use a pastry cutter or your fingertips to cut the butter into the flour mixture until it resembles coarse crumbs.
- Form the Dough: Gradually add the ice water, starting with 1/4 cup and adding more as needed, just until the dough begins to come together. Be careful not to overwork the dough. Once formed, divide the dough into two discs, wrap them in plastic wrap, and chill in the refrigerator for 30 minutes to firm up.
- Prepare the Filling: In a medium bowl, combine the pumpkin puree, brown sugar, ground cinnamon, ground ginger, ground cloves, ground nutmeg, and vanilla extract. Mix thoroughly until well blended and smooth.
- Preheat Oven and Roll Dough: Preheat your oven to 375°F (190°C). On a lightly floured surface, roll out one chilled disc of dough to about 1/8 inch thickness. Using a round cutter or a glass about 4 inches in diameter, cut out circles from the dough.
- Assemble the Hand Pies: Place a tablespoon of the pumpkin filling in the center of each dough circle. Fold the dough over to create a half-moon shape and press the edges together. Seal the edges firmly by crimping with a fork to prevent filling leakage.
- Add Egg Wash and Sugar: Brush the tops of the hand pies with the beaten egg wash to achieve a beautiful golden color during baking. Sprinkle a little granulated sugar on top for a subtle crunch and sweetness. Cut a couple of small slits in the top of each pie to allow steam to escape while baking.
- Bake: Line a baking sheet with parchment paper and place the hand pies on it, leaving some space between each. Bake in the preheated oven for 20 to 25 minutes or until the crusts are golden brown and crisp.
- Cool and Serve: Remove the pies from the oven and let them cool slightly on a wire rack. These hand pies are delightful served warm or at room temperature. Enjoy your homemade pumpkin hand pies!
Notes
- For best results, keep the butter cold to achieve a flaky crust.
- You can substitute pumpkin puree with canned pumpkin if fresh pumpkin is unavailable.
- Adjust the sugar according to your preferred sweetness level.
- These hand pies can be made ahead and refrigerated before baking for up to 24 hours.
- Store leftovers in an airtight container; they are best enjoyed within 2 days.


