
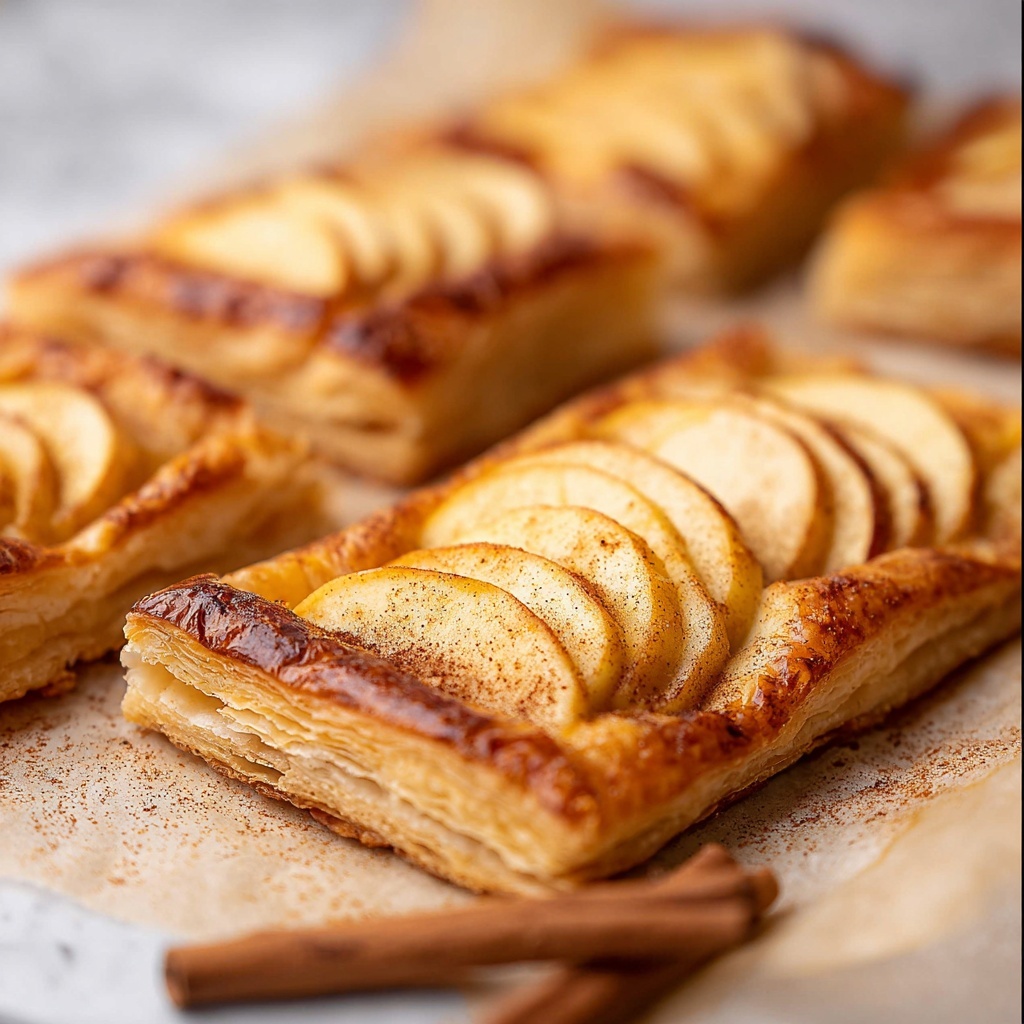
If you’re craving a dessert that looks stunning and tastes like a cozy autumn afternoon, this Puff Pastry Apple Tart Recipe is exactly what you need. It combines the flaky, buttery goodness of puff pastry with the warm, spiced sweetness of tender apples, creating a perfect balance of textures and flavors. Whether you’re serving it for a casual family dessert or impressing guests at a dinner party, this tart is as easy to pull together as it is delicious.
Ingredients You’ll Need
These ingredients are simple yet essential, each one bringing something special to this Puff Pastry Apple Tart Recipe. From the crisp apples and aromatic spices to the buttery puff pastry, every element works together to create a dish bursting with flavor, texture, and inviting color.
- 3 small/medium apples (peeled and sliced thin): Choose firm apples like Granny Smith or Fuji for the best texture and sweetness balance.
- 1 puff pastry sheet: The buttery layers are what make this tart delightfully flaky and golden.
- ¼ cup brown sugar: Adds a deep caramel note that enriches the apples beautifully.
- ½ teaspoon vanilla: Enhances the natural sweetness and warms up the flavor profile.
- ¼ teaspoon nutmeg: A hint of this spice adds cozy depth to the apple filling.
- 1 ½ teaspoons cinnamon: The classic spice for that unmistakable warmth and aroma.
- Pinch of sea salt: Balances the sweetness and heightens the other spices.
- 3 tablespoons melted butter (divided): One part to coat the apples and another to brush on the border for a golden finish.
- 2 tablespoons honey (optional): Adds a glossy, sweet glaze that makes the tart irresistibly shiny and tasty.
How to Make Puff Pastry Apple Tart Recipe
Step 1: Preheat the Oven
Start by preheating your oven to 400°F. A hot oven is key for getting that puff pastry beautifully crisp and golden in just the right amount of time.
Step 2: Prepare the Apples
Peel and slice your apples as thin as possible for that perfect tender bite. Toss the slices in a bowl with 2 tablespoons of melted butter, brown sugar, cinnamon, nutmeg, vanilla, and a pinch of sea salt. This mixture ensures each apple slice gets coated in rich, spiced sweetness that will caramelize as it bakes.
Step 3: Prepare the Puff Pastry Base
Lay your thawed puff pastry on a parchment-lined baking sheet. Using a sharp knife, score a 1-inch border around the edges—just a shallow line to help the pastry puff up along the border and keep those delicious juices contained. Then, poke holes in the center with a fork to prevent it from puffing too much in the middle. Brush the border with the remaining tablespoon of melted butter to help it brown beautifully.
Step 4: Arrange the Apples
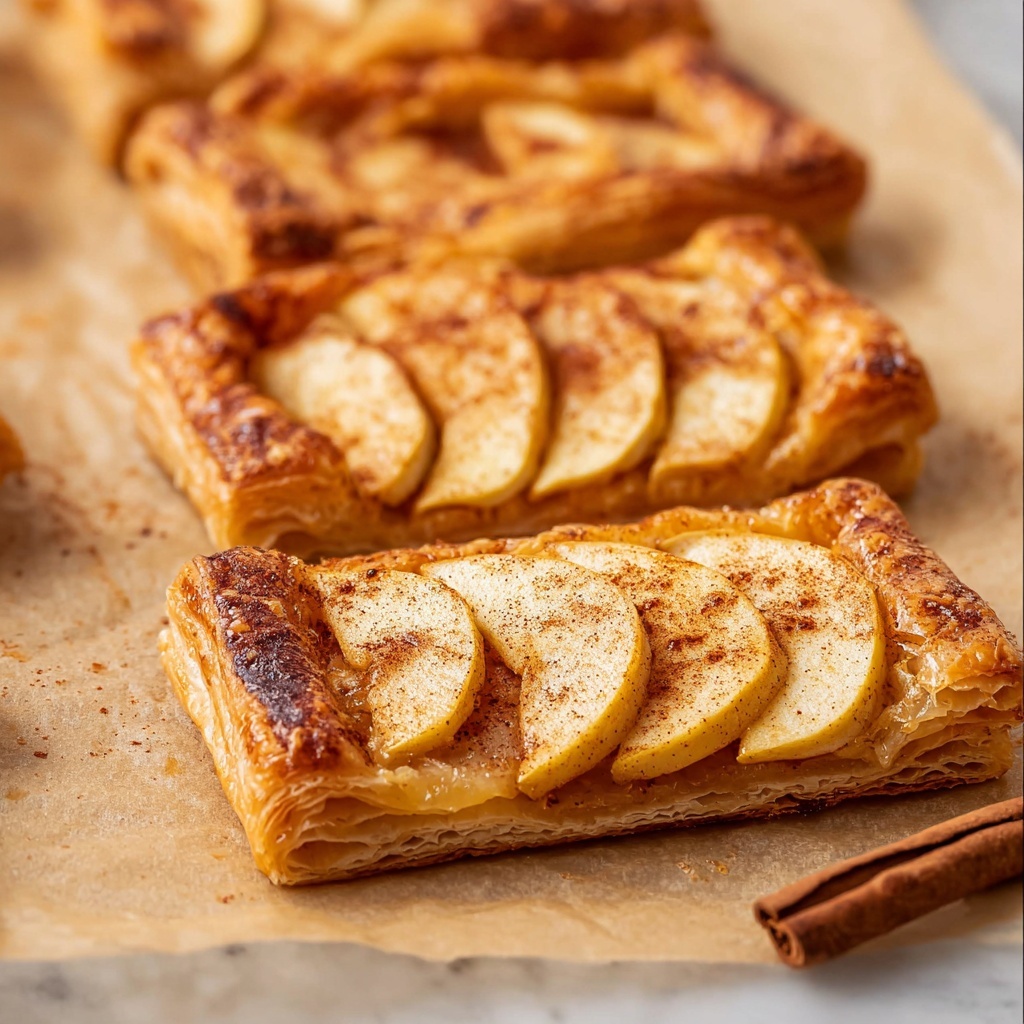
Neatly arrange your apple slices on the pastry inside the border. You can create three even rows or get creative with a fanciful pattern—it’s your tart, so have fun making it look as beautiful as it tastes!
Step 5: Bake Until Golden
Pop the tart into your preheated oven and bake for about 20 minutes, until the edges have puffed up and turned a gorgeous golden brown. Keep an eye on it starting at 15 minutes to make sure it doesn’t overbake. The smell of cinnamon and caramelizing apples will be irresistibly filling your kitchen.
Step 6: Add the Finishing Touches
Once baked, gently brush the apples with honey to add a shiny, sweet glaze that’s simply irresistible. Warming the honey slightly in the microwave makes it easier to spread evenly. Allow the tart to cool for several minutes before slicing and serving to let the flavors settle perfectly.
How to Serve Puff Pastry Apple Tart Recipe
Garnishes
A scoop of vanilla ice cream or a dollop of lightly whipped cream makes a classic accompaniment, enhancing the warm spices and flaky crust with creamy coolness. You can also sprinkle some toasted chopped nuts on top for a delightful crunch contrast.
Side Dishes
This tart pairs beautifully with a simple green salad if you’re serving it as part of a meal, or with a cup of hot tea or coffee to round off a cozy afternoon treat. The balance of sweet tartness and flaky pastry makes it versatile enough for both casual and more formal occasions.
Creative Ways to Present
For a rustic look, you can dust the edges with powdered sugar just before serving or drizzle extra honey in a delicate zigzag across the top. Present individual slices on colorful plates with a sprig of fresh mint or a cinnamon stick to elevate the experience visually and let guests know this Puff Pastry Apple Tart Recipe is something special.
Make Ahead and Storage
Storing Leftovers
Store any leftover tart covered loosely with foil or in an airtight container at room temperature for up to two days. This helps keep the puff pastry crispy and the apples tender without drying out.
Freezing
While best enjoyed fresh, you can freeze the unbaked tart wrapped tightly in plastic wrap and foil for up to a month. Bake it directly from frozen, adding a few extra minutes to the baking time. This is a great way to have a ready-to-bake treat on hand for busy days.
Reheating
Reheat slices in a preheated oven at 350°F for about 10 minutes to revive the crispness of the puff pastry and warm the apple filling. Avoid microwaving if possible, as it can make the pastry soggy.
FAQs
Can I use frozen puff pastry for this recipe?
Absolutely! Just be sure to thaw it in the refrigerator as per package instructions before using, so it’s easier to handle and bakes evenly.
What type of apples work best for this tart?
Firm apples like Granny Smith, Honeycrisp, or Fuji are excellent choices because they hold their shape well during baking without turning mushy.
Is it possible to make this tart gluten-free?
Yes, if you find a good quality gluten-free puff pastry, you can substitute it directly in this recipe for a delicious gluten-friendly version.
Can I add other fruits to this tart?
Definitely! Pears, peaches, or even berries would be wonderful additions or alternatives—just adjust the spices and sugar to complement the chosen fruit.
How do I make sure the puff pastry doesn’t get soggy?
Scoring the border and poking holes in the center, as described in the recipe, helps prevent sogginess. Also, tossing the apples with melted butter and spices before arranging them prevents excess liquid from seeping into the pastry too much.
Final Thoughts
This Puff Pastry Apple Tart Recipe is one of those feel-good desserts that never fails to impress while only requiring a handful of pantry staples. Its flaky pastry, warming spices, and tender apples come together in a way that feels both special and approachable. I can’t wait for you to try it, share it, and maybe even make it a new favorite craving for any season.
Print
Puff Pastry Apple Tart Recipe
- Prep Time: 10 minutes
- Cook Time: 20 minutes
- Total Time: 30 minutes
- Yield: 9 servings
- Category: Dessert
- Method: Baking
- Cuisine: American
- Diet: Vegetarian
Description
A delightful and easy-to-make Puff Pastry Apple Tart featuring thinly sliced spiced apples atop flaky, golden puff pastry. This recipe combines the warmth of cinnamon and nutmeg with the sweetness of brown sugar and honey for a perfect dessert or snack that bakes up beautifully in under 30 minutes.
Ingredients
Fruit and Spices
- 3 small/medium apples, peeled and thinly sliced
- ¼ cup brown sugar
- ½ teaspoon vanilla extract
- ¼ teaspoon ground nutmeg
- 1 ½ teaspoons ground cinnamon
- Pinch of sea salt
Dough & Fats
- 1 puff pastry sheet, thawed
- 3 tablespoons melted butter, divided
Optional Glaze
- 2 tablespoons honey (optional)
Instructions
- Preheat oven: Set your oven to 400°F (200°C) to ensure it reaches the perfect temperature for baking the tart.
- Prepare apples: Peel and slice the apples very thin. In a small bowl, toss the sliced apples with 2 tablespoons of melted butter, brown sugar, cinnamon, nutmeg, vanilla extract, and a pinch of sea salt, ensuring all slices are evenly coated with the flavorful mixture.
- Prepare the puff pastry base: Line a baking sheet with parchment paper. Lay the thawed puff pastry sheet on the parchment. Using a sharp knife, score a border about 1 inch from the edge all around the pastry without cutting fully through—this helps the edges puff up and contain the apple juices.
- Dock pastry center and brush border: Prick holes with a fork in the center area inside the scored border to prevent excessive puffing. Brush the border with the remaining 1 tablespoon of melted butter for a golden finish.
- Assemble the tart: Arrange the spiced apple slices neatly on the puff pastry inside the border—three even rows are suggested, but you can get creative with your arrangement.
- Bake the tart: Place the tart in the preheated oven and bake for approximately 20 minutes, or until the puff pastry edges are puffed and golden brown. Check after 15 minutes and monitor every 2 minutes to avoid overbaking.
- Add the honey glaze: Remove the tart from the oven. If using, gently brush the tops of the baked apples with honey, warming the honey slightly in the microwave for about 15 seconds to thin it out before brushing.
- Cool and serve: Allow the tart to cool for several minutes to set before slicing and serving. Enjoy warm or at room temperature.
Notes
- Ensure apples are sliced thinly for even cooking and a tender texture.
- Scoring the pastry border is crucial to keep the apples and juices contained without losing puffiness.
- Use a sharp knife for scoring to avoid cutting through the pastry fully.
- Optionally warm honey to make glazing easier and more even.
- This tart is best enjoyed the same day but can be stored refrigerated and gently reheated.
- For a dairy-free version, substitute butter with a plant-based alternative.


