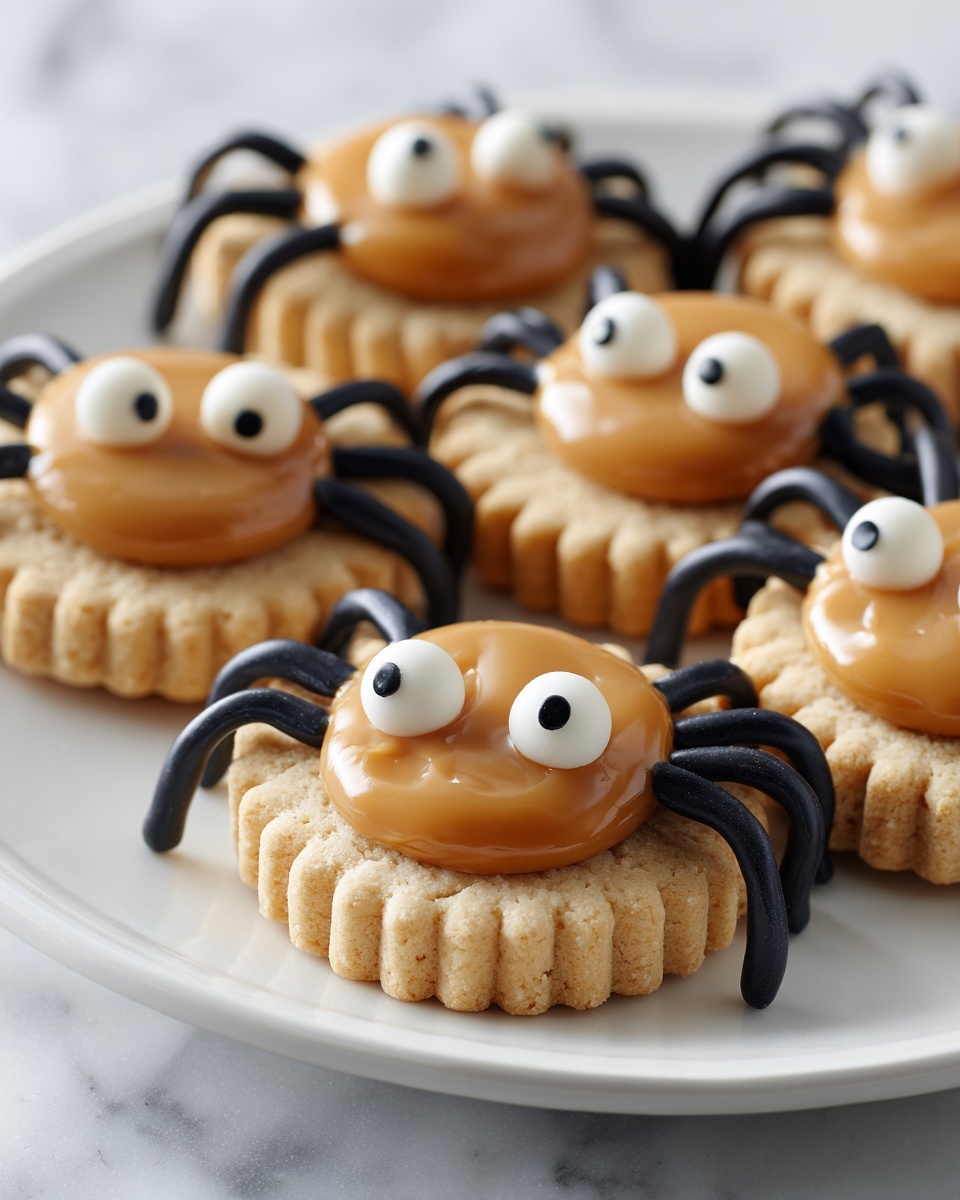
If you are on the hunt for a delightfully fun and festive treat, this Peanut Butter Spider Cookies Recipe is exactly what you need. These cookies combine the rich, creamy goodness of peanut butter with the playful charm of mini Reese’s peanut butter cups and chocolate spider legs, making them perfect for everything from spooky celebrations to anytime sweet cravings. The cookies are soft, chewy, and coated with a slight crunch from rolled sugar, delivering a texture and flavor that will keep you reaching for more.
Ingredients You’ll Need
This recipe calls for simple yet essential ingredients that come together to create the perfect balance of taste, texture, and appearance in every cookie. Each component plays a vital role from providing creaminess, sweetness, to that perfect peanut butter punch.
- 1 stick (1/2 cup) unsalted butter: Softened to room temperature for easy mixing and a tender crumb.
- ½ cup brown sugar: Adds moisture and a rich depth of flavor with its subtle molasses notes.
- ⅓ cup granulated sugar: Helps create a light crisp exterior when rolled on the dough balls.
- ¾ cup creamy peanut butter (not natural): Provides that classic creamy peanut butter flavor crucial to the cookie’s identity.
- 1 large egg: Binds the dough together while adding richness.
- 1 teaspoon vanilla extract: Enhances all the flavors with a warm, inviting aroma.
- 1 ½ cups all-purpose flour: The backbone of the cookie, giving it structure without toughness.
- ¾ teaspoon baking soda: Helps the cookies rise just enough for a soft texture.
- ½ teaspoon baking powder: Adds a slight lift and tenderness alongside the baking soda.
- ¼ teaspoon salt: Balances the sweetness and accentuates flavors.
- Extra granulated sugar (for rolling): Creates a crunchy, sparkling coating on the cookie exterior.
- 24 mini Reese’s peanut butter cups, unwrapped and chilled: The star of the show, adding creamy chocolate and peanut butter centers.
- ½ cup semi-sweet chocolate chips (for spider legs): Melted and piped for a fun, spooky decoration.
- Candy eyeballs: Bring the cookies to life with a cute, creepy-crawly look.
How to Make Peanut Butter Spider Cookies Recipe
Step 1: Prep the Reese’s & Oven
Start off by unwrapping the mini Reese’s peanut butter cups and popping them into the freezer. This keeps them firm and prevents melting too quickly once pressed into the warm cookies. Meanwhile, preheat your oven to 350°F (175°C) so it’s ready to go when you’ve formed your dough balls.
Step 2: Make the Dough
In a large mixing bowl, beat together the unsalted butter, brown sugar, and granulated sugar until light and fluffy – this creates the perfect base for a tender cookie. Next, blend in the creamy peanut butter, egg, and vanilla extract until everything is smooth and well combined, delivering that irresistible creamy peanut butter flavor throughout.
Step 3: Add Dry Ingredients
Gradually mix in the all-purpose flour, baking soda, baking powder, and salt. Stir just until the dough comes together to avoid overworking it, ensuring your cookies remain soft and chewy rather than dense.
Step 4: Form the Cookies
Roll tablespoon-sized portions of dough between your palms, then gently roll each ball in some extra granulated sugar. This not only prevents sticking but also adds a delightful crunchy texture and sparkle on top. Place the sugared dough balls spaced evenly on a baking sheet, giving them room to spread.
Step 5: Bake and Add Reese’s
Bake the cookies for 8 to 11 minutes, just until the edges begin to crack. This keeps the centers soft and gooey. When the cookies come out of the oven and are still warm, immediately press a chilled mini Reese’s peanut butter cup into the center of each one. Let the cookies cool on the sheet for about 15 to 20 minutes so they firm up perfectly.
Step 6: Make Spider Legs
Melt the semi-sweet chocolate chips in short intervals in the microwave, stirring often to achieve a smooth consistency. Transfer the melted chocolate to a piping tool or a zip-top bag with a small corner cut off, then carefully pipe four legs on each side of the Reese’s cup, creating your spider effect.
Step 7: Attach the Eyes
With another small dab of melted chocolate, attach candy eyeballs to each Reese’s peanut butter cup. This tiny detail transforms your cookies from simply delicious to adorably spooky. Let the chocolate set before serving or storing.
How to Serve Peanut Butter Spider Cookies Recipe
Garnishes
These cookies shine on their own, but if you want to elevate their presentation, consider sprinkling a light dusting of powdered sugar for a frosty effect. You can also add additional candy eyes or colorful sprinkles around the spiders to amp up the festive vibe.
Side Dishes
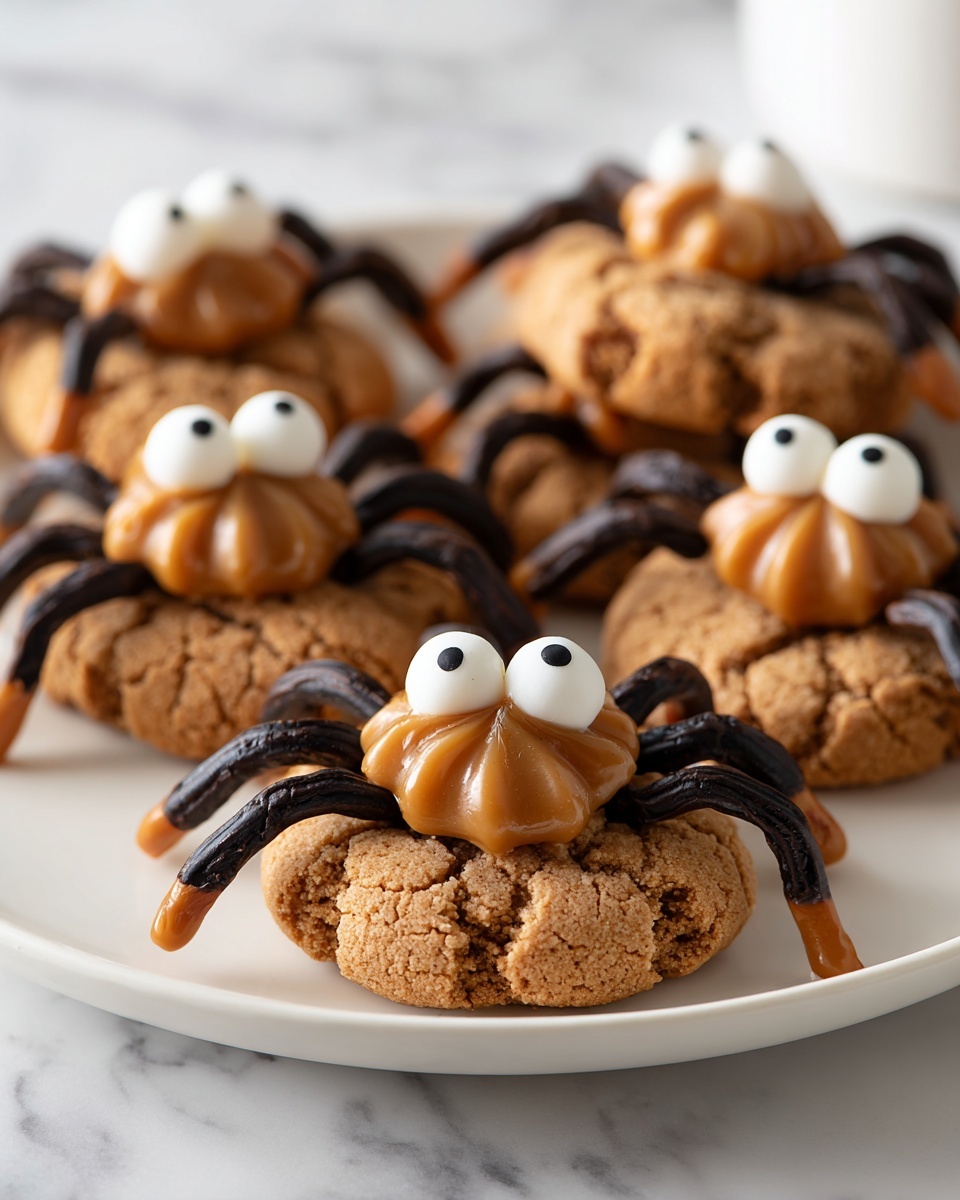
Serve these Peanut Butter Spider Cookies with a cold glass of milk for classic comfort. For parties, they pair wonderfully with pumpkin spice lattes or simple hot chocolate, adding a playful crunch alongside warm, cozy beverages.
Creative Ways to Present
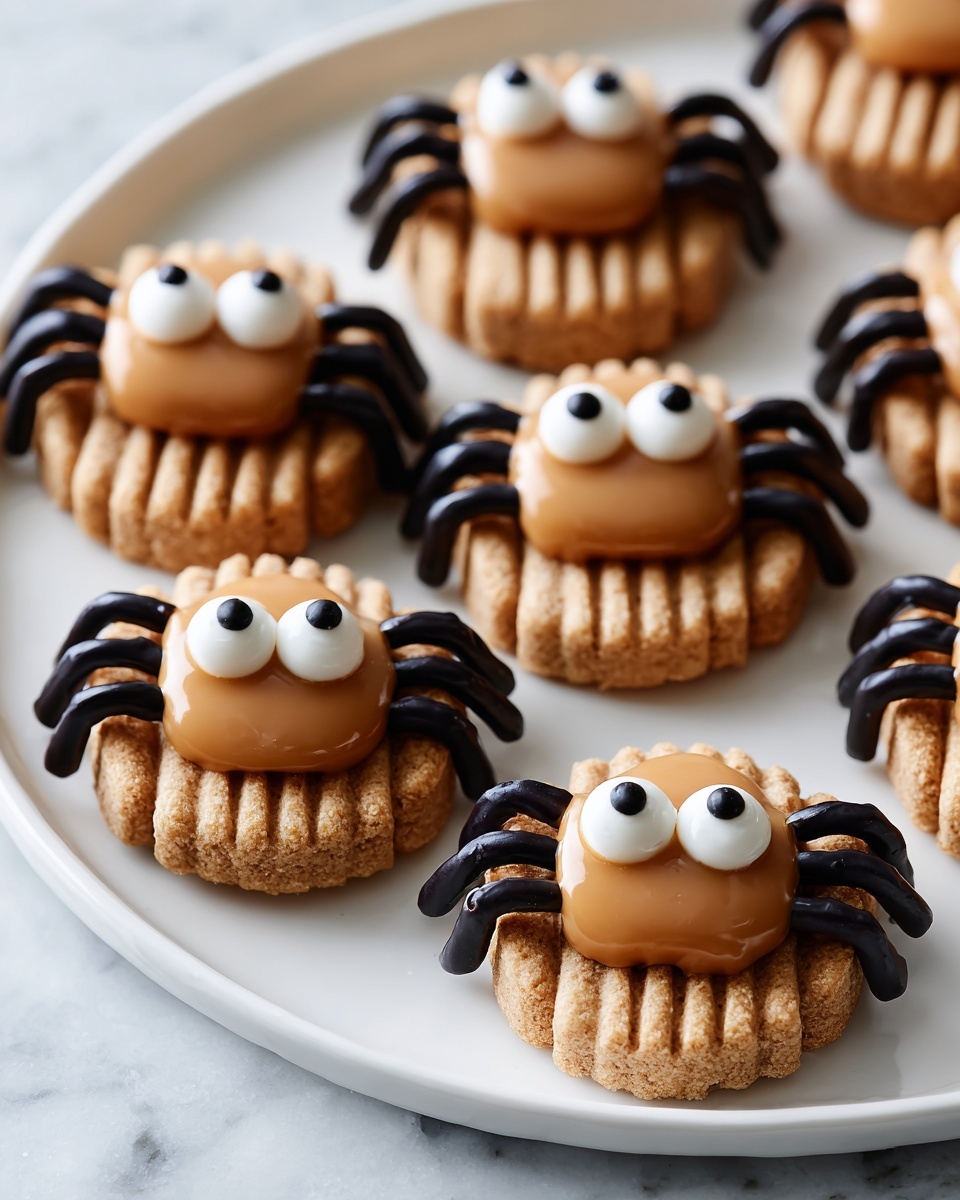
Arrange your peanut butter spider cookies on a black or orange decorative platter to highlight their Halloween charm anytime you want a themed dessert. You might also place them in small paper cups and wrap them individually for gift-giving or party favors—guaranteed to delight kids and adults alike!
Make Ahead and Storage
Storing Leftovers
Keep your Peanut Butter Spider Cookies Recipe fresh by storing them in an airtight container at room temperature. They will remain soft and tasty for up to 4 days, perfect for enjoying throughout the week without losing that just-baked quality.
Freezing
If you want to make these ahead for future enjoyment, freeze fully baked cookies in a single layer on a baking sheet until firm, then transfer them to a freezer-safe bag or container. Frozen cookies can last up to 3 months and thaw beautifully without compromising texture.
Reheating
To revive the warm, gooey experience, microwave frozen or refrigerated cookies for about 15 to 20 seconds. Be careful not to overheat, especially with the chocolate spider legs, so they retain their shape and perfect peanut butter flavor.
FAQs
Can I use natural peanut butter in this Peanut Butter Spider Cookies Recipe?
Natural peanut butter tends to be thinner and can affect the dough’s consistency, making it less stable. It’s best to use creamy, commercial-style peanut butter for a more predictable texture and flavor balance.
Do I have to chill the mini Reese’s before adding?
Yes, chilling the mini Reese’s helps them hold their shape when pressed into the warm cookies, preventing them from melting too quickly and keeping the spiders looking neat and delicious.
Can I substitute candy eyeballs with something else?
Absolutely! If candy eyeballs aren’t available, you can use small dots of melted white chocolate with a tiny drop of dark chocolate or edible marker to create eyes, or skip them altogether for a simpler look.
What’s the best way to pipe the chocolate spider legs?
Using a squeeze bottle or a zip-top bag with a small corner cut off allows the most control for drawing precise spider legs. Take your time to pipe them so they look delicate and spider-like.
Are these cookies suitable for kids?
Definitely! These cookies are fun, not too sweet, and decorated to delight children of all ages. Just make sure to supervise younger kids when handling melted chocolate for safety.
Final Thoughts
Making this Peanut Butter Spider Cookies Recipe is such a joyful experience because it brings together classic flavors with a whimsical twist that’s perfect for any occasion. Whether you’re baking for kids, friends, or yourself, these cookies are guaranteed to bring smiles and satisfy peanut butter lovers everywhere. So grab your mixing bowl and start creating some spooky-sweet magic today!
Print
Peanut Butter Spider Cookies Recipe
- Prep Time: 15 minutes
- Cook Time: 10 minutes
- Total Time: 40 minutes
- Yield: 24 cookies
- Category: Dessert
- Method: Baking
- Cuisine: American
Description
Peanut Butter Spider Cookies are a fun and spooky treat perfect for Halloween or any themed party. These soft and chewy cookies feature a creamy peanut butter dough rolled in sugar, topped with mini Reese’s peanut butter cups to create the spider’s body, and decorated with melted chocolate for legs and candy eyeballs for a playful finish. Easy to make and irresistibly delicious, these cookies bring festive flair and peanut buttery goodness together in every bite.
Ingredients
Cookie Dough
- 1 stick (1/2 cup) unsalted butter, room temperature
- ½ cup brown sugar
- ⅓ cup granulated sugar
- ¾ cup creamy peanut butter (not natural)
- 1 large egg
- 1 teaspoon vanilla extract
- 1 ½ cups all-purpose flour
- ¾ teaspoon baking soda
- ½ teaspoon baking powder
- ¼ teaspoon salt
- Extra granulated sugar (for rolling)
Decoration
- 24 mini Reese’s peanut butter cups, unwrapped and chilled
- ½ cup semi-sweet chocolate chips
- Candy eyeballs
Instructions
- Prep the Reese’s & Oven: Unwrap the mini Reese’s peanut butter cups and place them in the freezer to chill while you prepare the cookies. Preheat your oven to 350°F (175°C) to ensure it reaches the right temperature for baking.
- Make the Dough: In a large mixing bowl, beat together the unsalted butter, brown sugar, and granulated sugar until the mixture is light and fluffy. Then add the creamy peanut butter, egg, and vanilla extract, mixing thoroughly until smooth and well combined.
- Add Dry Ingredients: Gradually incorporate the all-purpose flour, baking soda, baking powder, and salt into the wet mixture. Mix just until the dough comes together, being careful not to overmix which can toughen the cookies.
- Form the Cookies: Roll the cookie dough into tablespoon-sized balls with your hands, then roll each ball in granulated sugar to coat. Place these dough balls evenly spaced on a baking sheet lined with parchment paper or a non-stick surface.
- Bake: Bake the cookies for 8 to 11 minutes or until the edges just start to crack, but the centers remain soft. This ensures a chewy texture perfect for these treats.
- Add Reese’s: Immediately after removing the cookies from the oven, press a chilled mini Reese’s peanut butter cup into the center of each cookie. Allow the cookies to cool on the baking sheet for 15 to 20 minutes to set properly.
- Make Spider Legs: Melt the semi-sweet chocolate chips in the microwave by heating them in 30-second intervals, stirring between each until smooth. Transfer the melted chocolate to a squeeze bottle or a zip-top plastic bag with a tiny corner snipped off for piping. Pipe four spider legs on each side of the Reese’s cup on every cookie to create the spooky spider effect.
- Attach the Eyes: Use a small dab of the melted chocolate as glue to stick candy eyeballs onto each Reese’s peanut butter cup, completing the spider look. Let the chocolate set before serving.
Notes
- Chilling the Reese’s cups before placing them on the cookies helps them hold shape and prevents melting.
- Do not overbake the cookies; they should be soft in the middle for best texture.
- You can substitute candy eyeballs with small edible pearls or draw eyes with white and black icing if preferred.
- Use parchment paper or silicone mats on the baking sheet to prevent sticking and ease cleanup.
- If desired, semi-sweet chocolate chips can be replaced with dark or milk chocolate chips depending on taste preference.


