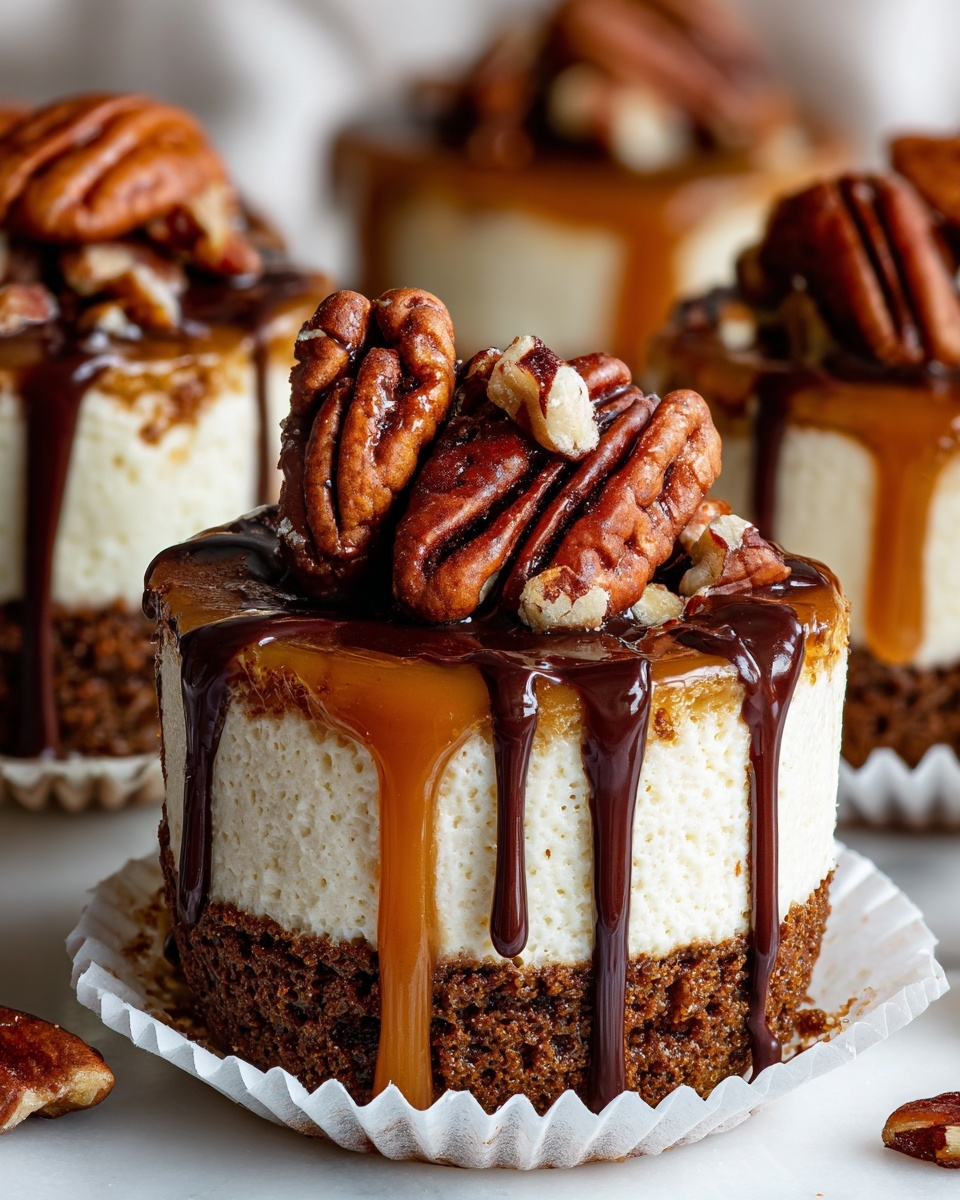
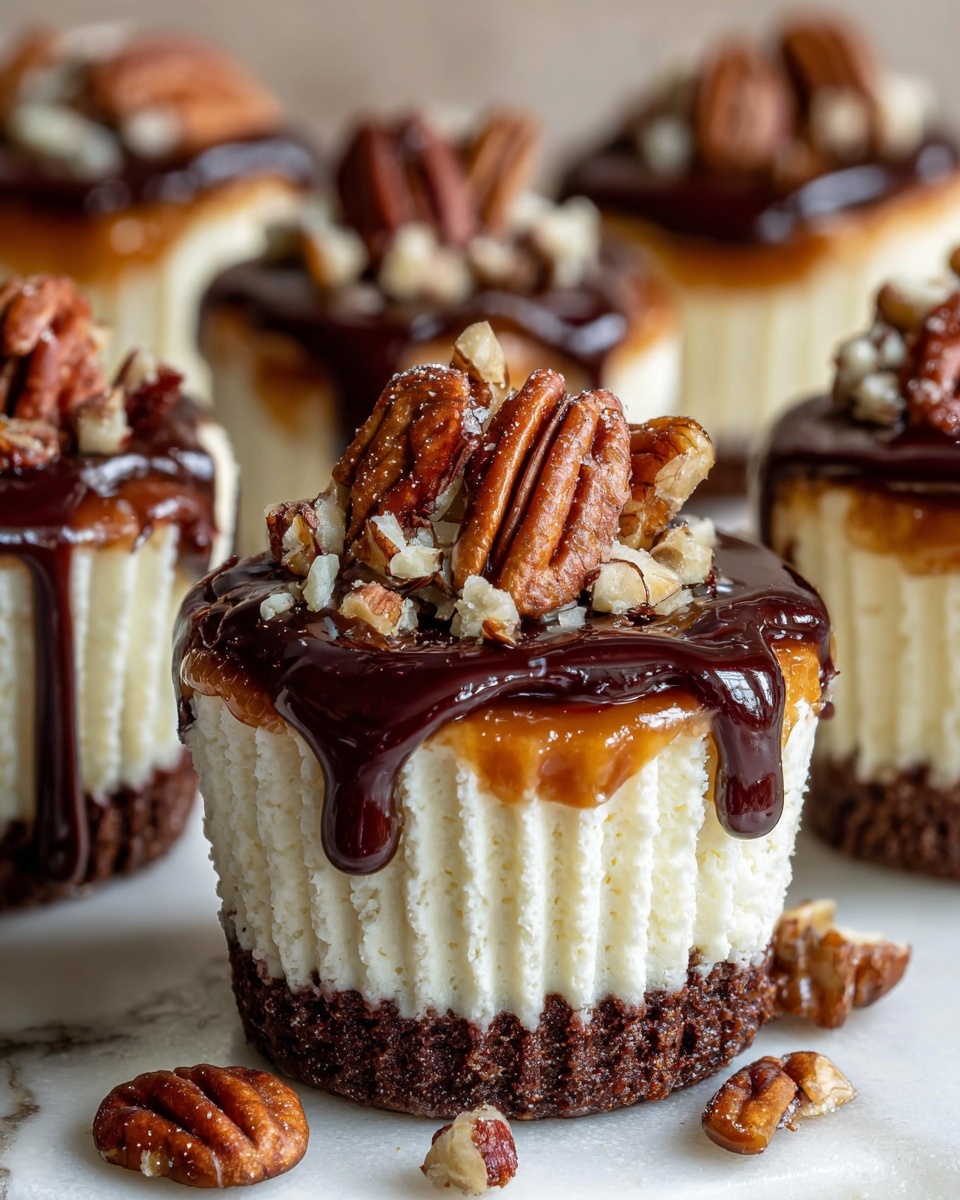
If you have a sweet tooth and love the magic of turtles in dessert form, you are going to adore this Mini Turtle Cheesecakes Recipe. These tiny delights combine a buttery graham cracker crust, creamy cheesecake filling, luscious caramel, crunchy pecans, and rich chocolate drizzle all in one bite-sized treat. Perfect for parties, gifting, or treating yourself, this recipe is a total crowd-pleaser that feels fancy but is surprisingly simple to make. Get ready for an indulgent adventure that celebrates everything we love about a classic turtle candy but in cheesecake form!
Ingredients You’ll Need
Whipping up these Mini Turtle Cheesecakes is wonderfully straightforward because each ingredient plays a key role in balancing flavor, texture, and color. From the crisp graham crust to the smooth cream cheese, and from the sweet caramel to the crunchy pecans, these components work harmoniously to create a dessert you’ll want to make again and again.
- 1 cup graham cracker crumbs: Provides a crunchy, slightly sweet base that holds everything together beautifully.
- 2 tablespoons sugar: Balances the crust’s flavor with just the right amount of sweetness.
- 4 tablespoons unsalted butter, melted: Adds richness and helps bind the crust crumbs firmly.
- 8 oz cream cheese, softened: The core of the cheesecake, delivering that creamy, tangy texture we crave.
- 1/4 cup sugar: Sweetens the cheesecake filling; adjust to your taste.
- 1 egg: Gives structure to the filling to make it set perfectly.
- 1 teaspoon vanilla extract: Enhances all the flavors with its warm, aromatic essence.
- 1/2 cup caramel sauce: The signature sweet topping that gives these cheesecakes their turtle inspiration.
- 1/4 cup chopped pecans: Adds delightful crunch and a nutty note to balance the sweetness.
- 1/4 cup melted chocolate (milk or semi-sweet): Drizzled on top for a gorgeous finish and that luscious chocolate hit.
How to Make Mini Turtle Cheesecakes Recipe
Step 1: Prepare the Crust
Start by preheating your oven to 325°F (163°C) and lining a muffin tin with cupcake liners. This setup ensures your mini cheesecakes bake evenly and are easy to remove later. Then, combine graham cracker crumbs, sugar, and melted butter in a bowl until the mixture resembles wet sand. Press this mixture firmly into each liner to form a solid, flavorful base. The crust is your first layer of deliciousness, so make sure it’s compact! Pop the crusts into the oven briefly to set while you prepare the filling.
Step 2: Make the Cheesecake Filling
In a mixing bowl, beat the softened cream cheese with sugar until smooth and creamy. This step is key for that classic silky texture. Next, add the egg and vanilla extract, mixing gently but thoroughly to combine. Avoid overmixing here to keep the filling light yet firm enough to hold its shape. Once your cheesecake batter is ready, fill each crust-lined cup about three-quarters full — leaving enough room at the top for the toppings later on.
Step 3: Bake the Cheesecakes
Bake your mini cheesecakes in the preheated oven for 18 to 20 minutes, or until the centers have just set but still wobble slightly when you gently shake the pan. This ensures they remain creamy and not overdone. Once baked, let them cool to room temperature to avoid condensation spoiling your perfect texture, then chill them in the fridge for at least two hours. This chilling step is essential for those clean, firm cuts and that satisfying bite.
Step 4: Add the Toppings
After chilling, it’s time to transform these little beauties into true mini turtle masterpieces. Spoon a generous amount of caramel sauce over each cheesecake. Then sprinkle chopped pecans on top for that signature crunch. Finally, drizzle melted chocolate artfully over everything. This trio of caramel, nuts, and chocolate is the hallmark of the Mini Turtle Cheesecakes Recipe, making every bite an irresistible balance of creamy, nutty, and sweet.
Step 5: Serve and Enjoy
Carefully peel off the cupcake liners, arrange your mini cheesecakes on a pretty platter, and serve chilled. Whether you’re dishing them out at a party or enjoying a cozy night in, these little desserts will bring smiles all around. Their size makes them perfectly portable and shareable, turning any occasion into something special and indulgent.
How to Serve Mini Turtle Cheesecakes Recipe

Garnishes
To really wow your guests, consider adding a few extra garnishes on top. A pinch of flaky sea salt heightens the caramel’s flavor, while a tiny dollop of whipped cream brings a light, airy contrast. Freshly chopped pecans or even a sprinkle of toasted coconut will add texture and a bit of crunch. Garnishing thoughtfully turns these treats from great to unforgettable.
Side Dishes
Though Mini Turtle Cheesecakes are a dessert star on their own, they pair beautifully with fresh berries or a light fruit salad to cut through the richness. A scoop of vanilla bean ice cream or a small cup of coffee can also complement these cheesecakes perfectly, providing warmth or coolness alongside the sweet bites. These simple sides elevate the whole eating experience.
Creative Ways to Present
If you want to jazz things up, serve these mini cheesecakes in decorative mini tart pans instead of cupcake liners for a rustic look. For parties, place each cheesecake in a clear mini dessert cup with alternating layers of crushed graham crackers and caramel for an irresistible parfait-style presentation. You can also thread a pecan on a toothpick and insert it into each cake, turning them into fun, finger-friendly desserts that are as charming as they are delicious.
Make Ahead and Storage
Storing Leftovers
Once assembled, Mini Turtle Cheesecakes keep wonderfully in the fridge for up to 4 days. Store them in an airtight container to maintain their moisture and prevent any fridge odors from creeping in. Because these cheesecakes are so rich and flavorful, you might find yourself reaching for them as a tempting treat all week long!
Freezing
You can freeze these mini cheesecakes for up to 2 months if you want to prepare them well ahead of time. Place them on a baking sheet in a single layer to freeze first, then transfer to a freezer-safe container or bag. Thaw overnight in the refrigerator before serving to preserve their creamy texture and delicious toppings.
Reheating
Since these cheesecakes are best served chilled, reheating is generally not recommended as it can alter the texture of the cream cheese and toppings. If you prefer a slightly softer cheesecake, leave them at room temperature for 15 to 20 minutes before serving. This little trick lets the flavors shine through perfectly.
FAQs
Can I use a different type of nuts instead of pecans?
Absolutely! Walnuts or almonds work beautifully as a substitute and will still give you that satisfying crunch and nutty flavor that complements the caramel and chocolate.
Is it necessary to bake the mini cheesecakes?
Yes, baking helps the cheesecake filling set properly and develop the smooth, creamy texture we love. No-bake versions tend to be softer and might not hold together as nicely in this particular recipe.
Can I make these mini cheesecakes gluten-free?
Definitely. Simply swap the graham cracker crumbs for a gluten-free variety, or crush gluten-free cookies as a crust base. The rest of the recipe remains the same and just as delicious.
What if I don’t have caramel sauce on hand?
You can easily make homemade caramel sauce with sugar, butter, and cream, or purchase a good quality store-bought caramel. The caramel is central to the ‘turtle’ flavor profile, so try not to skip this component.
How far in advance can I prepare the Mini Turtle Cheesecakes Recipe?
These cheesecakes can be made up to 2 days in advance and kept refrigerated. This makes them perfect for planning ahead for celebrations or just treating yourself without the last-minute rush.
Final Thoughts
There is something incredibly satisfying about making and sharing this Mini Turtle Cheesecakes Recipe. They look gorgeous, taste divine, and bring the nostalgic joy of a classic turtle candy into an elegant bite-sized dessert. Whether you’re new to cheesecake making or a seasoned pro, these mini delights are a wonderful way to brighten any occasion. Trust me, once you try them, you’ll want to keep these little treasures in your recipe rotation forever.
Print
Mini Turtle Cheesecakes Recipe
- Prep Time: 25 minutes
- Cook Time: 20 minutes
- Total Time: 2 hours 45 minutes
- Yield: 12 mini cheesecakes
- Category: Dessert
- Method: Baking
- Cuisine: American
Description
Delight in these Mini Turtle Cheesecakes, a perfect bite-sized dessert combining a buttery graham cracker crust with a creamy cheesecake filling, topped with rich caramel sauce, crunchy pecans, and a drizzle of melted chocolate. Ideal for parties or a sweet treat any time.
Ingredients
Crust
- 1 cup graham cracker crumbs
- 2 tablespoons sugar
- 4 tablespoons unsalted butter, melted
Cheesecake Filling
- 8 oz cream cheese, softened
- 1/4 cup sugar
- 1 egg
- 1 teaspoon vanilla extract
Toppings
- 1/2 cup caramel sauce
- 1/4 cup chopped pecans
- 1/4 cup melted chocolate (milk or semi-sweet)
Instructions
- Prepare the Crust: Preheat your oven to 325°F (163°C) and line a muffin tin with cupcake liners to prevent sticking and make removal easier.
- Mix Crust Ingredients: In a bowl, combine the graham cracker crumbs, sugar, and melted butter until the mixture resembles wet sand.
- Form Crusts: Divide the crumb mixture evenly among the cupcake liners, pressing firmly to form a compact crust at the bottom of each cup.
- Make the Cheesecake Filling: Beat the softened cream cheese and sugar together in a mixing bowl until smooth and creamy for a luscious filling.
- Add Egg and Vanilla: Incorporate the egg and vanilla extract into the cream cheese mixture, blending until fully combined to create a silky batter.
- Fill Liners: Spoon the cheesecake mixture into the prepared crusts, filling each about three-quarters full to allow space for baking rise.
- Bake the Cheesecakes: Bake in the preheated oven for 18-20 minutes, or until the centers just set without cracking.
- Cool and Chill: Let the cheesecakes cool to room temperature, then refrigerate for at least 2 hours to fully set and develop flavor.
- Add Toppings: Once chilled, spoon caramel sauce over each cheesecake, sprinkle with chopped pecans, and drizzle melted chocolate for that signature turtle flavor.
- Serve: Carefully remove the cupcake liners and serve your miniature turtle cheesecakes chilled for the best taste and texture.
Notes
- Ensure the cream cheese is fully softened to avoid lumps in the batter.
- Use cupcake liners to make removal and serving easier.
- For a more intense chocolate flavor, use semi-sweet chocolate for the drizzle.
- Store cheesecakes refrigerated and consume within 3 days for optimal freshness.
- These mini cheesecakes can be customized with different nuts or toppings as preferred.

