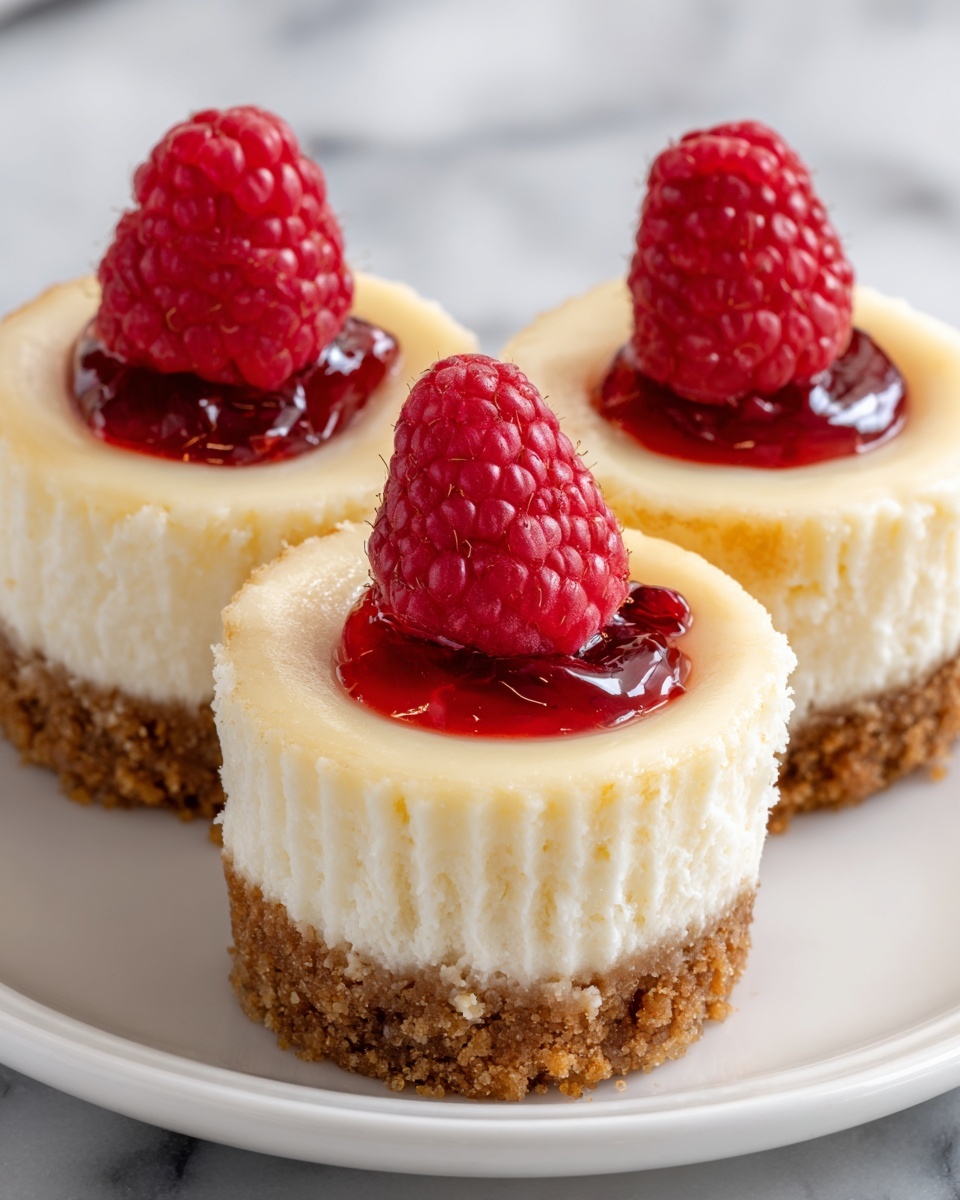
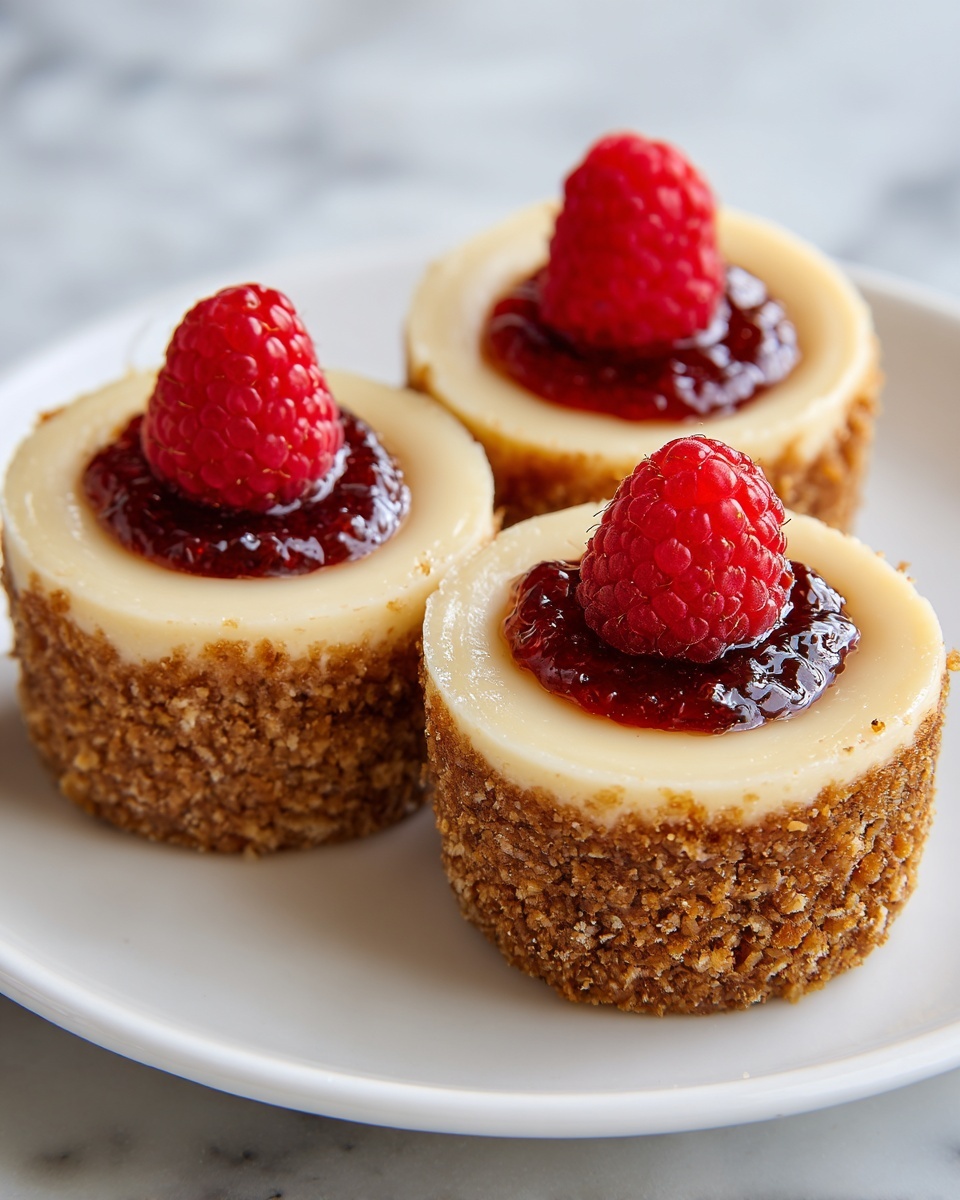
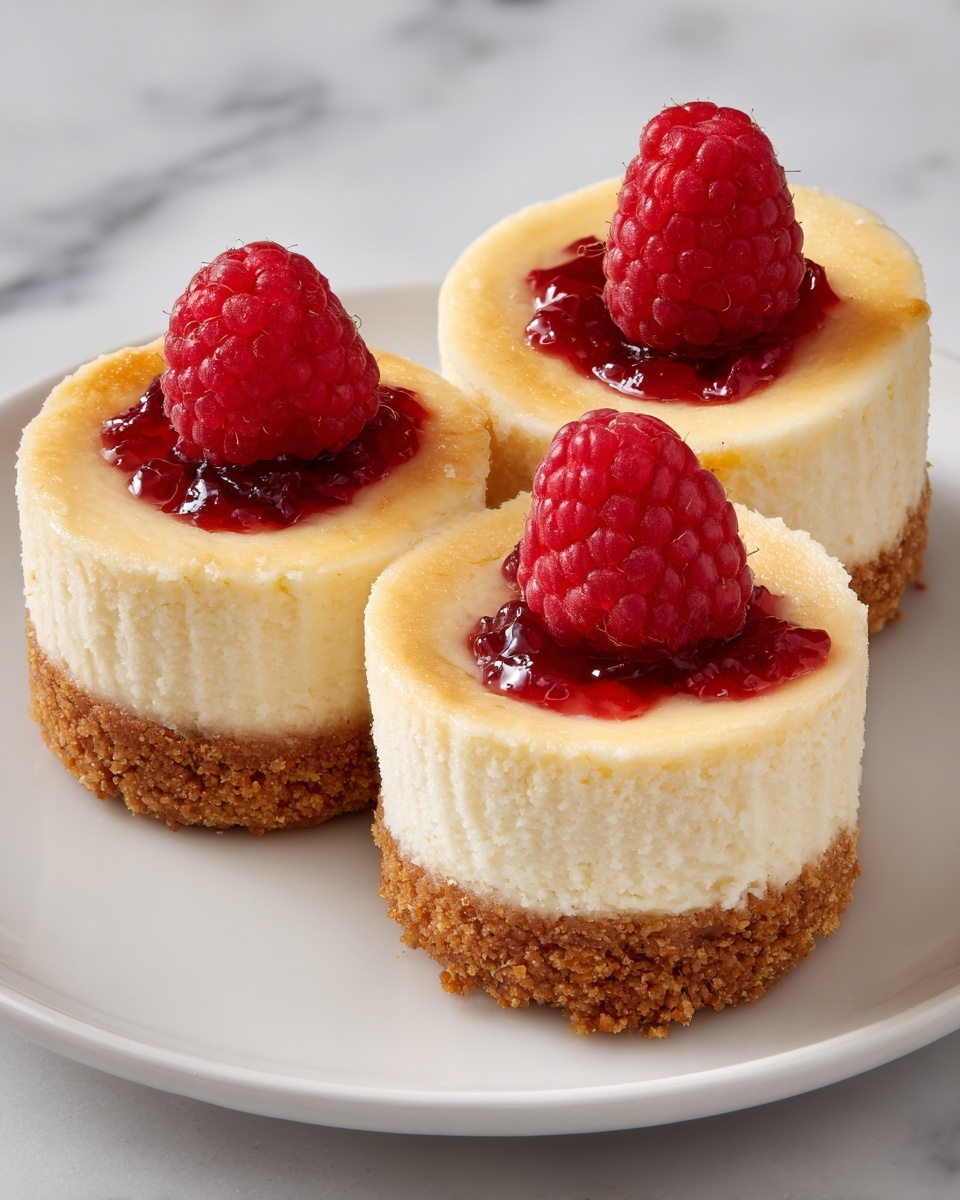
If you are searching for a delightful treat that blends creamy texture with a nostalgic crunch, look no further than this Mini Cheesecakes with Vanilla Wafer Crust Recipe. These little delights pack all the rich, velvety flavors of classic cheesecake into perfect bite-sized portions, nestled on a crisp and buttery vanilla wafer base. Whether you’re entertaining guests, craving a sweet snack, or preparing a crowd-pleaser dessert, this recipe offers an easy, charming way to satisfy your cheesecake cravings with a twist of fun and elegance.
Ingredients You’ll Need
Gathering a handful of simple, everyday ingredients is all it takes to create these irresistible treats. Each component plays a key role in giving these mini cheesecakes their signature creamy texture, balanced sweetness, and delightful flavor contrast from the crust.
- Vanilla wafer cookies: These form the crisp, flavorful crust that complements the creamy filling perfectly.
- Cream cheese, softened: The star ingredient providing that rich, smooth base everyone loves in cheesecake.
- Granulated sugar: Adds just the right amount of sweetness to balance the tanginess of the cream cheese and sour cream.
- Eggs: Help to bind the filling and create a luscious, custardy texture.
- Vanilla extract: Enhances the overall flavor with a gentle, aromatic warmth.
- Sour cream: Contributes moisture and a subtle tang that enriches the creaminess.
- Salt: A pinch brightens and balances the sweetness.
- Fresh fruit or pie filling (optional): Perfect for adding color, a fresh pop of flavor, and a decorative touch.
- Paper cupcake liners: Makes handling and serving these mini cheesecakes easy and mess-free.
How to Make Mini Cheesecakes with Vanilla Wafer Crust Recipe
Step 1: Prepare Your Pan and Crust
Start by preheating your oven to 325°F and lining a 12-cup muffin pan with paper cupcake liners. Place one vanilla wafer flat side down in the bottom of each liner. This creates the buttery, crisp crust that is the perfect base to hold the creamy cheesecake filling.
Step 2: Mix the Cream Cheese Filling
In a large bowl, beat the softened cream cheese with an electric mixer until perfectly smooth and free of lumps. Gradually add the sugar and continue mixing until combined. This ensures a velvety, sweet base that will shine through in every bite.
Step 3: Add Eggs and Flavorings
Beat in the eggs one at a time to incorporate air and maintain creaminess. Then, add the vanilla extract, sour cream, and salt. Mixing everything until the batter is smooth and creamy is key to achieving that classic cheesecake texture that melts in your mouth.
Step 4: Bake the Mini Cheesecakes
Divide the batter evenly among the prepared muffin cups, filling each about three-quarters full. Bake in the preheated oven for 18 to 20 minutes, or until the centers are set but still slightly jiggly. This precise baking time guarantees a creamy center without cracking or overbaking.
Step 5: Cool and Chill
Once baked, remove the pan from the oven and allow the mini cheesecakes to cool in the pan for 10 minutes. Then transfer them to a wire rack to cool completely before refrigerating. Chilling for at least 2 hours helps the flavors meld and the texture firm up, making each mini cheesecake perfectly delightful.
How to Serve Mini Cheesecakes with Vanilla Wafer Crust Recipe
Garnishes
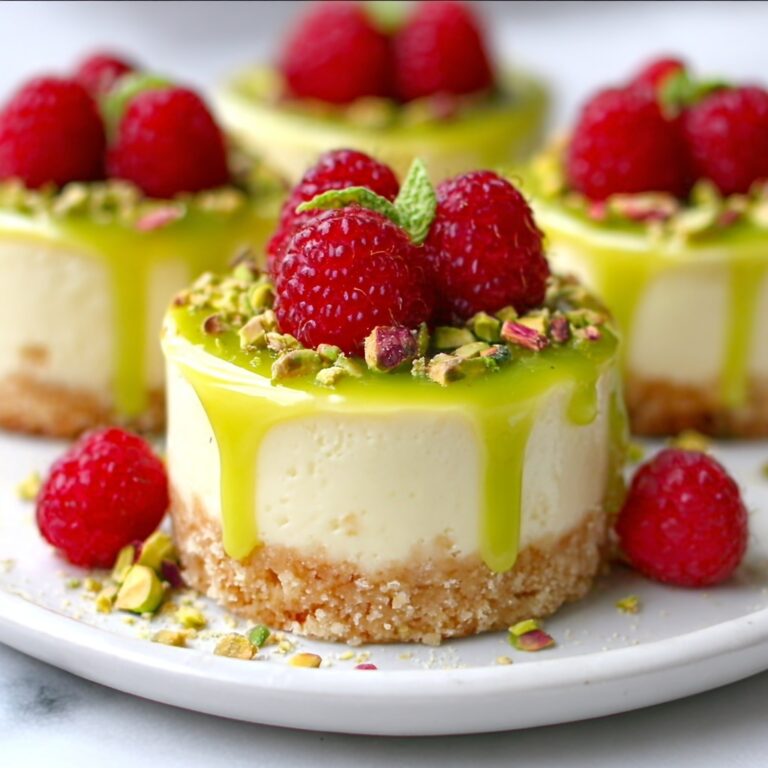
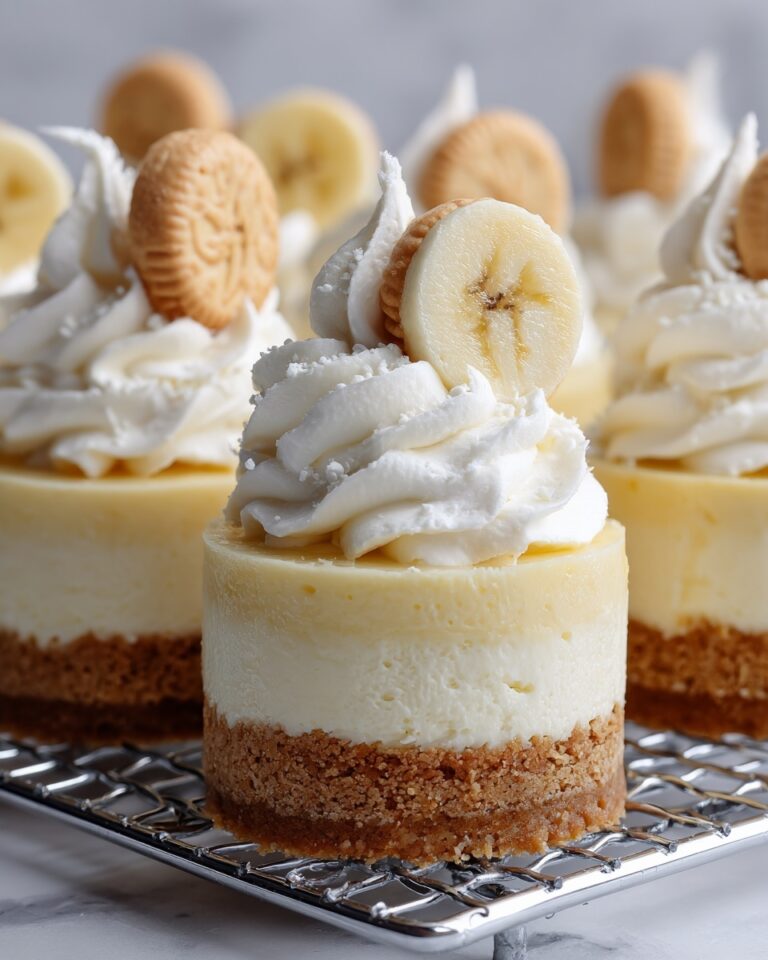
Topping your mini cheesecakes with fresh fruit, such as strawberries, blueberries, or raspberries, adds a burst of bright flavor and vibrant color. Alternatively, a spoonful of your favorite pie filling or fruit preserves offers a sweet, luscious finishing touch that perfectly complements the creamy filling.
Side Dishes
These mini delights shine wonderfully on their own, but pairing them with a cup of rich coffee or a delicate herbal tea can elevate the experience. For gatherings, serving alongside a fresh fruit platter or a light salad with citrus dressing balances the richness.
Creative Ways to Present
For an eye-catching dessert table, place the mini cheesecakes on a tiered cake stand or arrange them in colorful cupcake liners for visual appeal. You could also drizzle chocolate or caramel sauce over each one, or sprinkle chopped nuts for an extra textural surprise.
Make Ahead and Storage
Storing Leftovers
Leftover mini cheesecakes store beautifully in an airtight container in the refrigerator for up to 4 days. Keeping them chilled not only preserves their freshness but also maintains the creamy texture you love.
Freezing
If you want to prepare these mini cheesecakes ahead of time, they freeze well. Place them in a single layer on a baking sheet and freeze. Once solid, transfer to a freezer-safe container with parchment paper between layers. Freeze for up to 1 month and thaw overnight in the fridge before serving.
Reheating
These cheesecakes are best enjoyed chilled, so reheating is generally not recommended. However, if you prefer them closer to room temperature, simply let them sit out for 15 to 20 minutes before serving to soften slightly without losing their creamy texture.
FAQs
Can I use flavored wafer cookies instead of vanilla?
Absolutely! Swapping vanilla wafers for chocolate or lemon-flavored versions can add a fun twist to your mini cheesecakes, giving each bite a unique flavor profile.
Do I need to use an electric mixer for the cream cheese?
Using an electric mixer helps achieve a smooth, lump-free filling quickly, but if you don’t have one, vigorous whisking by hand can work—just be patient to get the right texture.
What if I don’t have sour cream—can I substitute it?
You can substitute sour cream with Greek yogurt or even heavy cream for a slightly different texture and tang. Each option will still keep your cheesecakes creamy and delicious.
Can this recipe be doubled or tripled for a larger batch?
Yes, just multiply the ingredient amounts accordingly and use multiple muffin pans as needed. Remember to bake in batches if your oven can’t accommodate all at once.
Is it possible to make these mini cheesecakes dairy-free?
For a dairy-free version, you can try swapping the cream cheese and sour cream for plant-based alternatives, but results may vary slightly in texture and flavor.
Final Thoughts
This Mini Cheesecakes with Vanilla Wafer Crust Recipe is a genuinely charming way to enjoy cheesecake without the fuss of a big slice. Its perfect balance of creamy filling and crumbly crust makes it a guaranteed crowd-pleaser, whether for a family dessert or a festive gathering. Give this recipe a try—you might just find your new favorite sweet treat that’s as fun to make as it is to eat!
Print
Mini Cheesecakes with Vanilla Wafer Crust Recipe
- Prep Time: 15 minutes
- Cook Time: 20 minutes
- Total Time: 35 minutes (plus 2 hours chilling time)
- Yield: 12 mini cheesecakes
- Category: Dessert
- Method: Baking
- Cuisine: American
- Diet: Vegetarian
Description
These Mini Cheesecakes with Vanilla Wafer Crust are a delightful bite-sized dessert perfect for parties or a sweet treat. Featuring a buttery vanilla wafer base and a creamy, smooth cheesecake filling, they are easy to prepare and can be made ahead of time. Top them with fresh fruit or pie filling for extra flavor and presentation.
Ingredients
Crust
- 12 vanilla wafer cookies
Filling
- 16 ounces cream cheese, softened
- ½ cup granulated sugar
- 2 large eggs
- 1 teaspoon vanilla extract
- ½ cup sour cream
- ¼ teaspoon salt
Topping (Optional)
- Fresh fruit or pie filling
Other
- Paper cupcake liners
Instructions
- Preheat and Prepare Pan: Preheat your oven to 325°F and line a 12-cup muffin pan with paper cupcake liners to ensure easy removal and clean-up.
- Form the Crust: Place one vanilla wafer cookie flat side down into the bottom of each paper liner to create an even crust base for each mini cheesecake.
- Make the Filling: In a large bowl, beat the softened cream cheese using an electric mixer until it’s smooth without lumps. Gradually add granulated sugar and blend until fully combined.
- Add Eggs and Flavorings: Beat in the eggs one at a time to maintain a creamy texture. Then add vanilla extract, sour cream, and salt, mixing until the batter is smooth and creamy.
- Fill the Muffin Cups: Evenly divide the cheesecake batter among the prepared muffin cups, filling each about three-quarters full to allow room for slight rising.
- Bake: Bake the mini cheesecakes in the preheated oven for 18 to 20 minutes, or until the centers are just set and not jiggly.
- Cool: Remove the pan from the oven and let cheesecakes cool in the pan for 10 minutes. Then transfer them to a wire rack to cool completely at room temperature.
- Chill: Refrigerate the mini cheesecakes for at least 2 hours to set fully and enhance flavor.
- Serve: Before serving, optionally top each mini cheesecake with fresh fruit, fruit preserves, or pie filling for added sweetness and appeal.
Notes
- Prepare these mini cheesecakes up to a day in advance and keep refrigerated; add toppings just before serving to maintain freshness.
- For variety, you can substitute vanilla wafers with flavored wafer cookies such as chocolate or lemon.
- Add an extra twist by swirling in chocolate or caramel sauce into the batter before baking for a marbled effect and richer flavor.


