
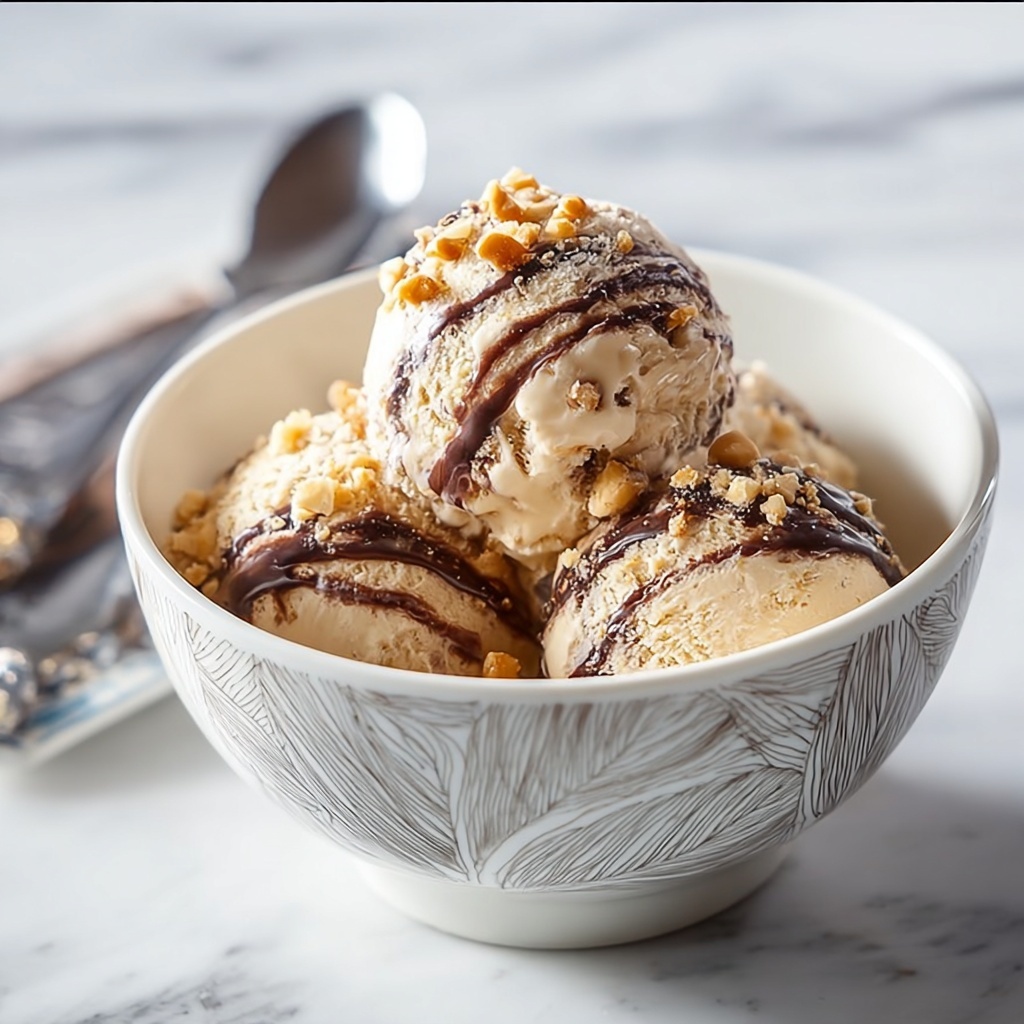
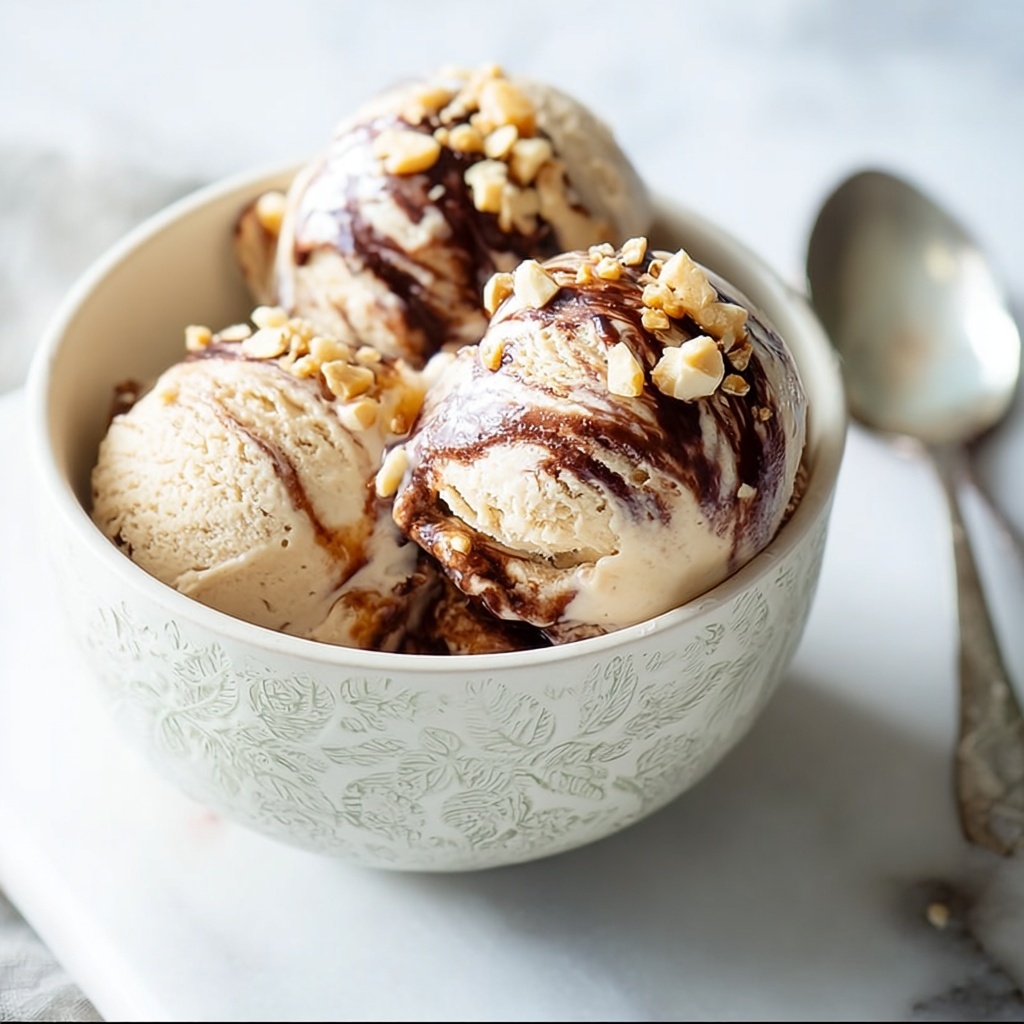
If you have a sweet tooth and love the perfect combination of creamy, chocolatey, and nutty flavors, you are going to adore this Ice Cream with Peanut Butter Cups & Fudge Recipe. This delightful treat brings together the smooth richness of homemade ice cream with generous chunks of peanut butter cups and luscious ribbons of fudge. Every spoonful is a heavenly mix of textures and tastes, perfect for cooling down on a warm day or impressing guests at your next gathering. Making this ice cream at home is easier than you might think, and the result feels like a decadent scoop of happiness.
Ingredients You’ll Need
The charm of this recipe lies in its simplicity and quality ingredients. Each component plays a crucial role in building the rich, creamy texture and the irresistible flavor profile that defines Ice Cream with Peanut Butter Cups & Fudge Recipe.
- 2 cups heavy cream: This provides the luscious creaminess that’s essential for a smooth, rich ice cream base.
- 1 cup whole milk: Adds just enough lightness to balance the heaviness of the cream, ensuring the perfect mouthfeel.
- ¾ cup granulated sugar: Sweetens the ice cream naturally, enhancing all the complementary flavors.
- 1 tablespoon pure vanilla extract: Brings a warm, aromatic note that complements the peanut butter and chocolate beautifully.
- 1 cup chopped peanut butter cups: These little candy treasures add crunchy bursts and a salty-sweet flavor contrast.
- ½ cup hot fudge sauce (plus extra for drizzling): This rich, gooey sauce swirled into the ice cream delivers that classic chocolate fudge indulgence.
- Pinch of salt: Enhances all the sweet flavors and balances the richness perfectly.
How to Make Ice Cream with Peanut Butter Cups & Fudge Recipe
Step 1: Whisk Together the Creamy Base
Start by combining the heavy cream, whole milk, granulated sugar, vanilla extract, and a pinch of salt in a mixing bowl. Whisk until the sugar has completely dissolved. This ensures your ice cream base is perfectly sweet and smooth before churning.
Step 2: Churn the Ice Cream
Pour the mixture into your ice cream maker and churn according to the manufacturer’s instructions. This step typically takes about 20 to 25 minutes. Churning aerates the mixture, transforming it into that delicious soft-serve texture you crave.
Step 3: Incorporate the Peanut Butter Cups and Fudge
Once the ice cream has reached a soft-serve consistency, gently fold in the chopped peanut butter cups. Then, carefully swirl in the hot fudge sauce. Take your time here — you want pretty ribbons of fudge without overmixing and losing that beautiful marbled effect.
Step 4: Freeze Until Firm
Transfer the finished ice cream to a freezer-safe container and cover it. Freeze for at least 4 hours, or until firm. This step allows the ice cream to develop its full texture and deep flavors.
How to Serve Ice Cream with Peanut Butter Cups & Fudge Recipe
Garnishes
For an extra touch of indulgence, drizzle some warm fudge sauce over the top just before serving. You can also sprinkle additional chopped peanut butter cups or even a pinch of flaky sea salt to create irresistible contrasts in texture and flavor.
Side Dishes
This ice cream pairs wonderfully with warm brownies, a slice of rich chocolate cake, or even crispy waffle cones. The heat and crunch beautifully complement the cold, creamy, and luscious texture of the ice cream.
Creative Ways to Present
Try layering the fudge and peanut butter cups inside a clear parfait glass for a stunning visual effect. Alternatively, serve scoops inside hollowed-out chocolate cups or on top of mini peanut butter cookie sandwiches for a fun twist that’s bound to impress at any gathering.
Make Ahead and Storage
Storing Leftovers
If you have any Ice Cream with Peanut Butter Cups & Fudge Recipe leftovers, be sure to keep them in an airtight container in the freezer. This will prevent ice crystals from forming and keep the ice cream tasting fresh and creamy for several days.
Freezing
After preparing your ice cream, freezing it properly is key. Use a freezer-safe container with a tight lid. For the best texture, press a piece of plastic wrap directly onto the surface before sealing the container to minimize air exposure.
Reheating
Unlike most dishes, this ice cream isn’t something you’d reheat. Instead, let it sit at room temperature for 5 to 10 minutes before scooping to soften slightly—this makes serving easier and enhances the creamy texture.
FAQs
Can I make this ice cream without an ice cream maker?
Absolutely! While this recipe shines when churned, you can achieve a no-churn version by folding the peanut butter cups and fudge swirl into whipped cream mixed with sweetened condensed milk, then freezing until firm.
What kind of peanut butter cups work best?
Mini peanut butter cups or classic-sized ones both work well, but mini cups create more even distribution throughout the ice cream. Using high-quality peanut butter cups enhances the overall flavor immensely.
Can I substitute dairy ingredients for a vegan version?
This recipe relies on heavy cream and whole milk for its creaminess. However, you can experiment with coconut cream and plant-based milks, but the texture and flavor will differ slightly from the traditional version.
How long does this ice cream keep in the freezer?
For the best flavor and texture, consume within one to two weeks. Over time, ice crystals may form, which can affect the smoothness of the ice cream.
Is it possible to add more fudge sauce inside?
Definitely! Feel free to layer more fudge sauce at different stages when placing the ice cream in the container. This creates a beautiful ripple effect that adds extra chocolate delight to every bite.
Final Thoughts
This Ice Cream with Peanut Butter Cups & Fudge Recipe is one of those special treats that always feels like a celebration in a bowl. With its creamy base, bits of peanut butter cups, and rich fudge swirls, it’s a dessert guaranteed to bring smiles around the table. Whether you’re making it for yourself, family, or friends, I promise it will become a deliciously memorable favorite. So go ahead, grab those ingredients, and whip up a batch—you won’t regret it!
Print
Ice Cream with Peanut Butter Cups & Fudge Recipe
- Prep Time: 10 minutes
- Cook Time: 25 minutes (churning time)
- Total Time: 4 hours 35 minutes (including freezing)
- Yield: 8 servings
- Category: Dessert
- Method: Churning
- Cuisine: American
- Diet: Vegetarian
Description
This homemade Ice Cream with Peanut Butter Cups & Fudge is a rich and creamy dessert featuring smooth vanilla ice cream swirled with luscious hot fudge and studded with chopped peanut butter cups. Perfectly balanced with sweet and salty flavors, this recipe brings a decadent treat you can easily make at home with an ice cream maker.
Ingredients
Ice Cream Base
- 2 cups heavy cream
- 1 cup whole milk
- ¾ cup granulated sugar
- 1 tablespoon pure vanilla extract
- pinch of salt
Add-ins
- 1 cup chopped peanut butter cups
- ½ cup hot fudge sauce (plus extra for drizzling)
Instructions
- Mix Ingredients: In a mixing bowl, whisk together the heavy cream, whole milk, granulated sugar, vanilla extract, and a pinch of salt until the sugar is completely dissolved, ensuring a smooth base for the ice cream.
- Churn Ice Cream: Pour the mixture into your ice cream maker and churn it according to the manufacturer’s instructions, typically about 20 to 25 minutes, until it reaches a soft-serve consistency with a creamy texture.
- Add Peanut Butter Cups and Fudge: Gently fold in the chopped peanut butter cups and carefully swirl in the hot fudge sauce, taking care not to overmix so that the fudge creates beautiful ribbons throughout the ice cream.
- Freeze: Transfer the ice cream to a freezer-safe container, cover it tightly, and freeze for at least 4 hours or until firm enough to scoop.
- Serve: Scoop the ice cream into bowls or cones and drizzle with additional hot fudge sauce if desired to elevate the chocolaty peanut butter flavor.
Notes
- For a richer, more intense chocolate flavor, substitute dark chocolate fudge and use mini peanut butter cups.
- To create a ripple effect, layer the fudge and peanut butter cups alternately in the container before freezing.
- This recipe works best with an ice cream maker for perfect texture; however, a no-churn version can be made by folding the ingredients into whipped cream and sweetened condensed milk.


