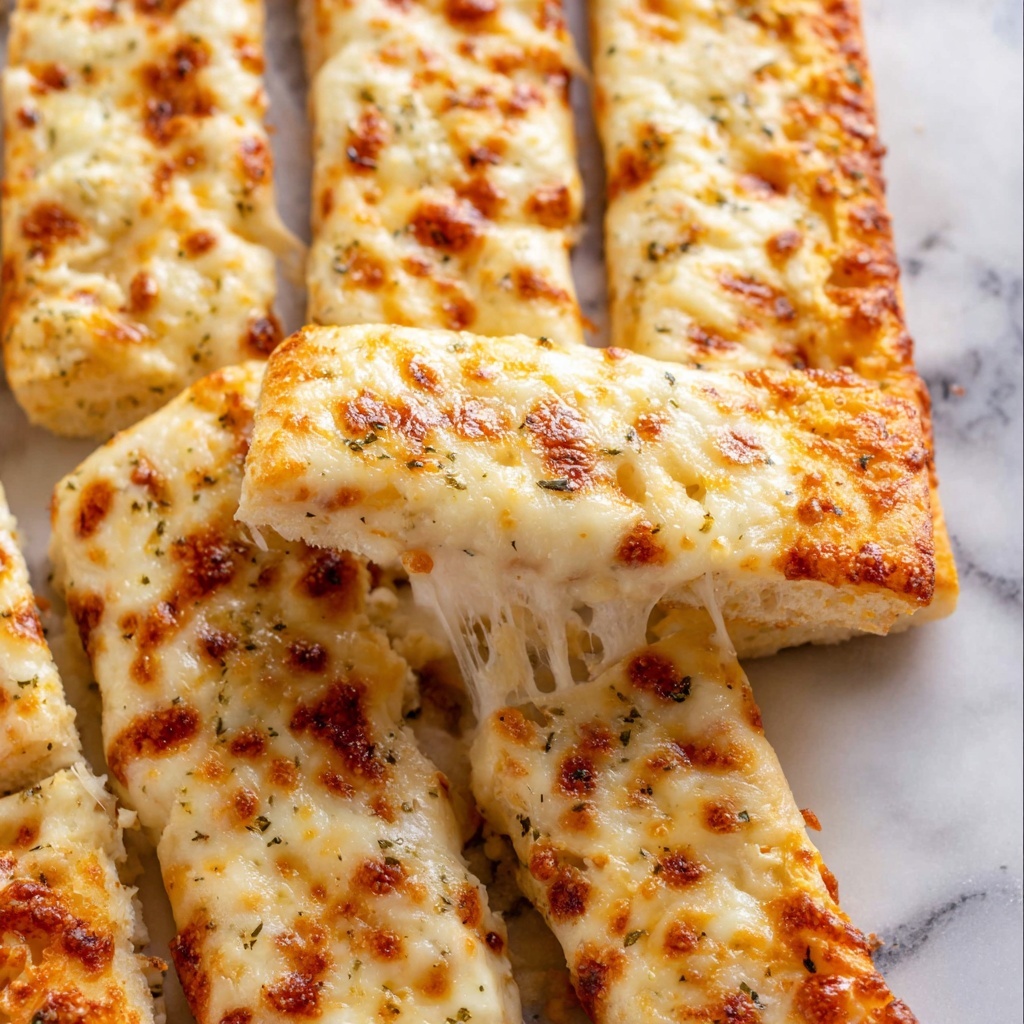
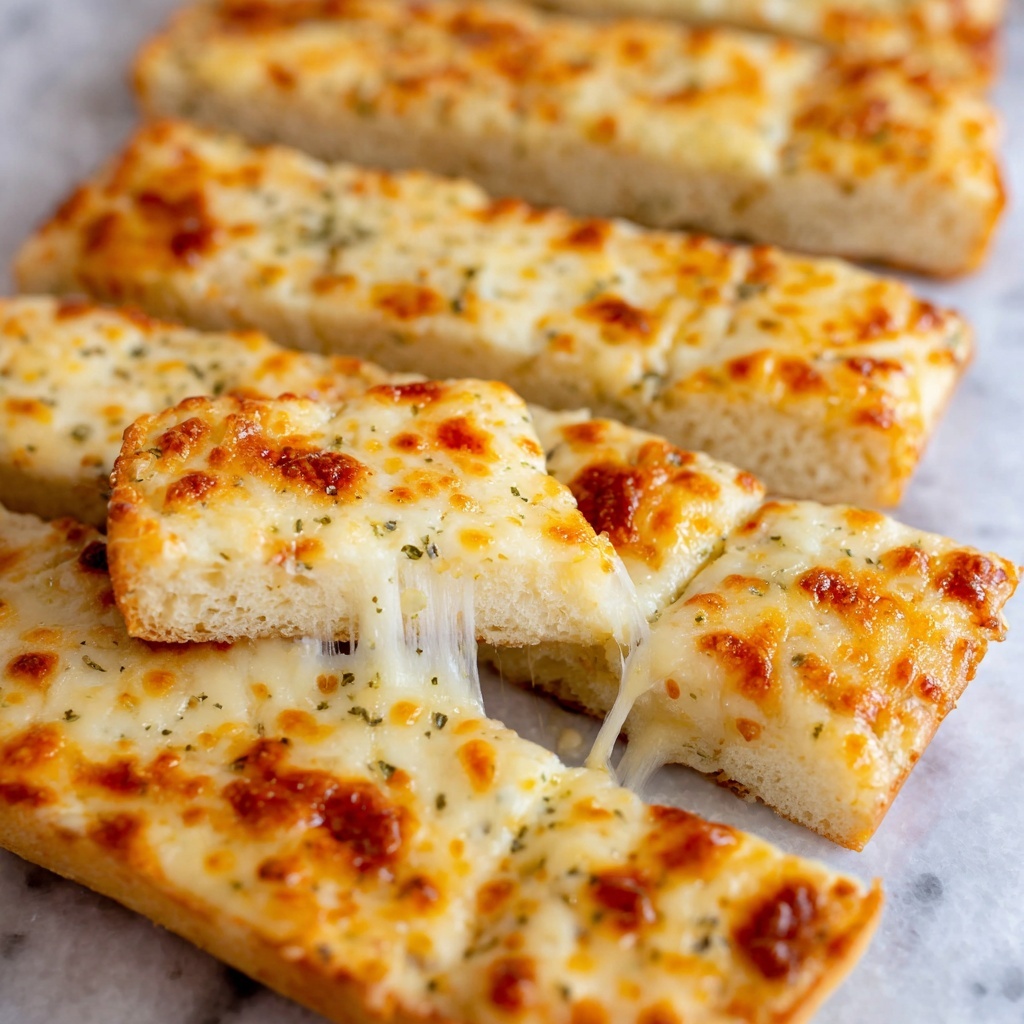
If you have a craving for something warm, cheesy, and utterly irresistible, then this Homemade Cheesy Breadsticks Recipe is about to become your new best friend in the kitchen. With a crisp yet soft crust, a buttery garlic layer, and a generous blanket of melted mozzarella and Parmesan, these breadsticks are the perfect snack, appetizer, or party pleaser. Trust me, once you try making these from scratch, you’ll love how simple ingredients come together to create a flavor-packed treat that everyone will ask you to make again and again.
Ingredients You’ll Need
Gathering the right ingredients is key to nailing the perfect balance of flavor, texture, and that gorgeous golden-brown finish on your breadsticks. Each of these components plays a vital role, from the soft pizza crust foundation to the buttery garlic topping and melty cheeses.
- 1 recipe Homemade Pizza Crust: The tender, slightly chewy base that holds everything together and gives these breadsticks their structure.
- 2 teaspoons olive oil: Used to coat the baking sheet so the crust bakes evenly and gains a slight crispness on the bottom.
- 2 tablespoons butter (melted): Adds richness and keeps the breadsticks moist and flavorful.
- 1 teaspoon minced garlic: Infuses the crust with a delicious garlicky aroma that’s impossible to resist.
- 1 teaspoon Italian Seasoning (divided): A blend of herbs that adds a subtle earthiness and depth of flavor throughout the dish.
- ½ teaspoon salt: Enhances all the flavors without overpowering them.
- 2 cups shredded mozzarella: The gooey, melty star of the show, giving that classic cheesy pull with every bite.
- ¼ cup shredded Parmesan: Adds a sharp, nutty contrast that perfectly complements the mozzarella.
How to Make Homemade Cheesy Breadsticks Recipe
Step 1: Preheat and Prepare
Start by moving your oven rack to the lowest position and preheating your oven to a sizzling 500 degrees F. This high heat is crucial for achieving that golden, bubbly cheese and crispy crust every time.
Step 2: Roll Out the Dough
Lay a piece of parchment paper on your cutting board and place your pizza dough in the center. Sprinkle some flour on top to keep things from sticking, then roll it into a 14- by 10-inch rectangle. Don’t hesitate to use your hands to gently pull the dough into shape if needed—it’s all about achieving that perfect rectangle canvas for your breadsticks.
Step 3: Prepare the Baking Sheet
Drizzle about 2 teaspoons of olive oil on a large rimmed baking sheet, spreading it evenly with your hands. Carefully peel the dough off the parchment and transfer it onto the baking sheet. Use your palms to gently pat and reshape the dough so it fits nicely—remember, it should stay around that 14- by 10-inch size and not cover the whole sheet.
Step 4: Add the Garlic Butter and Cheese
Mix the melted butter with the minced garlic and pour it evenly over the dough. Spread it out using a knife or the back of a spoon so every inch gets that rich, savory coating. Then sprinkle half of the Italian seasoning and the salt across the top. Layer on the shredded mozzarella and Parmesan evenly, followed by the remaining Italian seasoning for that extra herbal pop.
Step 5: Bake to Perfection
Slide the baking sheet into the oven and bake for about 10 minutes. Watch as the cheese melts beautifully and the edges start to turn a gorgeous golden brown. Once done, take the breadsticks out and let them rest for a minute or two so they firm up just enough for cutting.
Step 6: Slice and Serve
Using a pizza cutter, slice your breadsticks into 18 strips by cutting 6 times lengthwise and 3 times crosswise. This portioning ensures that everyone gets the perfect cheesy bite every time.
How to Serve Homemade Cheesy Breadsticks Recipe

Garnishes
Sprinkle freshly chopped parsley or basil on top for a vibrant pop of color and fresh aroma. You can also add a little extra grated Parmesan or a dash of chili flakes if you want a subtle kick with some heat.
Side Dishes
These breadsticks pair wonderfully with marinara sauce for dipping, a fresh Caesar salad, or even alongside a hearty bowl of soup. Their versatility makes them a fantastic addition to almost any meal.
Creative Ways to Present
For a crowd-pleasing appetizer, arrange the breadsticks in a circular pattern on a large platter with small bowls of assorted dips in the center—think garlic ranch, pesto, or spicy sriracha mayo. It’s a fun and inviting way to showcase your Homemade Cheesy Breadsticks Recipe and get everyone excited to dig in.
Make Ahead and Storage
Storing Leftovers
Wrap any leftover breadsticks tightly in aluminum foil or place them in an airtight container to keep them fresh. Stored at room temperature, they’ll stay tasty for a day, and in the fridge, you can enjoy them for up to 3 days without sacrificing too much texture.
Freezing
If you want to set aside some breadsticks for later, freezing works like a charm. Lay them out on a baking sheet to freeze individually first, then transfer to a freezer-safe bag or container. When properly sealed, they’ll hold up well for up to 2 months—perfect for quick snacks on demand.
Reheating
To bring back that fresh-baked magic, pop the breadsticks in a preheated oven at 350 degrees F for 8-10 minutes. This method revives the crispy edges and melty cheese much better than a microwave, keeping your Homemade Cheesy Breadsticks Recipe tasting just like the first time.
FAQs
Can I use store-bought pizza dough for this recipe?
Absolutely! Store-bought pizza dough works great and cuts down preparation time. Just make sure it’s thawed and at room temperature before rolling it out.
What if I don’t have Italian seasoning?
You can easily make your own blend with dried oregano, basil, thyme, and rosemary. Even a simple sprinkle of each herb individually will add wonderful flavor.
Can I make these breadsticks gluten-free?
Yes, if you substitute the pizza dough with a gluten-free variant, these breadsticks can be made gluten-free while still being delicious.
How can I make the breadsticks extra crispy?
Using olive oil on the baking sheet and baking at a high temperature like 500 degrees F helps develop crispness. You can also broil them for the last 1-2 minutes for a golden crust, but watch closely to avoid burning.
What dips go best with Homemade Cheesy Breadsticks Recipe?
Classic marinara is always a winner, but ranch dressing, garlic butter, pesto, or even a spicy aioli are fantastic alternatives to switch things up.
Final Thoughts
Making this Homemade Cheesy Breadsticks Recipe is one of those simple joys that turns an ordinary day into something special. Whether it’s for a cozy night in, a party snack, or a comforting side dish, these breadsticks bring warmth and smiles to the table. So grab your rolling pin, preheat that oven, and get ready to enjoy cheesy, garlicky perfection in every bite—you won’t regret it!
Print
Homemade Cheesy Breadsticks Recipe
- Prep Time: 10 minutes
- Cook Time: 10 minutes
- Total Time: 20 minutes
- Yield: 18 servings
- Category: Appetizer
- Method: Baking
- Cuisine: Italian
- Diet: Vegetarian
Description
This Homemade Cheesy Breadsticks recipe features a crispy, golden crust topped with a flavorful blend of melted mozzarella and Parmesan cheeses, garlic-infused butter, and Italian seasoning. Perfect as a snack, appetizer, or side dish, these breadsticks are easy to prepare and baked to perfection in just 10 minutes.
Ingredients
Breadstick Base
- 1 recipe Homemade Pizza Crust
- 2 teaspoons olive oil (or as needed to coat baking sheet)
Topping
- 2 tablespoons butter (melted)
- 1 teaspoon minced garlic
- 1 teaspoon Italian Seasoning (divided)
- ½ teaspoon salt
- 2 cups shredded mozzarella cheese
- ¼ cup shredded Parmesan cheese
Instructions
- Preheat Oven: Move the oven rack to the lowest position and preheat the oven to 500°F (260°C) to achieve a crispy, golden crust.
- Prepare Dough: Place a sheet of parchment paper on a cutting board or flat surface. Center the pizza dough on the parchment and sprinkle a little flour over it to prevent sticking. Roll the dough out with a rolling pin into a 14- x 10-inch rectangle. Use your hands as needed to shape it evenly.
- Oil Baking Sheet and Transfer Dough: Drizzle approximately 2 teaspoons of olive oil onto a large rimmed baking sheet and spread it evenly with your hands. Peel the dough off the parchment and place it onto the prepared baking sheet. Use your hands to pat and reshape the dough back into the 14- x 10-inch rectangle.
- Add Garlic Butter and Seasonings: Mix melted butter and minced garlic, then spread the mixture evenly over the dough using a knife or the back of a spoon. Sprinkle ½ teaspoon of Italian seasoning and salt over the buttered dough.
- Top with Cheese and Remaining Seasoning: Evenly distribute the shredded mozzarella and Parmesan cheeses over the dough. Sprinkle the remaining ½ teaspoon of Italian seasoning on top of the cheese for extra flavor.
- Bake Breadsticks: Bake in the preheated oven for 10 minutes or until the cheese is melted and golden brown.
- Slice and Serve: Remove from the oven and let rest for 1–2 minutes. Use a pizza cutter to slice the bread into 18 strips by cutting 6 times lengthwise and 3 times crosswise. Serve warm.
Notes
- Ensure the pizza dough is rolled out evenly to guarantee consistent baking.
- You can substitute Italian seasoning with a blend of oregano, basil, and thyme if unavailable.
- For a spicier twist, sprinkle red pepper flakes before baking.
- These breadsticks pair well with marinara or ranch dipping sauces.
- If you prefer a crispier crust, bake for an additional 2–3 minutes, but watch carefully to avoid burning.

