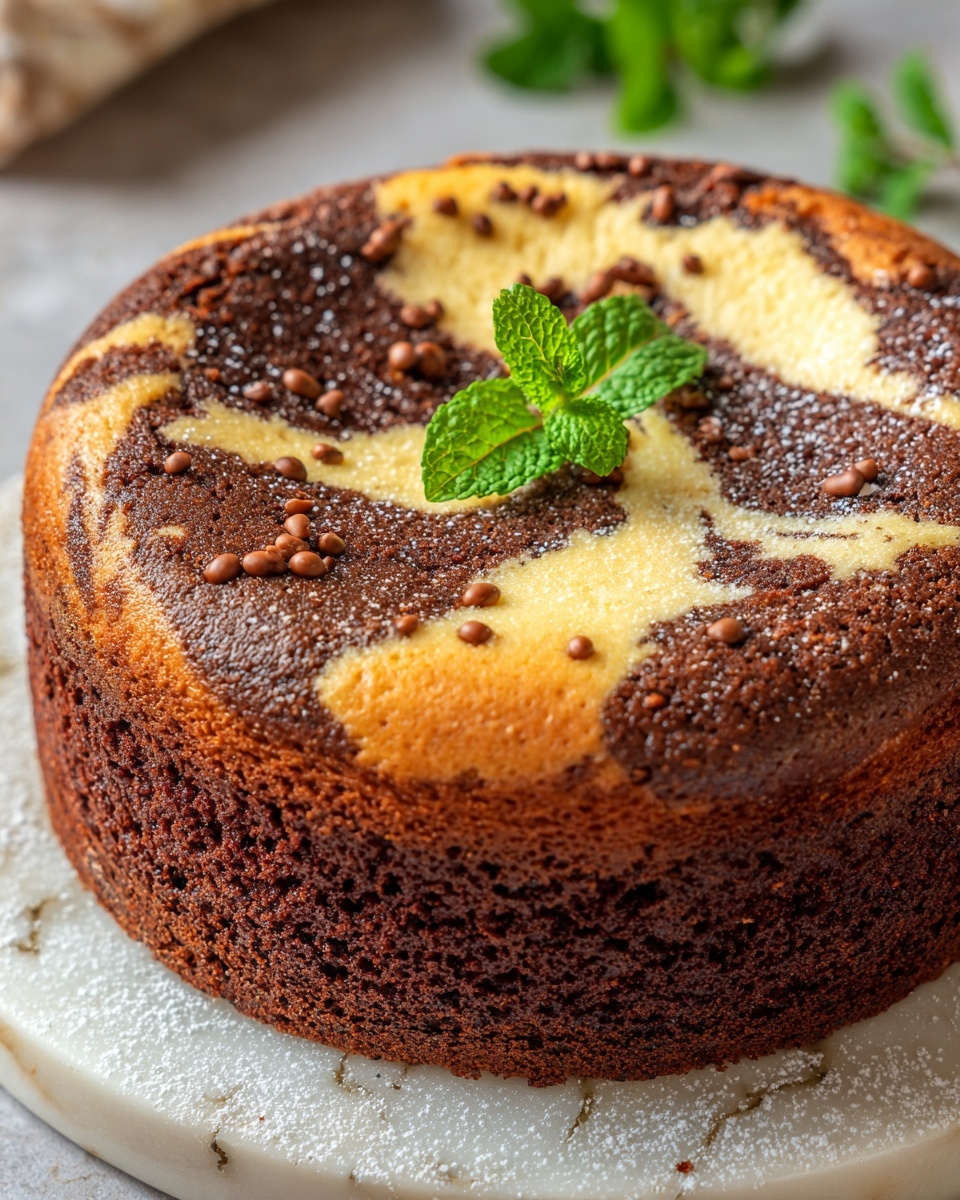
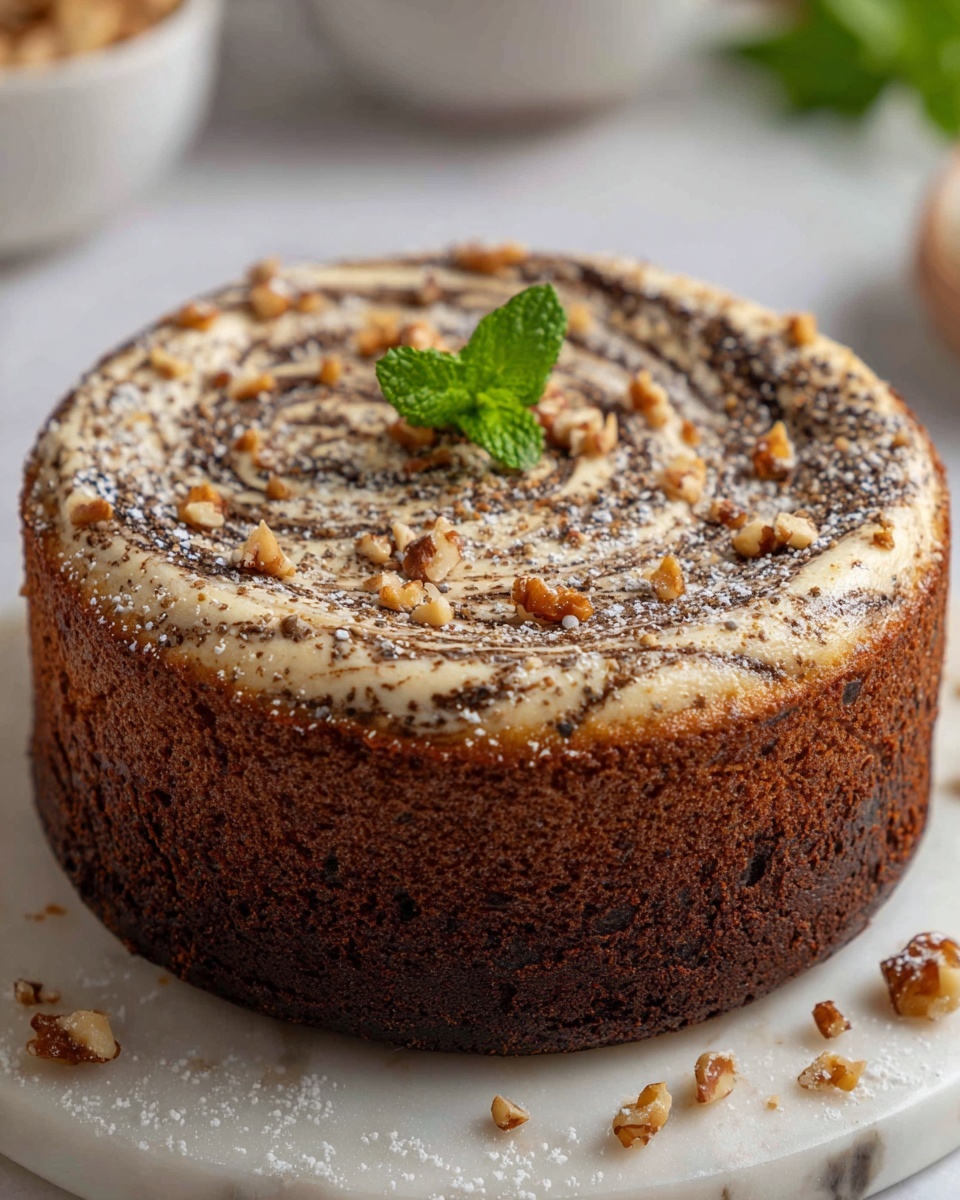
If you’re on the hunt for a dessert that is as fun to make as it is to eat, then this Earthquake Cake Recipe is about to become your new favorite. Picture a luscious chocolate cake base topped with a wildly indulgent cream cheese layer that cracks and swirls beautifully during baking, resembling the dramatic rifts of an earthquake. With the perfect crunch from toasted pecans and coconut and a melty chocolate finish, this cake combines textures and flavors in the most irresistible way. It’s a crowd-pleaser that brings smiles and second helpings every time you serve it.
Ingredients You’ll Need
The beauty of this Earthquake Cake Recipe lies in its simple yet thoughtfully chosen ingredients. Each one plays an essential role in creating the rich layers of flavor and texture—from the moist chocolate cake to the creamy, tangy topping and the toasty nuts that provide a satisfying crunch.
- Chocolate cake mix: A reliable base that brings deep, chocolaty flavor and moist texture with minimal effort.
- Unsalted butter: Both melted and softened, it enriches the cake and the cream cheese layer for smoothness and flavor.
- Shredded coconut: Adds a sweet, chewy contrast that complements the chocolate perfectly.
- Chopped pecans (or walnuts): Provide a toasty, crunchy bite that balances the creamy elements.
- Cream cheese: Softened to create the lush, tangy topping that cracks beautifully as the cake bakes.
- Powdered sugar: Sweetens the cream cheese mixture evenly without any grittiness.
- Vanilla extract: Enhances all the flavors with its warm, floral notes.
- Salt: Just a touch to sharpen the sweetness and deepen the overall flavor profile.
- Semi-sweet chocolate chips (optional): For those who want to dial up the chocolate factor with melty pockets of goodness.
How to Make Earthquake Cake Recipe
Step 1: Preheat the oven and prepare your pan
Start by heating your oven to 350°F (175°C). Grease a 9×13-inch baking dish generously with butter or cooking spray to ensure your Earthquake Cake lifts out cleanly after baking. This simple step will save you some cake heartbreak later.
Step 2: Prepare the chocolate cake mix
Whip up your chocolate cake batter according to the package’s directions. Pour this rich, velvety batter into your prepared pan and spread it out evenly. This forms the decadent chocolate foundation that supports all the delicious layers to come.
Step 3: Add the coconut and nuts
Sprinkle shredded coconut and chopped pecans evenly over the top of the cake batter. Resist the temptation to stir them in; the toppings should rest on the batter’s surface to create that signature earthquake effect during baking.
Step 4: Make the creamy topping
In a medium bowl, beat the softened cream cheese with 1/4 cup of melted butter, powdered sugar, vanilla extract, and salt. Continue until the mixture is luxuriously smooth and creamy. This luscious blend will gently marble across the cake as it bakes, adding tangy richness and a delightful cracked look.
Step 5: Layer the cream cheese mixture
Dollop spoonfuls of the cream cheese mixture over the top of the cake batter. Spread them lightly but don’t worry about covering the entire surface; the cracks and swirls are all part of the charm that gives this recipe its name.
Step 6: Bake to perfection
Bake the cake at 350°F for 40 to 45 minutes. You’ll know it’s ready when the cake is set and a toothpick inserted in the center comes out clean. The cream cheese will have cracked and bubbled up, creating the dramatic “earthquake” appearance.
Step 7: Add chocolate chips (optional)
If you’re feeling extra indulgent, sprinkle semi-sweet chocolate chips over the surface during the last 5 minutes of baking. These will melt into gooey pockets of chocolate goodness that elevate the overall richness.
Step 8: Cool and enjoy
Allow the Earthquake Cake to cool slightly in the pan before slicing. This helps it set up just enough to serve, but still remain wonderfully gooey and moist.
How to Serve Earthquake Cake Recipe

Garnishes
A light dusting of powdered sugar visually enhances the cracks and swirls of the cake’s surface. For an extra special touch, add a few whole pecans or coconut flakes on top to echo the textures inside.
Side Dishes
Earthquake Cake is rich and satisfying on its own, but pairing it with a scoop of vanilla ice cream or a drizzle of salted caramel sauce turns dessert into an unforgettable experience. Fresh berries or a tangy raspberry coulis also provide a lovely contrast to the cake’s fudgy sweetness.
Creative Ways to Present
Slice the cake into squares and serve on rustic wooden boards for a cozy, homey feel. You can also cut it into smaller bite-sized pieces for parties or potlucks so everyone gets to sample the layers of flavor in every mouthful.
Make Ahead and Storage
Storing Leftovers
Keep any leftover Earthquake Cake covered tightly with plastic wrap or stored in an airtight container at room temperature for up to two days. For longer freshness, refrigeration is best—it helps maintain the cream cheese topping’s creamy texture.
Freezing
Wrap cake slices individually in plastic wrap and then aluminum foil to freeze for up to three months. Thaw them in the fridge overnight and enjoy a nearly fresh slice of this stunning Earthquake Cake Recipe at your convenience.
Reheating
For warm, gooey bites, reheat leftovers in the microwave for 20-30 seconds. This quickly melts the cream cheese topping back to its luscious consistency without drying out the cake.
FAQs
Can I use homemade chocolate cake batter instead of a mix?
Absolutely! Feel free to use your favorite homemade chocolate cake recipe. Just keep in mind that the texture and moisture levels might vary, so you may need to experiment a bit to get that perfect sweep of cream cheese on top.
What if I don’t like coconut or nuts?
You can leave out the coconut and nuts entirely or swap them for other toppings like crushed cookies, graham crackers, or even mini marshmallows. The key is keeping a bit of texture contrasting the creamy layers.
Is the cream cheese filling necessary?
The cream cheese mixture is what really makes this an Earthquake Cake. It creates the iconic cracked top and adds a delicious tang that balances the sweetness. Skipping it would change the character of the cake significantly.
How do I know the cake is done baking?
Bake until a toothpick inserted near the center comes out clean or with just a few moist crumbs. The cream cheese topping will look cracked and set—both signs that your cake is ready to come out of the oven.
Can I use different nuts?
Yes! Pecans and walnuts are classic for their flavor and crunch, but feel free to use almonds, hazelnuts, or even pistachios depending on your taste and what you have on hand.
Final Thoughts
Making this Earthquake Cake Recipe is like inviting a big hug from the kitchen, filled with chocolate, cream cheese, and nutty goodness all in one delightful slice. It’s a dessert that’s approachable but feels indulgent, perfect for sharing with friends and family or treating yourself after a long day. I can’t wait for you to try it and watch those signature cracks form—it really is as fun to bake as it is to eat!
Print
Earthquake Cake Recipe
- Prep Time: 15 minutes
- Cook Time: 40-45 minutes
- Total Time: 55-60 minutes
- Yield: 12 servings
- Category: Dessert
- Method: Baking
- Cuisine: American
Description
Earthquake Cake is a rich and indulgent chocolate dessert featuring a moist chocolate cake base topped with a gooey cream cheese mixture, shredded coconut, chopped pecans, and optional semi-sweet chocolate chips. The cream cheese layer creates a unique ‘cracked’ or ‘earthquake’ effect on the surface after baking, making it both visually appealing and decadently delicious—a perfect treat for gatherings or special occasions.
Ingredients
Cake Base
- 1 box (15.25 oz) chocolate cake mix (any brand)
- 1/2 cup unsalted butter, melted
Toppings
- 1 cup shredded coconut
- 1 cup chopped pecans (or walnuts)
Cream Cheese Filling
- 8 oz cream cheese, softened
- 1/4 cup unsalted butter, softened
- 1 1/2 cups powdered sugar
- 1 teaspoon vanilla extract
- 1/4 teaspoon salt
Optional
- 1/2 cup semi-sweet chocolate chips
Instructions
- Preheat the oven: Preheat your oven to 350°F (175°C). Grease a 9×13-inch baking dish thoroughly with butter or cooking spray to prevent sticking.
- Prepare the cake mix: Follow the package instructions for the chocolate cake mix, mixing ingredients as directed. Pour the batter evenly into the prepared baking dish.
- Add toppings: Evenly sprinkle the shredded coconut and chopped pecans over the unbaked cake batter. Make sure not to mix them in; they should sit on top.
- Make the cream cheese filling: In a medium bowl, use a mixer to beat together the softened cream cheese, softened butter, powdered sugar, vanilla extract, and salt until the mixture is smooth and creamy.
- Layer the cream cheese mixture: Spoon dollops of the cream cheese filling over the top of the cake batter and gently spread it. It’s fine if the cream cheese layer doesn’t cover the batter completely; it will create a cracked pattern as it bakes.
- Bake the cake: Place the baking dish in the preheated oven and bake for 40-45 minutes, or until the cake is fully set and a toothpick inserted into the center comes out clean. The cream cheese topping will form a distinctive cracked or ‘earthquake’ appearance.
- Optional chocolate chip topping: If using, sprinkle semi-sweet chocolate chips over the cake during the last 5 minutes of baking to allow them to melt slightly and add extra chocolate flavor.
- Cool and serve: Remove the cake from the oven and allow it to cool slightly in the pan before cutting into squares and serving. Enjoy your delicious Earthquake Cake!
Notes
- You can substitute walnuts for pecans if preferred or based on availability.
- Ensure the cream cheese and butter for the filling are properly softened to ensure a smooth mixture.
- Do not mix the coconut and nuts into the cake batter; layering them on top maintains texture contrast and the signature cracked look.
- For a richer flavor, consider adding a tablespoon of coffee or espresso powder to the cake batter.
- Store leftover cake covered in the refrigerator for up to 4 days.
- For best results, let the cake cool slightly before serving to allow the cream cheese topping to set properly.


