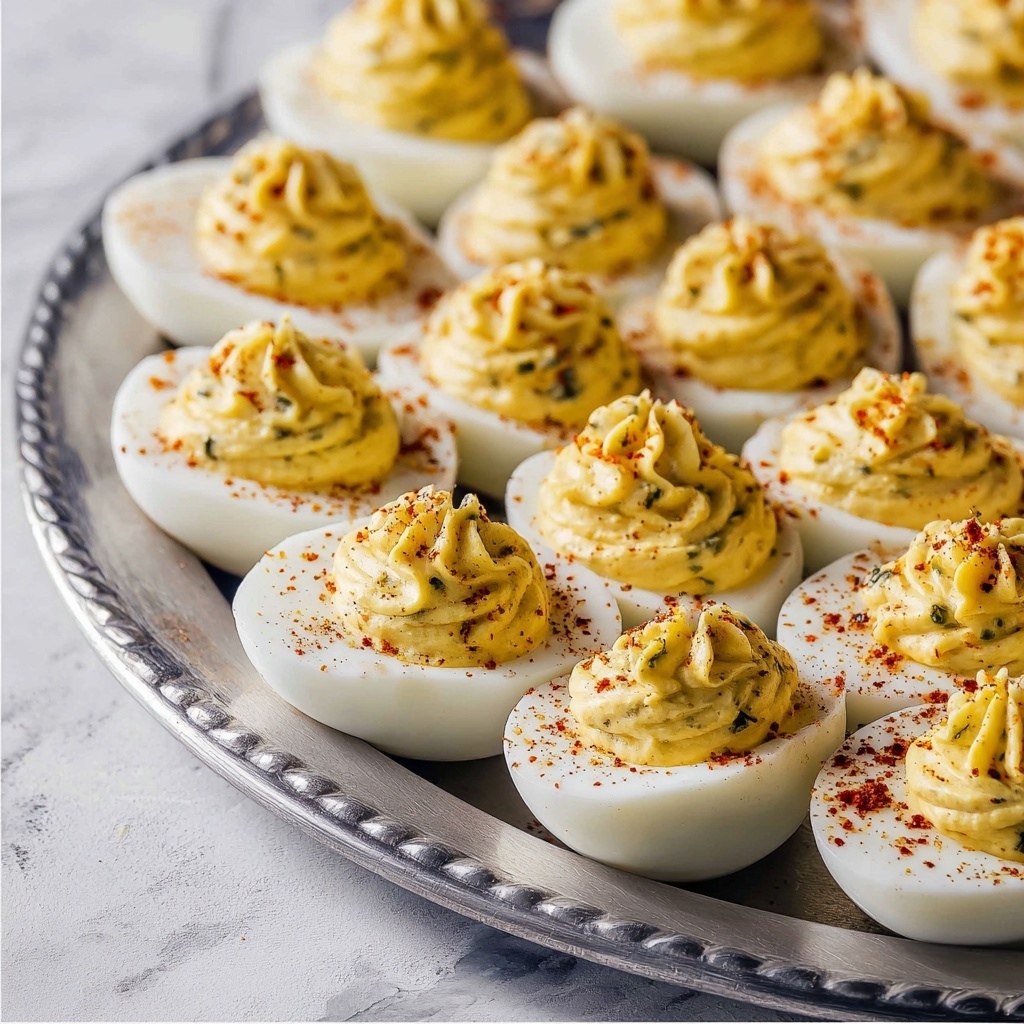
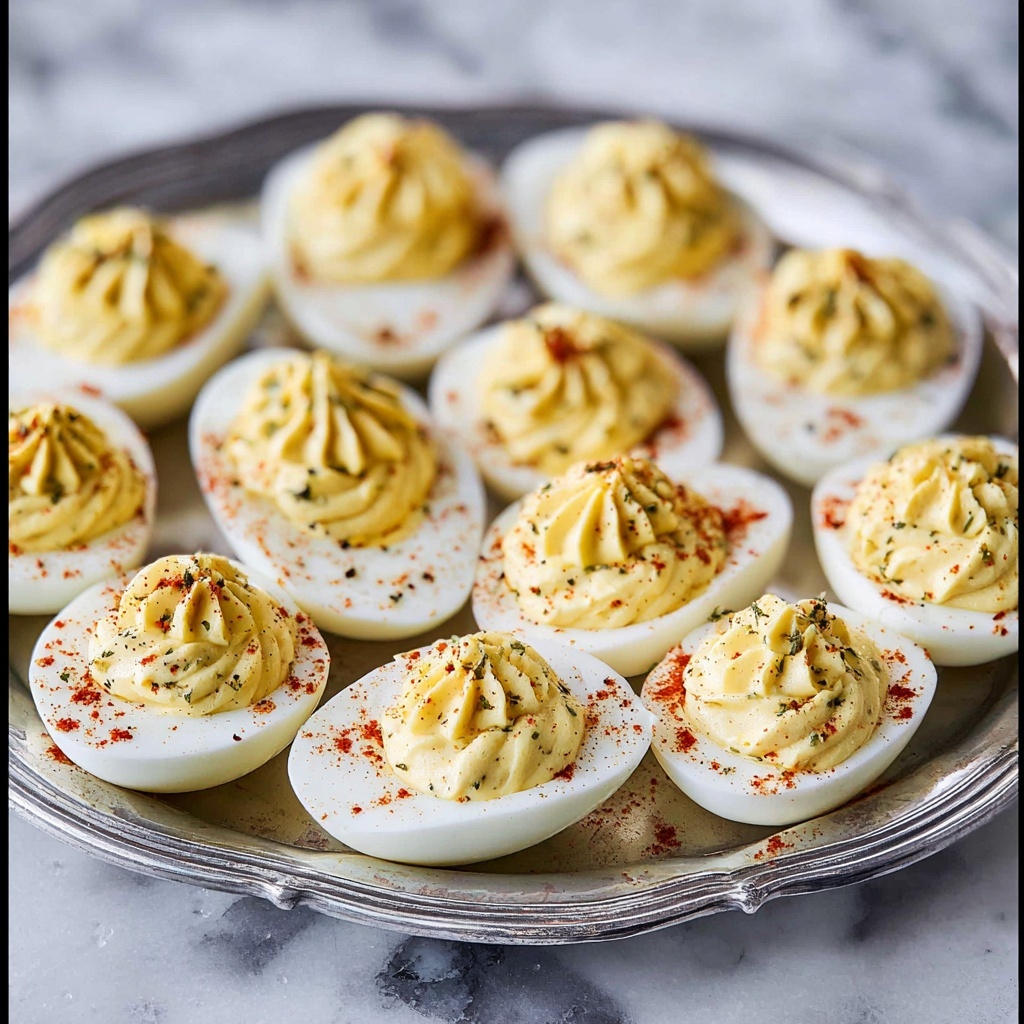
If you’ve ever found yourself craving the perfect party appetizer or a reliable snack that never disappoints, then this Classic Deviled Eggs Recipe is about to become your go-to favorite. These creamy, tangy, and delectably simple bites have a way of bringing smiles to every gathering, whether it’s a holiday celebration or a weekend brunch with friends. The balance of smooth egg yolk filling with just the right touch of mustard and pickle relish creates a harmony of flavors that feels comforting and fresh all at once. Once you make this recipe, you’ll understand why deviled eggs have been a beloved staple through the ages.
Ingredients You’ll Need
Don’t be fooled by how few ingredients this Classic Deviled Eggs Recipe calls for. Each one plays a crucial role in developing its irresistible flavor and texture. From the creamy mayonnaise adding richness to the zesty mustard giving it a little kick, these essentials work together perfectly.
- 12 large eggs: The base of the dish, providing a delicate yet substantial canvas for the filling.
- 1/3 cup mayonnaise: Adds creamy richness; feel free to swap half with plain Greek yogurt for a tangier twist.
- 2 tablespoons pickle relish: Brings a sweet and tangy crunch that brightens the filling wonderfully.
- 1 1/2 teaspoons dijon mustard: Introduces a subtle heat and depth that balances the flavors expertly.
- Salt and freshly ground black pepper: Season to taste, enhancing all the ingredients’ natural flavors.
- Paprika: A classic garnish that adds color and a hint of smoky taste just before serving.
How to Make Classic Deviled Eggs Recipe
Step 1: Hard Boil the Eggs
Start by cooking your eggs perfectly to achieve that smooth, firm white and creamy yolk center. Whether you prefer the stovetop, Instant Pot, or even baking them in the oven, each method offers a foolproof way to get those eggs ready without a single crack. The trick of adding baking soda in the stovetop method will make peeling the eggs effortless, saving you extra time and frustration.
Step 2: Peel and Cut Eggs
Once cooled in an ice bath, gently peel each egg to reveal its pristine white exterior. Slice them lengthwise with care to keep the whites intact and scoop out the yolks – these golden centers are the foundation for your luscious filling.
Step 3: Make the Filling
Pop the yolks into a bowl and mash them together with mayonnaise, pickle relish, and mustard until you get a smooth, creamy consistency. This step is where the magic happens, as the flavors meld beautifully. Then, season with salt and freshly ground pepper to taste. Play around with the proportions if you want a creamier or tangier spread – customizing this filling makes it your own.
Step 4: Assemble Your Deviled Eggs
Return generous spoonfuls of that creamy filling back into each egg white half. If you want to get fancy, use a pastry bag or a plastic bag with the corner snipped off to pipe neat, elegant swirls. Don’t forget that sprinkle of paprika or some fresh chives on top for that classic, irresistible finishing touch.
Step 5: Chill and Store
Once assembled, keep your Classic Deviled Eggs Recipe chilled in the fridge. They’re best enjoyed within 2-3 days to maintain freshness. This also makes them superb for prepping ahead of time when planning a party or gathering.
How to Serve Classic Deviled Eggs Recipe

Garnishes
Garnishing is where you can get creative while still honoring tradition. A light dusting of paprika adds both color and gentle smoky flavor, but feel free to mix things up with chopped fresh herbs like parsley, dill, or chives to brighten the presentation and add a fresh note.
Side Dishes
Classic deviled eggs shine as starters alongside a vibrant salad, crisp vegetable platters, or hearty sandwiches. They balance heavier dishes with their creamy texture and tangy flavor, making them perfect companions for picnic fare or barbecue spreads.
Creative Ways to Present
Looking to impress your guests? Serve your deviled eggs on a bed of fresh greens or edible flowers, or arrange them on a colorful platter with small bowls of extra relish or mustard nearby for self-serving. You can also elevate the filling by mixing in ingredients like bacon bits, smoked salmon, or avocado for a surprising twist.
Make Ahead and Storage
Storing Leftovers
Keep your deviled eggs refrigerated in an airtight container and enjoy within 2-3 days. Storing them promptly helps maintain that luscious texture and fresh flavor we all love. Leaving them out for too long can dry out the filling or affect their safety.
Freezing
Freezing deviled eggs is not recommended, as the texture of the eggs and filling can change unpleasantly once thawed. To keep your Classic Deviled Eggs Recipe tasting fresh, it’s best to prepare and consume them within a few days.
Reheating
These deviled eggs are traditionally served cold or at room temperature, so there’s no need to reheat. In fact, warming them could alter the texture of the filling and the eggs themselves, so stick to chilled or fresh for the best experience.
FAQs
Can I make deviled eggs without mayonnaise?
Absolutely! Many people substitute mayonnaise with plain Greek yogurt or sour cream to lighten the filling or provide a tangier flavor. Just remember, this can slightly alter the creamy texture you expect from classic deviled eggs, but it’s still delicious.
How can I make peeling hard-boiled eggs easier?
Adding a teaspoon of baking soda to the boiling water can help loosen the egg shells, making peeling much smoother. Alternatively, ensure you cool the eggs quickly in an ice bath immediately after cooking to stop the cooking process and make the peel come off more easily.
What’s the best mustard to use in the Classic Deviled Eggs Recipe?
Dijon mustard is the traditional choice because of its sharp and spicy flavor, but yellow mustard works beautifully too if you prefer a milder taste. Feel free to experiment until you find what suits your palate best.
Can I prepare deviled eggs in advance?
Yes! You can boil and peel the eggs a day ahead, keeping them refrigerated. Prepare the filling and assemble the deviled eggs on the day you plan to serve them for optimal freshness. Holding fully assembled eggs overnight is fine as well but keep them well-covered.
Are there any variations to the Classic Deviled Eggs Recipe?
Definitely! You can add ingredients like chopped herbs, crumbled bacon, smoked paprika, or even a dash of hot sauce to customize the flavor. For something unique, try mixing in avocado or using flavored mayonnaise. The Classic Deviled Eggs Recipe is a fantastic base for endless creativity.
Final Thoughts
There’s just something about a well-made batch of deviled eggs that feels like a warm hug on a plate, and this Classic Deviled Eggs Recipe captures that sentiment perfectly. Whether you’re new to making them or a seasoned pro, this recipe offers a reliable, delicious way to bring people together over simple, timeless flavors. I can’t wait for you to try it and make it one of your favorites too!
Print
Classic Deviled Eggs Recipe
- Prep Time: 10 minutes
- Cook Time: 15 minutes
- Total Time: 25 minutes
- Yield: 12 servings
- Category: Appetizer
- Method: Stovetop
- Cuisine: American
- Diet: Low Lactose
Description
Classic Deviled Eggs are a beloved appetizer with creamy, tangy filling made from hard-boiled egg yolks, mayonnaise, pickle relish, and mustard, finished with a dash of paprika for garnish. Perfect for parties, picnics, or simple gatherings, this recipe provides multiple cooking methods for the eggs, including stovetop, Instant Pot, and oven baking, ensuring easy preparation according to your preferred technique.
Ingredients
Eggs
- 12 large eggs
Filling
- 1/3 cup mayonnaise (or half mayo and half plain Greek yogurt)
- 2 tablespoons pickle relish (or diced dill pickle)
- 1 1/2 teaspoons Dijon mustard (or yellow mustard)
- Salt and freshly ground black pepper, to taste
Garnish
- Paprika
Instructions
- Hard Boil Eggs: For stovetop, add eggs to a saucepan and cover with cold water. Bring water to a boil, stir in 1 teaspoon baking soda to help peeling, cover with lid, and remove from heat. Let sit 12 minutes. Transfer eggs to an ice water bath to cool. For Instant Pot, add 1 cup water and a wire rack. Place eggs on rack, cook on high pressure for 5 minutes, and natural release for 5 minutes. Cool eggs in ice water for 5 minutes. For oven, preheat to 325°F, place eggs in muffin tin cups, bake 30 minutes, then cool in ice water.
- Peel and Cut Eggs: Carefully peel the cooled eggs. Slice each egg lengthwise in half and gently remove the yolks, placing them into a bowl.
- Prepare Filling: To the bowl with yolks, add mayonnaise, pickle relish, and mustard. Mash together with a fork until smooth and creamy. Season with salt and pepper to taste. Adjust consistency and flavor by adding more mayo, mustard, or seasonings if desired.
- Assemble: Spoon or pipe the yolk filling back into each egg white half. Garnish with a sprinkle of paprika or fresh chives just before serving for color and flavor.
- Storage: Store prepared deviled eggs in an airtight container in the refrigerator. Consume within 2-3 days depending on freshness of eggs to ensure safety and quality.
Notes
- Adding baking soda to the boiling water helps the eggs peel more easily by altering the pH of the water.
- You can substitute half the mayonnaise with plain Greek yogurt for a lighter filling.
- Use Dijon mustard for a sharper flavor or yellow mustard for a milder taste.
- Garnish options include paprika, chives, dill, or a small slice of pickle for added freshness.
- Ensure eggs are fully cooled in ice water to prevent overcooking and achieve a smooth yolk texture.
- Deviled eggs are best eaten within a few days; discard if they develop any off smell or appearance.


