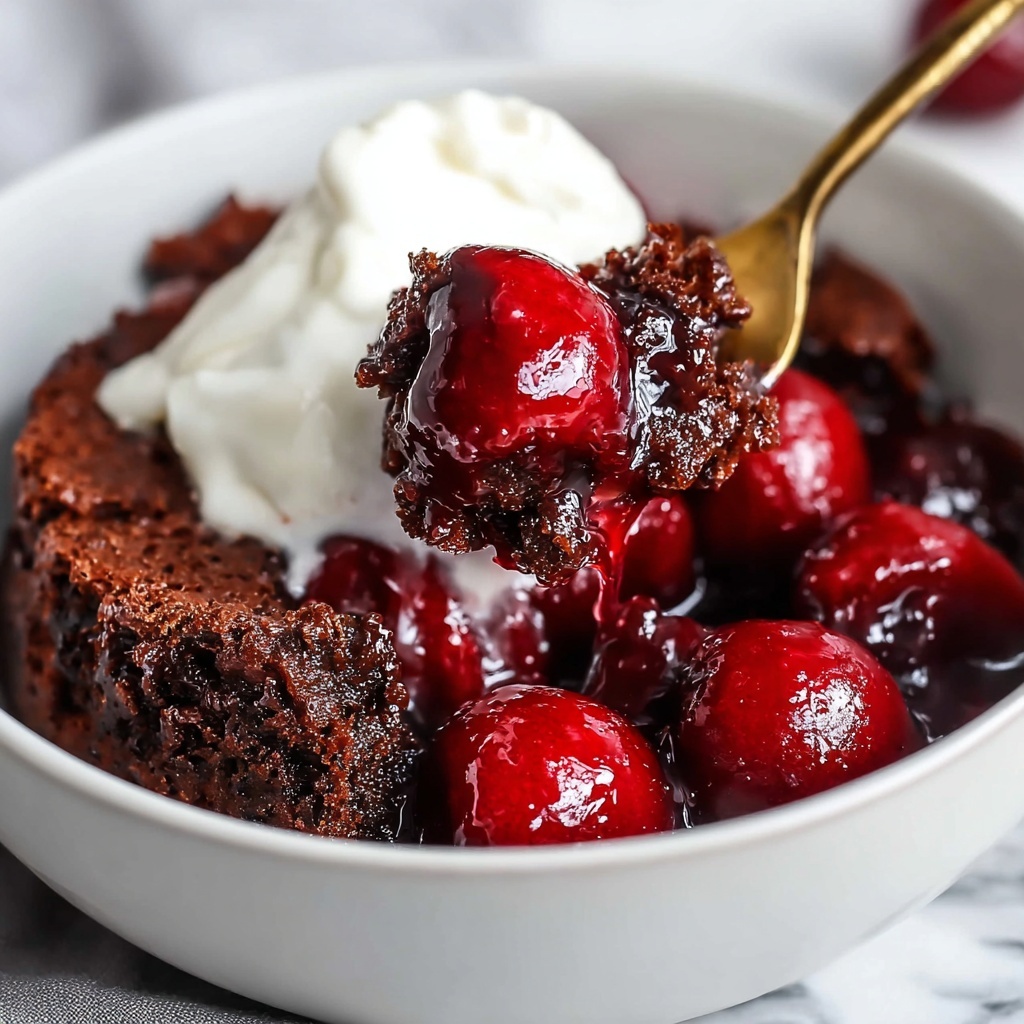
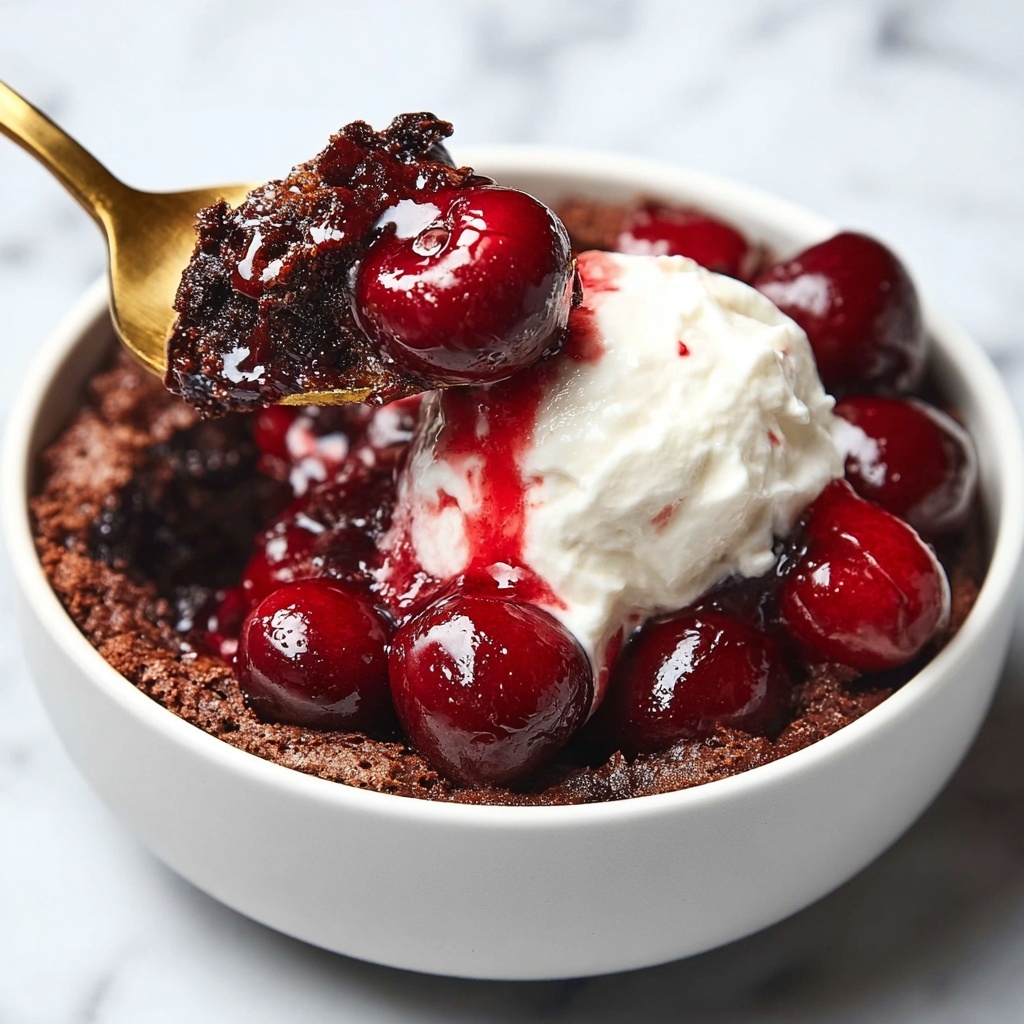
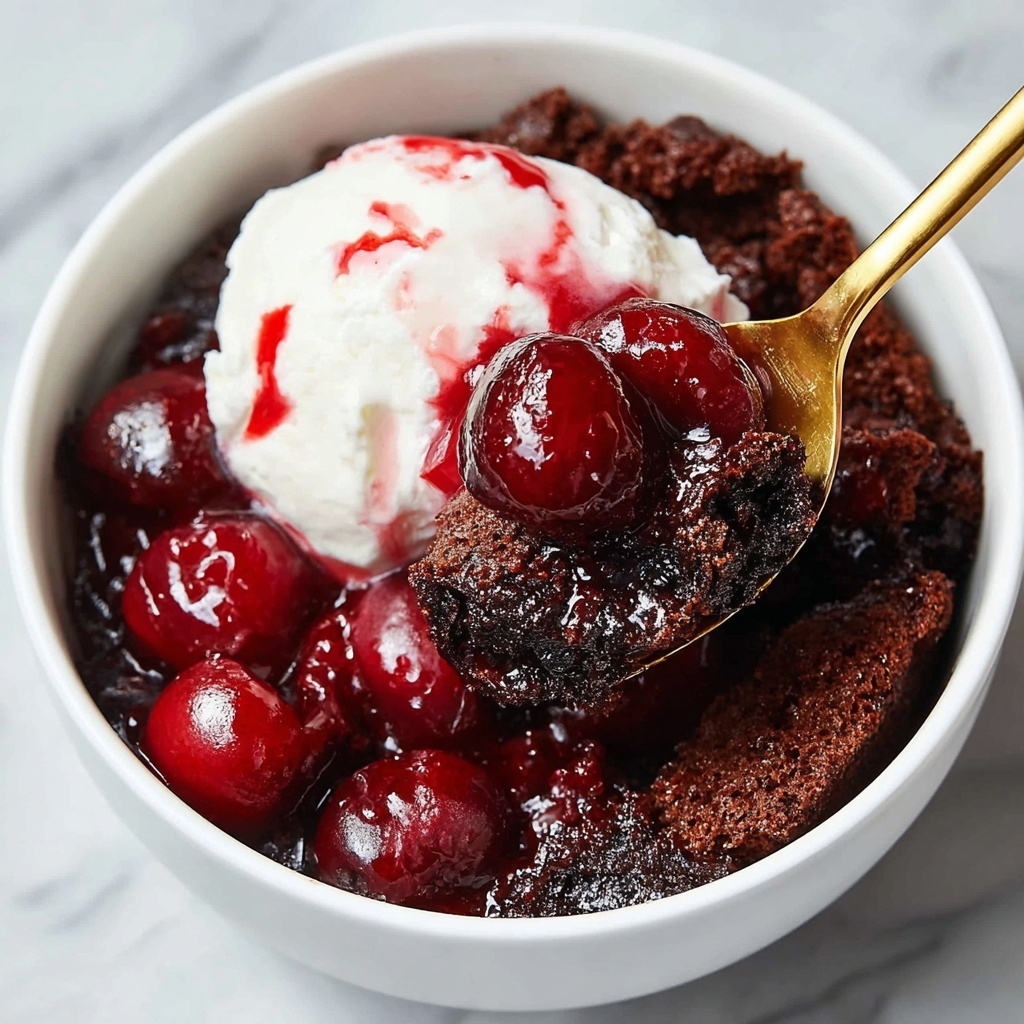
If you’re craving a dessert that’s effortless to throw together yet irresistibly delicious, this Chocolate Cherry Dump Cake Recipe is about to become your new favorite go-to. Imagine bright, juicy cherry filling bubbling under a rich, fudgy devil’s food cake topping, all melted together with luscious butter to create a perfectly textured, warm dessert. It’s like cherry pie met chocolate cake and they decided to throw a party in your oven. Plus, it’s so straightforward to make that even beginners feel confident, yet impressive enough to share at any gathering. Trust me, once you try this Chocolate Cherry Dump Cake Recipe, you’ll keep coming back for more!
Ingredients You’ll Need
What’s amazing about this recipe is how a handful of simple, pantry-friendly ingredients come together to create such a showstopping dessert. Each one plays its own role, giving the cake depth, sweetness, and that perfect gooey texture that keeps you reaching for seconds.
- Cherry Pie Filling: The star fruity component that adds juicy bursts of cherry flavor and vibrant color.
- Devil’s Food Cake Mix: This gives the cake a rich chocolate base with a tender, cakey crumb.
- Butter (melted): Provides moisture and helps the dry cake mix form a luscious crust as it bakes.
- Whipped Topping: Optional but highly recommended for a light, creamy contrast when serving.
- Vanilla Ice Cream: The perfect cooling companion that melts over the warm cake, adding extra indulgence.
How to Make Chocolate Cherry Dump Cake Recipe
Step 1: Preheat Oven and Prepare Pan
Start by heating your oven to 350°F (175°C). While it warms up, grab a 13×9-inch baking dish and generously spray it with cooking spray so the cake won’t stick after baking. Getting this right makes cleanup easier and your serving experience seamless.
Step 2: Layer the Cherry Pie Filling
Pour both cans of cherry pie filling directly into the prepared pan and use a spatula to spread it out evenly. This layer will bubble and caramelize in the oven, infusing the cake with that unmistakable fruity goodness.
Step 3: Sprinkle the Cake Mix
Next, take your devil’s food cake mix and sprinkle it evenly over the cherry layer. Cover the filling completely so every bite has a balanced mix of chocolate cake and cherries.
Step 4: Pour Melted Butter Over the Top
Drizzle the melted butter over the cake mix, trying to cover as much surface area as possible. Don’t worry if some spots are a little drier; the butter will soak in during baking, creating a moist, golden crust that’s simply heavenly.
Step 5: Bake to Perfection
Pop the dish into your preheated oven and bake for 40 to 45 minutes. You’ll know it’s ready when the edges start bubbling with that gorgeous cherry syrup and the top looks set with a slight crust. The smell alone will have you ready to dive in.
Step 6: Cool Before Serving
After pulling your Chocolate Cherry Dump Cake Recipe from the oven, let it cool for about 10 minutes. This helps the flavors meld together and makes it easier to portion. Ready your toppings for the best experience!
How to Serve Chocolate Cherry Dump Cake Recipe
Garnishes
Top your warm dump cake with a generous swirl of whipped topping or a scoop of creamy vanilla ice cream. These add a delightful contrast to the warm, rich layers beneath. If you’re feeling fancy, sprinkle on some chocolate shavings or a sprinkle of toasted nuts for extra texture and flavor.
Side Dishes
This dessert is rich enough to stand on its own but pairs beautifully with fresh fruit, like sliced strawberries or a handful of raspberries, to brighten things up. For an adult twist, drizzle a little bourbon or amaretto over the top right before serving.
Creative Ways to Present
Rather than serving straight from the pan, consider scooping into pretty dessert bowls or mason jars for an inviting, rustic look. You can also layer the components in a trifle dish for a crowd-pleasing presentation, showcasing the vibrant cherry filling beneath the chocolate cake clouds topped with cream.
Make Ahead and Storage
Storing Leftovers
Once cooled, cover the dump cake tightly with plastic wrap or foil and store it in the refrigerator. It will stay fresh for up to 4 days, making it an excellent make-ahead option if you want to get ahead of dessert duties.
Freezing
This Chocolate Cherry Dump Cake Recipe freezes beautifully. Wrap the whole pan securely in plastic wrap and foil, then freeze for up to 2 months. When you’re ready to enjoy, thaw overnight in the fridge and reheat to revive that warm, melty magic.
Reheating
To bring leftovers back to life, warm individual servings in the microwave for about 30 seconds or place the whole dish in a 350°F (175°C) oven until heated through. Add your favorite toppings after reheating to restore the dessert’s irresistible charm.
FAQs
Can I use fresh or frozen cherries instead of canned pie filling?
While fresh or frozen cherries can be used, they may release more juice and require additional thickening like a bit of cornstarch. The canned pie filling is pre-sweetened and thickened, making it the easiest and most reliable choice for this recipe.
Is there a way to make this Chocolate Cherry Dump Cake Recipe gluten-free?
Absolutely! Use a gluten-free devil’s food cake mix and ensure your pie filling is gluten-free as well. The process stays the same, and you won’t sacrifice any of that rich, gooey deliciousness.
Can I substitute the butter with something else?
Butter is key for flavor and creating that crisp top, but you can try melted coconut oil or a dairy-free margarine for a different twist or to accommodate dietary needs. Keep in mind the flavor and texture might vary slightly.
What else can I add to the cake mix for extra flavor?
Feel free to mix in a teaspoon of cinnamon, a splash of vanilla extract in the melted butter, or even a handful of chocolate chips sprinkled over the top before baking to personalize your Chocolate Cherry Dump Cake Recipe.
Is this dessert suitable for a crowd?
Definitely! The 13×9-inch pan size yields about 6 generous servings, but it’s easy to double the recipe in a larger pan, making it a perfect, fuss-free choice for parties and family gatherings.
Final Thoughts
There’s something truly comforting about how simple ingredients come together in this Chocolate Cherry Dump Cake Recipe to create such a rich, inviting dessert. Every time I make it, it brings smiles all around the table. Whether you’re in a pinch or looking to impress with minimal effort, this recipe has your back. Seriously, give it a try and enjoy every warm, chocolatey, cherry-filled bite!
Print
Chocolate Cherry Dump Cake Recipe
- Prep Time: 10 minutes
- Cook Time: 40 minutes
- Total Time: 50 minutes
- Yield: 6 servings
- Category: Dessert
- Method: Baking
- Cuisine: American
Description
This Chocolate Cherry Dump Cake is a simple and delicious dessert perfect for any occasion. Featuring layers of cherry pie filling, devil’s food cake mix, and melted butter baked to a bubbly, rich perfection, it’s easy to make and delightful to eat. Serve warm topped with whipped topping or a scoop of vanilla ice cream for an indulgent treat.
Ingredients
Filling
- 2 cans (21 ounces each) cherry pie filling
Cake Topping
- 1 box devil’s food cake mix
- 3/4 cup butter, melted
Optional Toppings
- Whipped topping
- Vanilla ice cream
Instructions
- Preheat Oven and Prepare Pan: Heat your oven to 350°F (175°C) and spray the bottom of a 13×9-inch baking dish with cooking spray to prevent sticking.
- Layer Cherry Filling: Spread the cherry pie filling evenly over the bottom of the prepared baking dish, ensuring a uniform layer.
- Add Cake Mix: Sprinkle the dry devil’s food cake mix evenly over the cherry pie filling, covering it completely.
- Add Butter: Pour the melted butter evenly over the entire surface of the dry cake mix. Tilt the pan if needed to help cover as much of the top as possible with butter, leaving some dry spots as they will bake through.
- Bake: Place the baking dish in the oven and bake for 40 to 45 minutes, or until the edges are bubbly and the cake topping is set and cooked through.
- Cool and Serve: Allow the cake to cool for about 10 minutes before serving. Enjoy warm, topped with whipped topping or a scoop of vanilla ice cream for added indulgence.
Notes
- Use a glass or metal 13×9-inch baking dish for even cooking.
- Do not stir the layers; the distinct layers bake separately but meld into a delicious texture.
- For a crunchier topping, use cold butter cut into small pieces instead of melted, though melted butter is simpler and effective.
- Leftovers keep well covered in the refrigerator for up to 4 days; reheat before serving.
- You can substitute cherry pie filling with other fruit pie fillings like blueberry or apple for variety.


