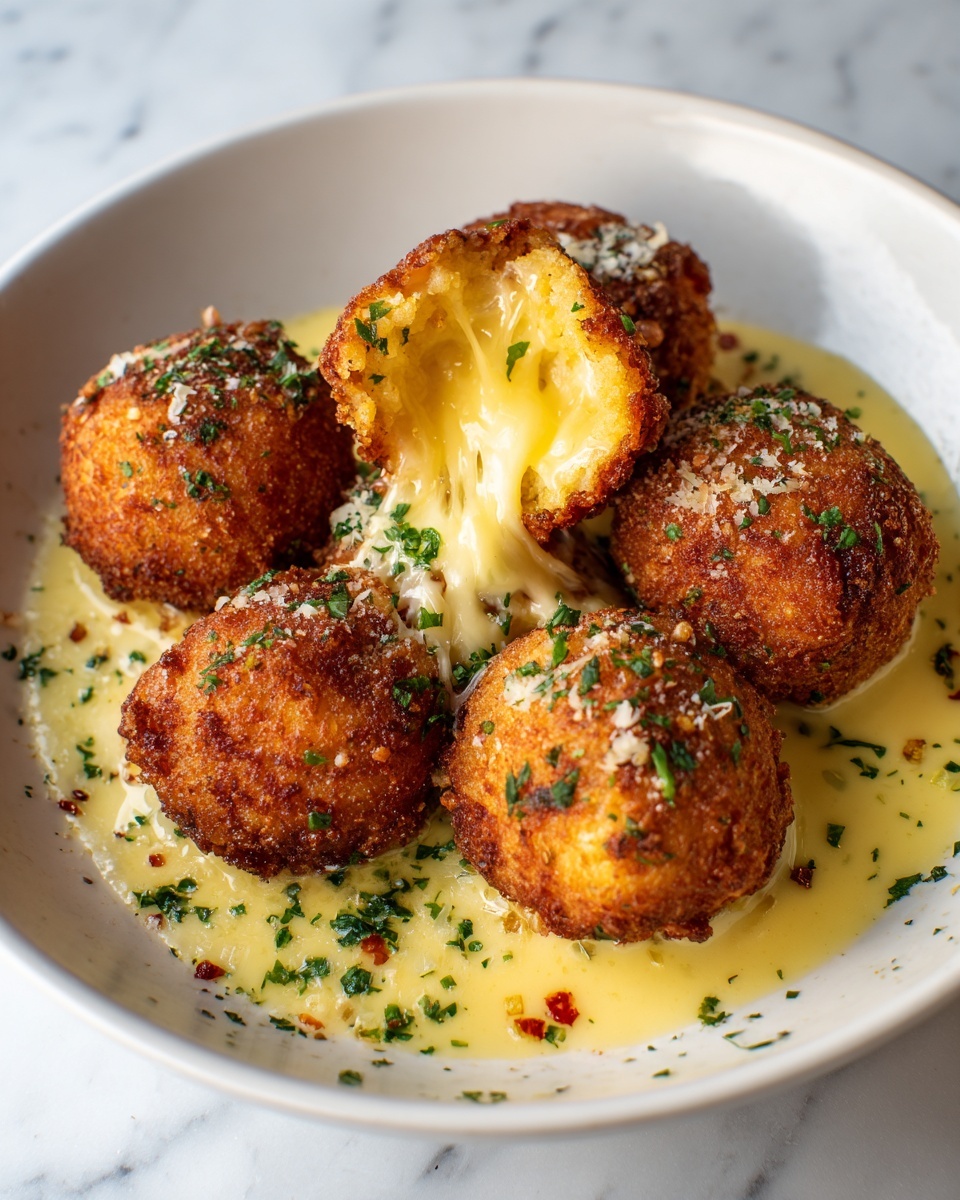
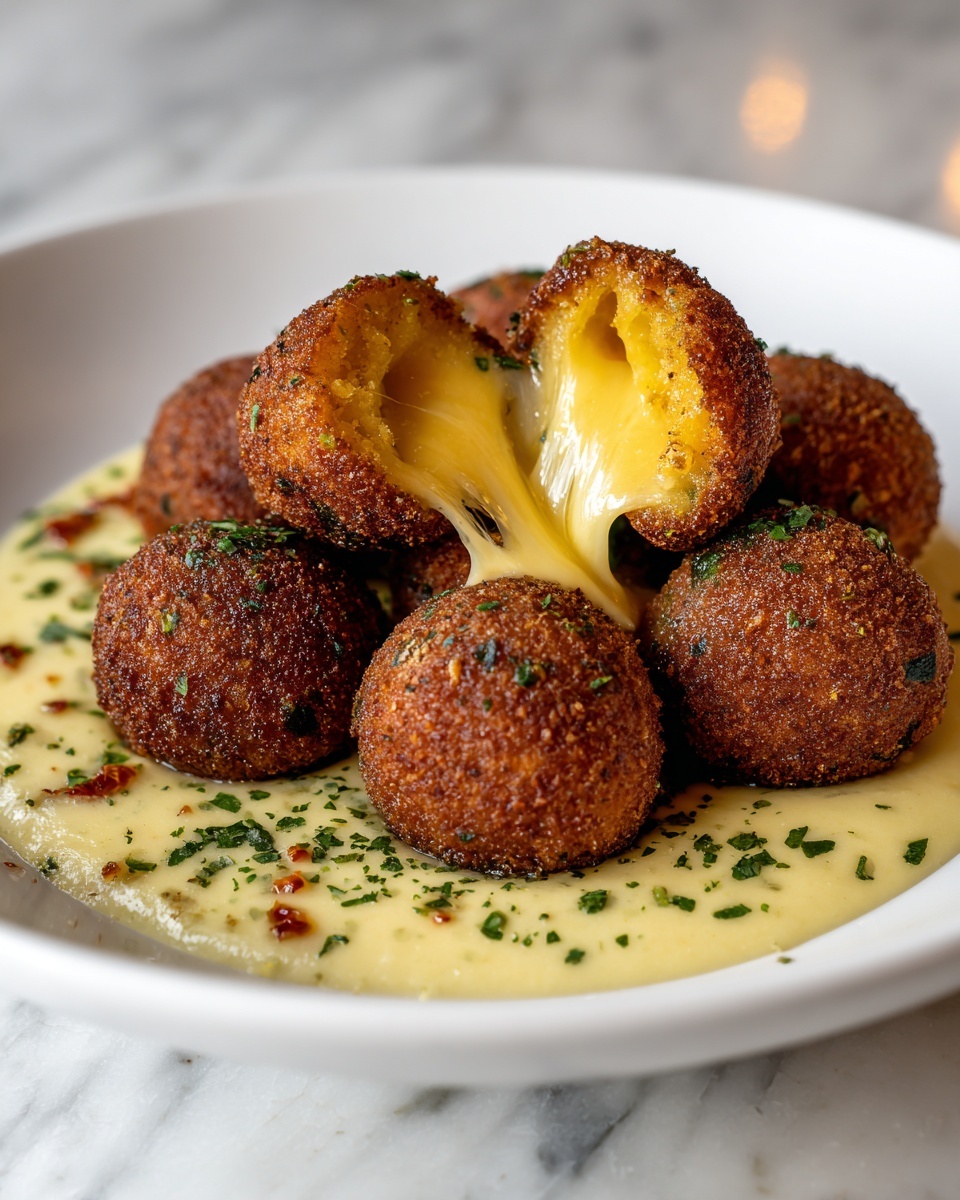
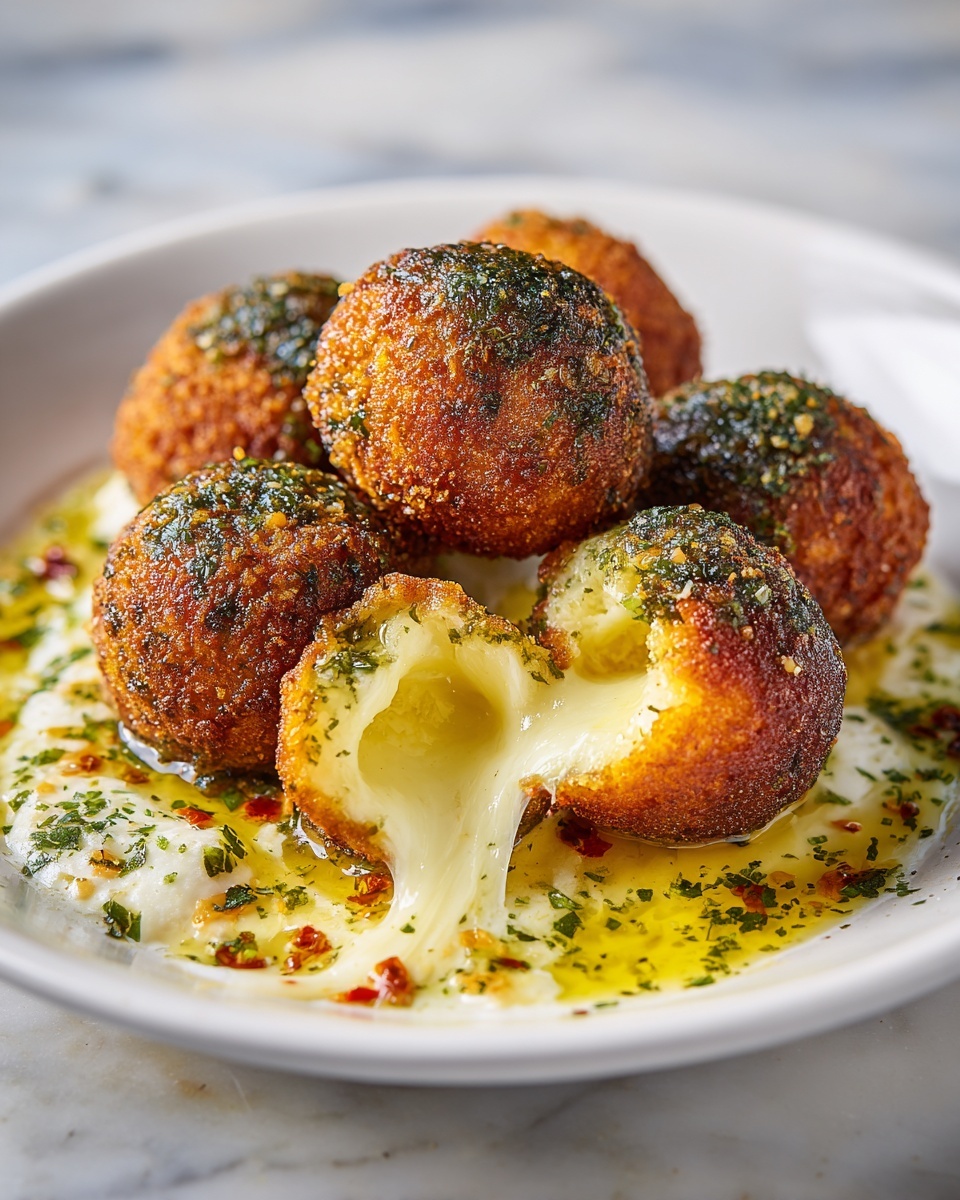
If you’re craving a snack that’s irresistibly crispy on the outside and bursting with cheesy, savory tuna goodness on the inside, the Cheesy Tuna Nuggets Recipe is your new best friend. These nuggets strike the perfect balance between comfort food and quick bites, making them perfect for any occasion, whether it’s a casual get-together or a simple family dinner. Each nugget is packed with tender tuna, sharp cheddar cheese, and just the right amount of seasoning, all wrapped in a crunchy breadcrumb coating that will have you reaching for more. Trust me, once you try this Cheesy Tuna Nuggets Recipe, it’ll quickly become a staple in your recipe arsenal.
Ingredients You’ll Need
This Cheesy Tuna Nuggets Recipe is delightfully straightforward, relying on a handful of ingredients that each play a crucial role in delivering great texture, flavor, and color. From the rich shredded cheddar to the fresh green onions, every component comes together perfectly to create a snack you’ll love.
- Tuna (2 cans, 5 oz each, drained): The star protein that brings a mild flavor and moist texture to the nuggets.
- Shredded cheddar cheese (1 cup): Adds richness and a gooey, melty texture that binds the mixture.
- Breadcrumbs (1/2 cup): Provides the crunchy coating that seals in moisture and delivers satisfying crispiness.
- Mayonnaise (1/4 cup): Gives creaminess and helps hold the nuggets together while adding subtle tang.
- Egg (1, beaten): Acts as a binder to keep the nuggets firm yet tender.
- Chopped green onions (2 tablespoons): Infuses a fresh, vibrant zing and a pop of color.
- Garlic powder (1 teaspoon): Enhances overall flavor with a hint of warm, savory depth.
- Salt and pepper: Essential for seasoning, bringing out all the flavors beautifully.
- Cooking oil for frying: Ensures the nuggets get that perfect golden crust.
How to Make Cheesy Tuna Nuggets Recipe
Step 1: Mix the Main Ingredients
Start by placing drained tuna, shredded cheddar cheese, mayonnaise, chopped green onions, garlic powder, salt, and pepper in a large bowl. Mixing these together well ensures that every nugget will be packed with that delicious cheesy tuna flavor. The mayonnaise adds moisture while the green onions give a lovely fresh touch.
Step 2: Add the Beaten Egg
Next, incorporate the beaten egg into the mixture. This is key to binding everything together so the nuggets hold their shape during frying, making sure no ingredients fall apart or scatter. A well-mixed batter at this stage guarantees perfectly formed nuggets.
Step 3: Form the Nuggets
Using your hands, shape the mixture into small, nugget-sized patties. Aim for uniform sizes so they cook evenly. The size is just right for snacking and dipping, making these nuggets perfect finger-food for any occasion.
Step 4: Coat the Nuggets
Pour breadcrumbs onto a plate and press each nugget gently into them until they are evenly coated. This breadcrumb layer will crisp up beautifully when fried, giving that snack-worthy crunch everyone loves.
Step 5: Heat the Oil
Warm cooking oil in a skillet over medium heat. The temperature is crucial here: too high and the nuggets might burn on the outside before cooking through, too low and they’ll absorb too much oil and become greasy.
Step 6: Fry Until Golden
Fry the nuggets for 3 to 4 minutes on each side, or until they turn a stunning golden brown and develop a crunchy crust. The inside should be tender, cheesy, and bursting with tuna flavor. Once cooked, transfer them to paper towels to drain any excess oil.
Step 7: Serve Warm
Serve your Cheesy Tuna Nuggets warm for the best experience, paired with your favorite dipping sauce to take the flavor to the next level.
How to Serve Cheesy Tuna Nuggets Recipe
Garnishes
Topping your nuggets with a sprinkle of freshly chopped parsley, extra green onions, or even a dash of smoked paprika can add an appealing pop of color and an extra layer of flavor. It’s these small touches that make your Cheesy Tuna Nuggets Recipe feel special and inviting.
Side Dishes
Think classic! Crispy fries, fresh garden salads, or crunchy coleslaw are perfect companions. They add balance to the rich nuggets and keep the meal light and fun. For a more wholesome option, roasted vegetables or steamed green beans pair wonderfully well.
Creative Ways to Present
Why not elevate this snack into a playful appetizer by arranging the nuggets on skewers, alternating them with cherry tomatoes and olives? Or turn them into mini sliders by sandwiching nuggets between small buns with lettuce and a tangy sauce. The Cheesy Tuna Nuggets Recipe lends itself well to creative, crowd-pleasing presentations that will impress friends and family alike.
Make Ahead and Storage
Storing Leftovers
Leftover Cheesy Tuna Nuggets can be kept in an airtight container in the refrigerator for up to 3 days. This makes them a convenient option for quick meals or snacks that don’t require starting from scratch.
Freezing
To freeze, lay the nuggets on a parchment-lined tray and flash freeze for a couple of hours until firm. Then transfer them to a freezer-safe bag or container. They will keep well for up to 1 month, making it easy to enjoy these tasty bites anytime.
Reheating
Reheat frozen or refrigerated nuggets in a preheated oven at 350°F (175°C) for about 10 minutes or until warmed through and crisp. Avoid microwaving if you want to keep them crunchy. This way, your Cheesy Tuna Nuggets Recipe stays just as delightful as when freshly made.
FAQs
Can I use fresh tuna instead of canned?
While fresh tuna could work, canned tuna is preferred for this recipe because it’s more convenient, already cooked, and has the perfect texture to bind with the other ingredients. Using fresh tuna would require cooking first and might change the nugget’s consistency.
Is it possible to bake these instead of frying?
Absolutely! You can bake the nuggets in a preheated oven at 400°F (200°C) on a greased baking sheet for about 15-20 minutes, flipping halfway through. Baking will give you a slightly less crispy crust, but it’s a healthier alternative.
What dipping sauces go well with Cheesy Tuna Nuggets?
They pair wonderfully with classic sauces like tartar, ranch, or spicy mayo. For a tangy twist, try a honey mustard or even a zesty sriracha aioli. These sauces complement the cheesy, savory flavors perfectly.
Can I prepare the mixture ahead of time?
Yes! You can prepare the tuna and cheese mixture up to a day in advance and keep it refrigerated. Just be sure to form and coat the nuggets right before frying to maintain their texture and prevent the breadcrumbs from becoming soggy.
How do I make the nuggets extra crispy?
For extra crispiness, double-coat the nuggets by dipping them in beaten egg and breadcrumbs a second time before frying. Also, make sure your oil is hot enough before frying to prevent the nuggets from soaking up too much oil.
Final Thoughts
This Cheesy Tuna Nuggets Recipe is one of those delightful discoveries that combines ease, flavor, and fun all in one. Whether you’re looking to impress guests, feed the family, or enjoy a cozy snack night, these nuggets never fail to satisfy. Give them a try and watch how quickly they become a beloved favorite in your kitchen!
Print
Cheesy Tuna Nuggets Recipe
- Prep Time: 10 minutes
- Cook Time: 15 minutes
- Total Time: 25 minutes
- Yield: 12 servings
- Category: Appetizer
- Method: Frying
- Cuisine: American
- Diet: Low Salt
Description
Cheesy Tuna Nuggets are a delicious and easy-to-make appetizer or snack featuring tender tuna combined with cheddar cheese, seasoned with garlic and green onions, then coated in crispy breadcrumbs and pan-fried to golden perfection. These flavorful nuggets are perfect for a quick bite or party platter.
Ingredients
Main Ingredients
- 2 cans (5 oz each) tuna, drained
- 1 cup shredded cheddar cheese
- 1/2 cup breadcrumbs
- 1/4 cup mayonnaise
- 1 egg, beaten
- 2 tablespoons chopped green onions
- 1 teaspoon garlic powder
- Salt and pepper to taste
- Cooking oil for frying
Instructions
- Mix ingredients: In a large bowl, combine the drained tuna, shredded cheddar cheese, mayonnaise, chopped green onions, garlic powder, salt, and pepper. Ensure everything is mixed thoroughly to create an even blend.
- Add egg: Add the beaten egg to the mixture and stir well so it binds all the ingredients together, helping the nuggets hold their shape when cooked.
- Form nuggets: Shape the mixture with your hands into small, nugget-sized patties, ensuring they are compact to avoid breaking during cooking.
- Coat nuggets: Press each nugget gently into the breadcrumbs to coat all sides evenly. This coating will crisp up nicely when fried.
- Heat oil: Pour cooking oil into a skillet and heat it over medium heat until shimmering and hot enough to fry.
- Fry nuggets: Carefully place the coated nuggets in the skillet and fry them for 3-4 minutes on each side or until they are golden brown and crispy on the outside.
- Drain and serve: Remove the cooked nuggets and place them on paper towels to drain excess oil. Serve warm with your favorite dipping sauce for a tasty treat.
Notes
- You can use plain or seasoned breadcrumbs depending on your taste preference.
- If you prefer a healthier option, bake the nuggets at 400°F (200°C) for 15-20 minutes, flipping halfway through.
- Make sure the oil is hot enough before frying to avoid soggy nuggets.
- These nuggets pair wonderfully with tartar sauce, ranch, or spicy mayo.
- For extra flavor, add a teaspoon of Dijon mustard or lemon zest to the mixture.

