
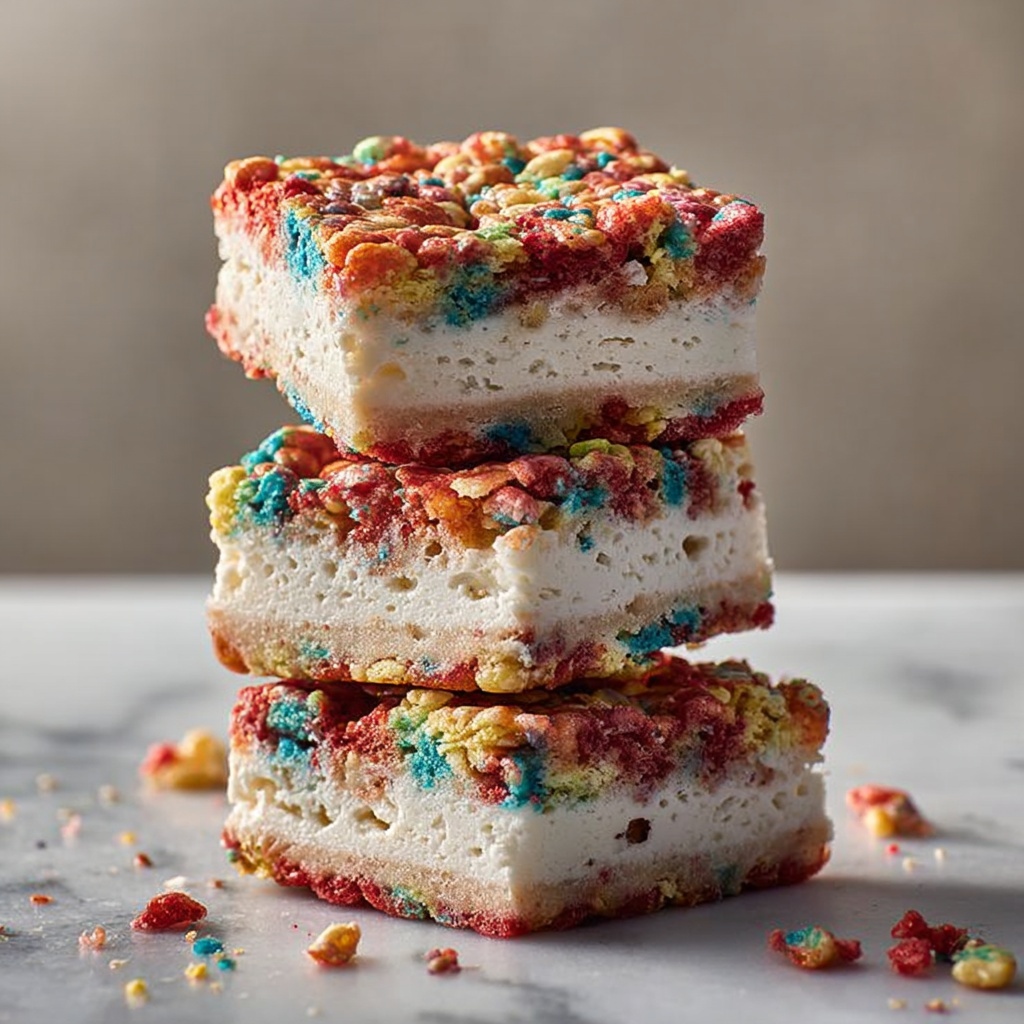
If you are on the hunt for a fun, colorful, and utterly delicious treat that brings childhood nostalgia and grown-up joy together in perfect harmony, this Cereal Ice Cream Sandwiches Recipe is your new best friend. Imagine crunchy, vibrant cereal layered with creamy vanilla ice cream, all sandwiched between two crispy, marshmallow-glazed cereal bars. It’s a dessert that’s no-bake, easy to make, and sure to brighten any day with its whimsical flair and refreshing taste. Whether it’s a summer party or a cozy night in, these ice cream sandwiches promise a delightful snack that’s both playful and satisfying.
Ingredients You’ll Need
Everything you need for this recipe is simple and accessible, yet each ingredient plays a special role in creating the perfect balance of texture, flavor, and color. From the crispy cereal that adds that signature crunch to the rich vanilla ice cream that brings creamy coolness, every component makes this dessert come alive.
- 5 cups colorful cereal: Choose Fruity Pebbles or Froot Loops for a burst of color and fruity flavor that makes each bite fun and lively.
- ¼ cup unsalted butter: This will melt into the marshmallows for a smooth, buttery binding agent that helps everything hold together.
- 1 (10 oz) bag mini marshmallows: They give the cereal mixture its sticky, chewy texture and subtle sweetness.
- 1 teaspoon vanilla extract: Just a hint adds warmth and depth to the marshmallow layer, enhancing the overall flavor.
- 1 ½ quarts vanilla or fruity ice cream: Slightly softened for easy spreading, it’s the creamy center that turns this treat into a refreshing frozen delight.
How to Make Cereal Ice Cream Sandwiches Recipe
Step 1: Prepare the Cereal Base
Start by lining a 9×13-inch baking pan with parchment paper, making sure to leave enough overhang on the sides so you can easily lift the finished sandwich out later. In a saucepan over medium heat, melt the butter until it’s just bubbling. Toss in the mini marshmallows, stirring constantly until the mixture is completely smooth and melted, then remove from heat. Stir in the vanilla extract to warm things up with a lovely aroma and taste.
Step 2: Mix and Press the First Layer
Immediately fold in the colorful cereal until every bit is fully coated with the marshmallow mixture. This sticky, shiny coating is what gives the cereal layers their perfect chewy-crisp texture. Using buttered hands or wax paper to avoid sticking, press half of this mixture firmly and evenly into the bottom of your prepared pan. Pop it into the freezer for about 15 minutes so it can firm up nicely.
Step 3: Add the Ice Cream Layer
Once the cereal base is set, spread your slightly softened ice cream evenly over it. This creamy layer is what makes the sandwich truly special, offering a cool contrast to the crunchy, sweet cereal. Return the pan to the freezer and chill for 30 to 45 minutes, or until the ice cream is firm and ready for the final layer.
Step 4: Top with the Remaining Cereal Mixture
Take the remaining cereal and marshmallow mix and press it gently but firmly on top of the set ice cream layer, creating the classic sandwich shape. Freeze the whole pan for at least 1 hour, ensuring every layer locks in its texture and flavor perfectly.
Step 5: Slice and Serve
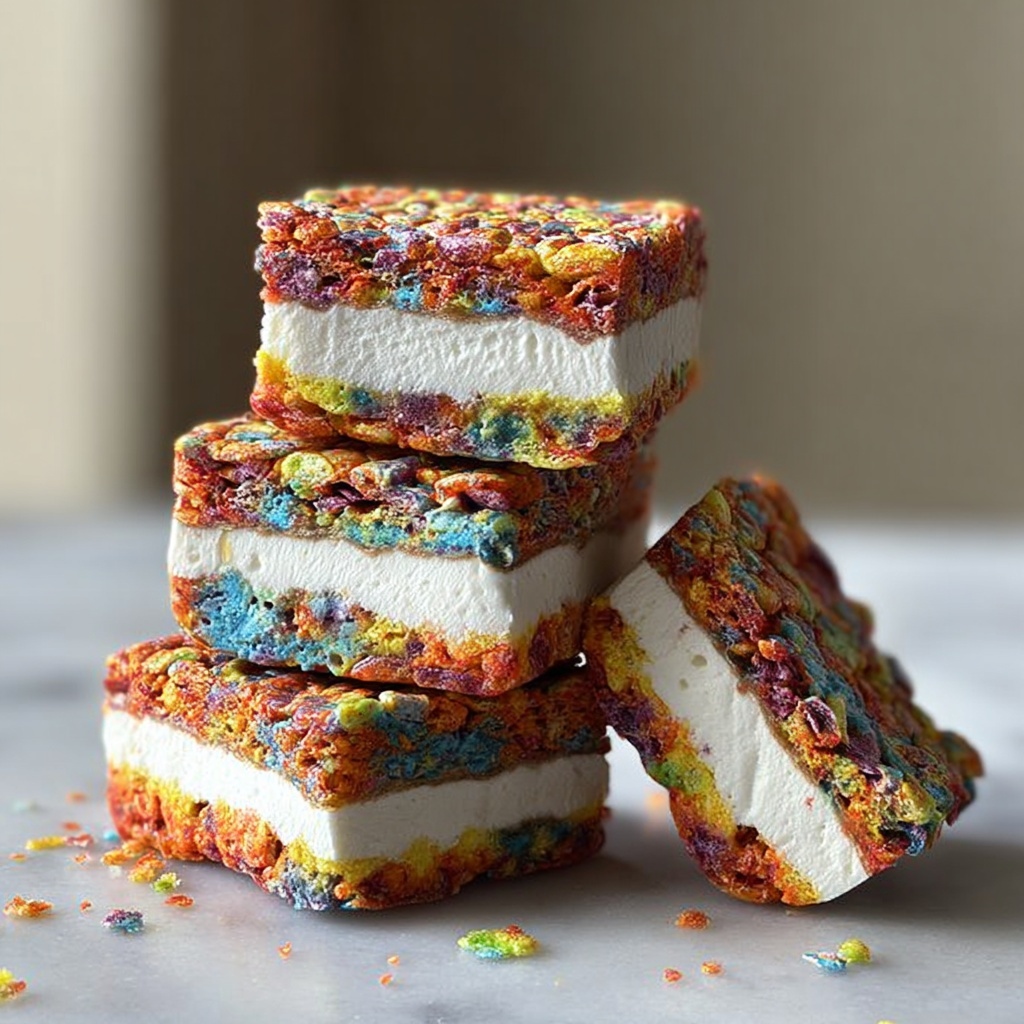
Use the parchment edges to lift the entire block out of the pan. With a sharp knife, cut into square sandwiches. Serve immediately, or wrap each sandwich well in plastic wrap and store them in the freezer until you’re ready for this colorful magic.
How to Serve Cereal Ice Cream Sandwiches Recipe
Garnishes
While these treats are spectacular on their own, adding a drizzle of chocolate syrup, a sprinkle of extra cereal crumbs, or even a few fresh berries can elevate the presentation and add a touch of freshness or decadence. Whipped cream on the side works beautifully if you want a little extra indulgence.
Side Dishes
This recipe shines as a standalone dessert, but if you’re hosting, consider pairing it with light fruit salads or iced tea for a balanced summer spread. The playful textures and flavors contrast wonderfully with simple, fresh sides.
Creative Ways to Present
Try making mini versions using a muffin tin for individual portions, perfect for parties and easy serving. You could also sprinkle edible glitter or colorful sprinkles on top before the final freeze for a fun twist. Serving these on bright plates or with colorful napkins can really bring their cheerful vibe to a party table.
Make Ahead and Storage
Storing Leftovers
Wrap each sandwich tightly in plastic wrap and keep them in an airtight container or freezer bag. Stored properly, they will stay fresh and tasty for up to a week, making it easy to grab a quick, sweet bite whenever the craving strikes.
Freezing
The freezer is your best friend for this recipe. Freeze the assembled sandwiches for at least a few hours before cutting and serving to ensure they hold together well. This also helps maintain the ideal balance between the crunchy cereal and creamy ice cream layers.
Reheating
These sandwiches are meant to be enjoyed frozen, so reheating isn’t recommended. Simply allow them to sit at room temperature for a few minutes before eating if they are too hard coming out of the freezer, and they’ll be perfectly soft without losing texture.
FAQs
Can I use a different type of cereal in this recipe?
Absolutely! The beauty of the Cereal Ice Cream Sandwiches Recipe is its versatility. Try your favorite colorful cereals, whether fruity or chocolatey, to put your own spin on it. Just keep in mind the cereal needs to have a sturdy crunch to hold up in the sandwich.
What type of ice cream works best?
Vanilla ice cream is classic and pairs perfectly with the sweet, colorful cereal layers, but fruity or even sherbet varieties can add a refreshing twist. Make sure the ice cream is slightly softened before spreading for easier assembly.
Is there a way to make these sandwiches dairy-free?
Yes! Swap traditional butter for a plant-based alternative, use dairy-free marshmallows, and select a vegan ice cream option. These substitutions keep the treat just as tasty and inclusive for different dietary needs.
How long do these sandwiches need to freeze before serving?
For the best texture, freeze the layered sandwiches for at least 1 hour after assembly. This ensures each layer is firm and the sandwich holds together well when sliced.
Can I prepare these in advance for a party?
Definitely! These ice cream sandwiches are fantastic make-ahead treats. Prepare and freeze them a day or two before your event, then serve straight from the freezer or after a brief rest at room temperature.
Final Thoughts
If you love treats that are bursting with color, texture, and a fun combination of flavors, the Cereal Ice Cream Sandwiches Recipe is a must-try. It’s such a joyful dessert to make and share, perfect for warm weather or any time you want to brighten your day with something sweet and playful. Trust me, once you’ve made these, they’ll become a beloved staple for your dessert repertoire.
Print
Cereal Ice Cream Sandwiches Recipe
- Prep Time: 15 minutes
- Cook Time: 0 minutes
- Total Time: 1 hour 45 minutes
- Yield: 12 sandwiches
- Category: Dessert
- Method: No-Cook
- Cuisine: American
- Diet: Vegetarian
Description
These Cereal Ice Cream Sandwiches are a delightful no-bake dessert combining colorful, crunchy cereal with creamy vanilla or fruity ice cream. Perfect for summer treats or fun gatherings, they feature a marshmallow-cereal crust that sandwiches a luscious ice cream filling, creating a colorful and delicious frozen dessert.
Ingredients
Marshmallow Cereal Base
- 5 cups colorful cereal (like Fruity Pebbles or Froot Loops)
- ¼ cup unsalted butter
- 1 (10 oz) bag mini marshmallows
- 1 teaspoon vanilla extract
Ice Cream Layer
- 1 ½ quarts vanilla or fruity ice cream (slightly softened)
Instructions
- Prepare the Pan: Line a 9×13-inch baking pan with parchment paper, leaving overhang on the sides to make removal easy.
- Melt Butter and Marshmallows: In a large saucepan, melt the butter over medium heat. Add the mini marshmallows and stir continuously until fully melted and smooth. Remove from heat and stir in vanilla extract.
- Combine with Cereal: Quickly fold in the colorful cereal until all pieces are thoroughly coated with the marshmallow mixture.
- Form Bottom Layer: Using buttered hands or wax paper, press half of the cereal mixture firmly and evenly into the bottom of the prepared pan. Place in the freezer for 15 minutes to firm up.
- Add Ice Cream Layer: Spread the slightly softened ice cream evenly over the chilled cereal layer. Freeze again for 30 to 45 minutes, until the ice cream is firm.
- Add Top Layer: Press the remaining cereal mixture on top of the ice cream layer, forming the top sandwich layer. Freeze for at least 1 hour or until fully set.
- Serve: Lift the assembled dessert from the pan using the parchment paper overhang. Cut into squares and serve immediately or wrap individually in plastic wrap and store in the freezer for later enjoyment.
Notes
- Use your favorite cereal to create various fun flavor combinations and colors.
- For mini-sized sandwiches, use a muffin tin to create portion-controlled treats.


