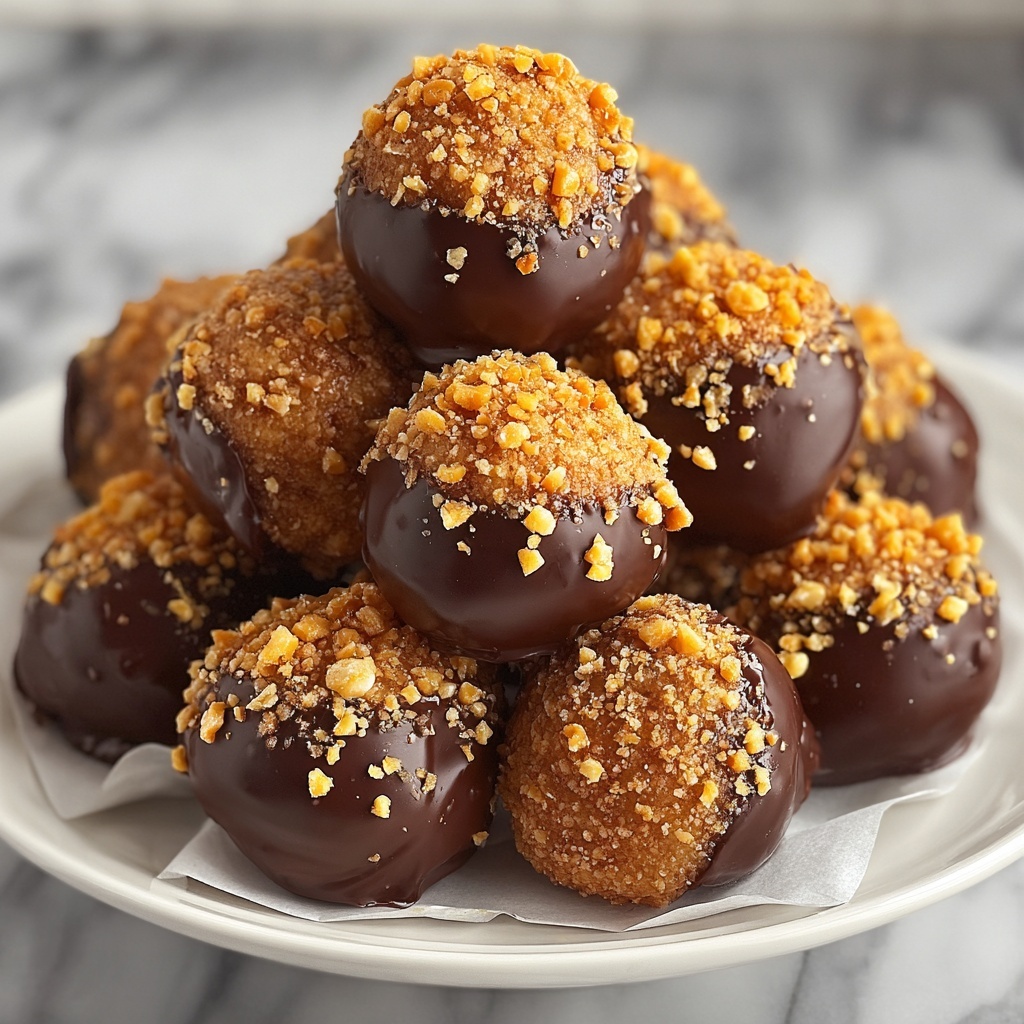
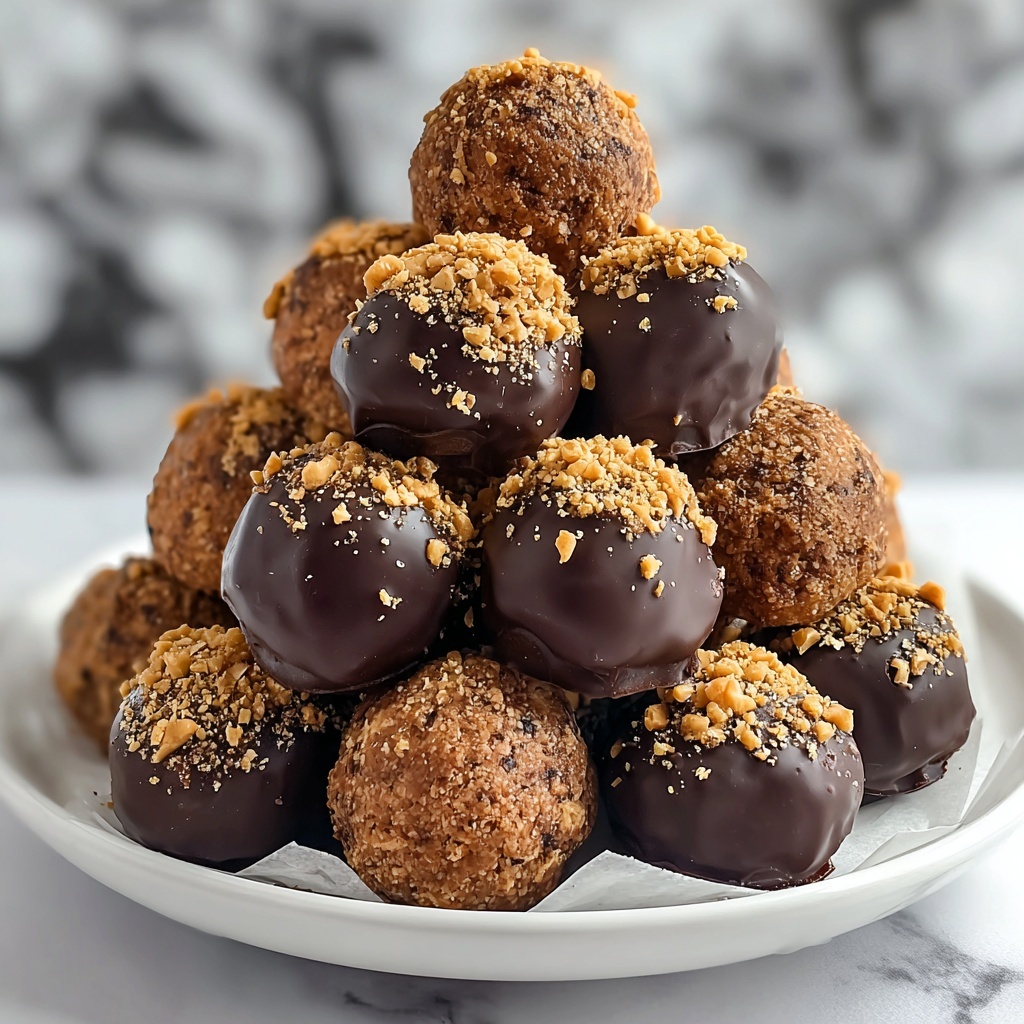
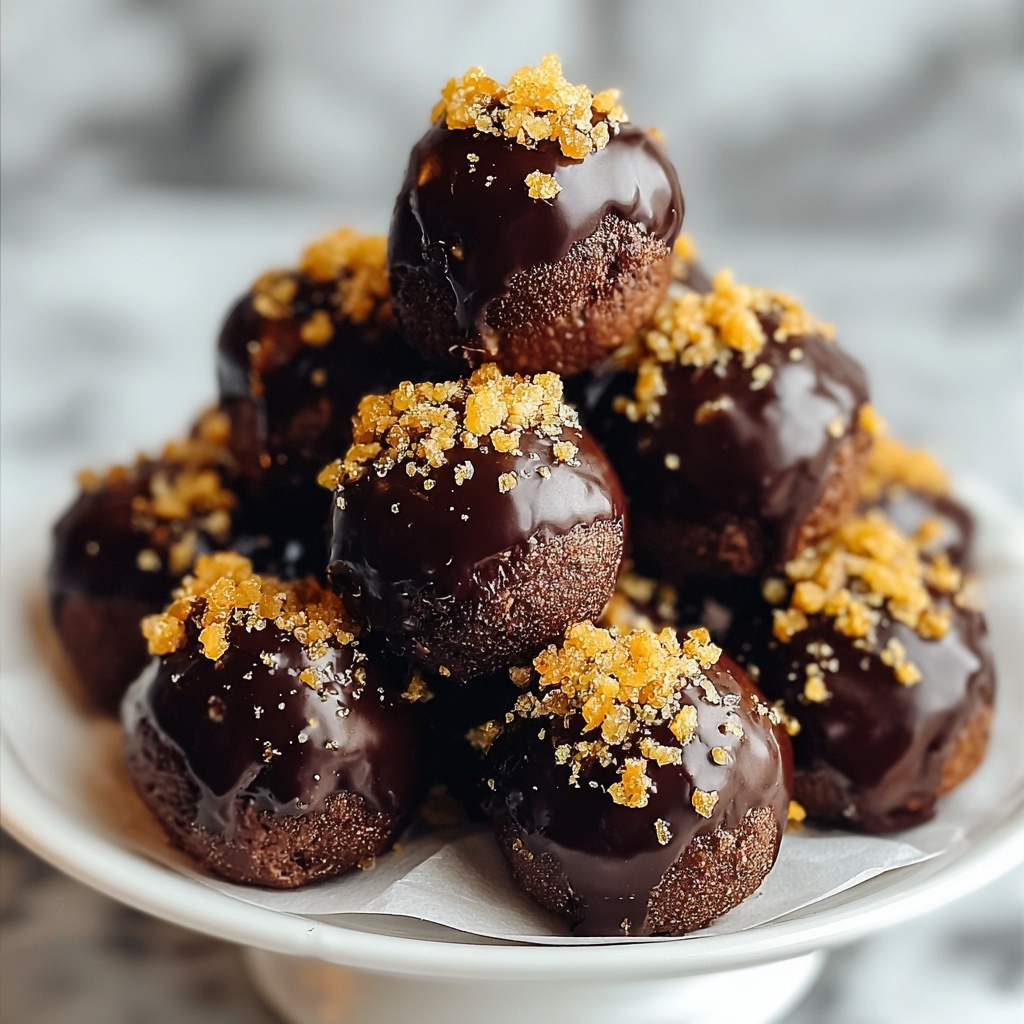
If you have a sweet tooth and adore the irresistible crunch of Butterfinger candy bars combined with creamy, dreamy peanut butter, then this Butterfinger Balls Recipe is about to become your new best friend in the kitchen. These delightful treats are a perfect balance of rich, smooth, and crunchy textures wrapped into bite-sized balls that are easy to make and even easier to enjoy. Whether you’re looking for a quick homemade dessert to impress guests or a tasty snack to satisfy chocolate cravings, these Butterfinger Balls deliver pure joy with every single bite.
Ingredients You’ll Need
Getting the ingredients together for this Butterfinger Balls Recipe is wonderfully straightforward. Each element plays a crucial role, from the creamy peanut butter that gives the mixture its luscious texture to the crushed Butterfinger bars that add that signature crisp bite and unforgettable flavor.
- 1 cup creamy peanut butter: Choose a smooth, creamy variety for the best texture and flavor integration.
- 1/4 cup unsalted butter, softened: Softened butter helps to bind the mixture and bring richness.
- 2 cups powdered sugar: This sweetens and thickens the base to the perfect consistency for rolling.
- 1 teaspoon vanilla extract: Adds a warm, fragrant undertone that complements the peanut butter and chocolate.
- Pinch of salt: Just a touch enhances the overall flavor and balances sweetness.
- 6 Butterfinger candy bars, finely crushed: The star ingredient that brings that iconic crunchy, peanut buttery crunch.
- 12 ounces semisweet or milk chocolate, chopped (optional, for dipping): Melting this is optional but highly recommended for an extra layer of chocolate bliss.
How to Make Butterfinger Balls Recipe
Step 1: Prepare the Peanut Butter Mixture
Begin by combining the creamy peanut butter, softened butter, powdered sugar, vanilla extract, and a pinch of salt in a mixing bowl. You can use an electric mixer for ease or stir vigorously by hand. The goal is to achieve a smooth and fully incorporated mixture that is thick enough to hold its shape when rolled.
Step 2: Incorporate the Butterfinger Bars
Next, gently fold in the finely crushed Butterfinger candy bars. Doing this carefully ensures the candy bits are evenly spread throughout the mixture, giving you that perfect crunch in every bite without breaking down too much of the candy’s texture.
Step 3: Form the Balls
Line a baking sheet with parchment or wax paper to prevent sticking. Use a tablespoon or similar scoop to portion out the mixture, then roll each portion between your palms to form neat little balls. Placing them evenly spaced on the sheet helps them chill properly and firm up evenly.
Step 4: Dip in Chocolate (Optional)
If you want to add a luscious chocolate coating, melt your chopped semisweet or milk chocolate over low heat or in a microwave-safe bowl in 30-second intervals, stirring often. Dip each Butterfinger ball into the melted chocolate, use a fork or dipping tool to ensure even coverage, then tap off any excess chocolate before placing the balls back onto the parchment-lined sheet.
Step 5: Chill and Set
Refrigerate the Butterfinger Balls for about 30 minutes to allow the chocolate to set and the balls to firm up. Chilling is key because it helps the flavors meld beautifully and makes handling easier when you serve.
Step 6: Serve and Store
Once set, your Butterfinger Balls are ready to enjoy! For the best taste and freshness, store them in an airtight container in the refrigerator, where they will keep beautifully for up to one week.
How to Serve Butterfinger Balls Recipe
Garnishes
To elevate your Butterfinger Balls recipe, consider sprinkling a tiny pinch of crushed candy bar on top or even a dusting of cocoa powder before the chocolate sets. You could also drizzle some white chocolate for a fun, contrasting look that makes them even more irresistible.
Side Dishes
These bites pair wonderfully with a scoop of vanilla ice cream or alongside a hot cup of coffee or milk for a simple yet decadent treat. They can also be offered on a dessert platter with fresh berries or nuts for added texture and a splash of color.
Creative Ways to Present
For parties or gift giving, arrange these Butterfinger Balls in decorative paper cups or stack them in a clear jar tied with a ribbon. You can also arrange them on a tiered dessert tray for an eye-catching display that guests will rave about.
Make Ahead and Storage
Storing Leftovers
Leftover Butterfinger Balls store exceptionally well in an airtight container in the refrigerator. They’ll stay fresh and maintain their delightful texture for up to a week, so you can enjoy a little sweet indulgence anytime.
Freezing
If you want to keep these treats longer or prepare in advance for a special occasion, freeze them in a single layer on a baking sheet first. Once frozen, transfer to a freezer-safe container or bag. They’ll keep for up to three months and can be thawed in the fridge when ready to enjoy.
Reheating
Since Butterfinger Balls are best served chilled or at room temperature, reheating is generally not recommended, especially if dipped in chocolate. If you prefer them softer, simply let them sit at room temperature for 10-15 minutes before serving.
FAQs
Can I use chunky peanut butter instead of creamy in the Butterfinger Balls Recipe?
You could, but creamy peanut butter is preferred here because it blends smoothly with the other ingredients and provides a consistent texture without overpowering the candy crunch.
Is it necessary to dip the Butterfinger Balls in chocolate?
Dipping is optional, but it adds a delicious chocolate shell that complements the sweet and crunchy interior perfectly, making the treat even more special.
How long do Butterfinger Balls last once made?
Stored in an airtight container in the refrigerator, they last up to one week. Freezing can extend their life to about three months.
Can I substitute the Butterfinger bars with another candy?
Feel free to experiment! However, Butterfinger bars have a unique crispy peanut butter center that defines this recipe, so substitutions might change the overall texture and flavor.
Are Butterfinger Balls gluten-free?
Butterfinger candy bars themselves contain no gluten ingredients, but always check packaging to be certain. This recipe uses gluten-free staples, but double-check each ingredient if you have gluten sensitivities.
Final Thoughts
There’s nothing quite like the joy of homemade sweets, and this Butterfinger Balls Recipe is a true gem that’s quick, fun, and absolutely addictive. Whether you’re making them for a family gathering, a special treat, or just because, these little bites of buttery, crunchy happiness are bound to brighten your day and your taste buds. Give it a try and watch how fast they disappear!
Print
Butterfinger Balls Recipe
- Prep Time: 15 minutes
- Cook Time: 0 minutes
- Total Time: 15 minutes plus 30 minutes chilling
- Yield: 20 servings
- Category: No Bake Desserts
- Method: No-Cook
- Cuisine: American
Description
Butterfinger Balls are a delicious no-bake treat combining creamy peanut butter, crushed Butterfinger candy bars, and optional chocolate coating. Perfect for a quick and easy dessert, these bite-sized sweets offer a satisfying crunch with a rich, peanut buttery flavor.
Ingredients
Butterfinger Balls Mixture
- 1 cup creamy peanut butter
- 1/4 cup unsalted butter, softened
- 2 cups powdered sugar
- 1 teaspoon vanilla extract
- Pinch of salt
- 6 Butterfinger candy bars, finely crushed
Chocolate Coating (Optional)
- 12 ounces semisweet or milk chocolate, chopped
Instructions
- Prepare the Peanut Butter Mixture: In a mixing bowl, combine the creamy peanut butter, softened butter, powdered sugar, vanilla extract, and a pinch of salt. Mix thoroughly until the mixture is smooth and fully incorporated, using an electric mixer or mixing by hand.
- Incorporate the Butterfinger Bars: Gently fold in the finely crushed Butterfinger candy bars, ensuring the candy is evenly distributed throughout the peanut butter mixture.
- Form the Balls: Line a baking sheet with parchment or wax paper. Using a tablespoon, scoop portions of the peanut butter mixture and roll them into balls. Place each ball onto the prepared baking sheet.
- Dip in Chocolate (Optional): Melt the semisweet or milk chocolate in a small saucepan over low heat while stirring continuously, or melt in the microwave using short intervals, stirring in between. Dip each peanut butter ball into the melted chocolate using a fork or dipping tool to coat evenly. Tap off any excess chocolate and return the balls to the baking sheet.
- Chill and Set: Refrigerate the Butterfinger Balls for approximately 30 minutes or until the chocolate coating has fully set and the balls have firmed up.
- Serve and Store: Once the chocolate is set, transfer the Butterfinger Balls to an airtight container and store in the refrigerator for up to one week.
Notes
- For easier rolling, slightly chill the mixture before shaping it into balls.
- Chocolate coating is optional; you can skip it for a peanut butter and Butterfinger-only treat.
- Make sure the Butterfinger bars are finely crushed to ensure an even texture in the balls.
- Store the balls in an airtight container in the refrigerator to maintain freshness.
- These treats can also be frozen for longer storage; thaw briefly before serving.
