
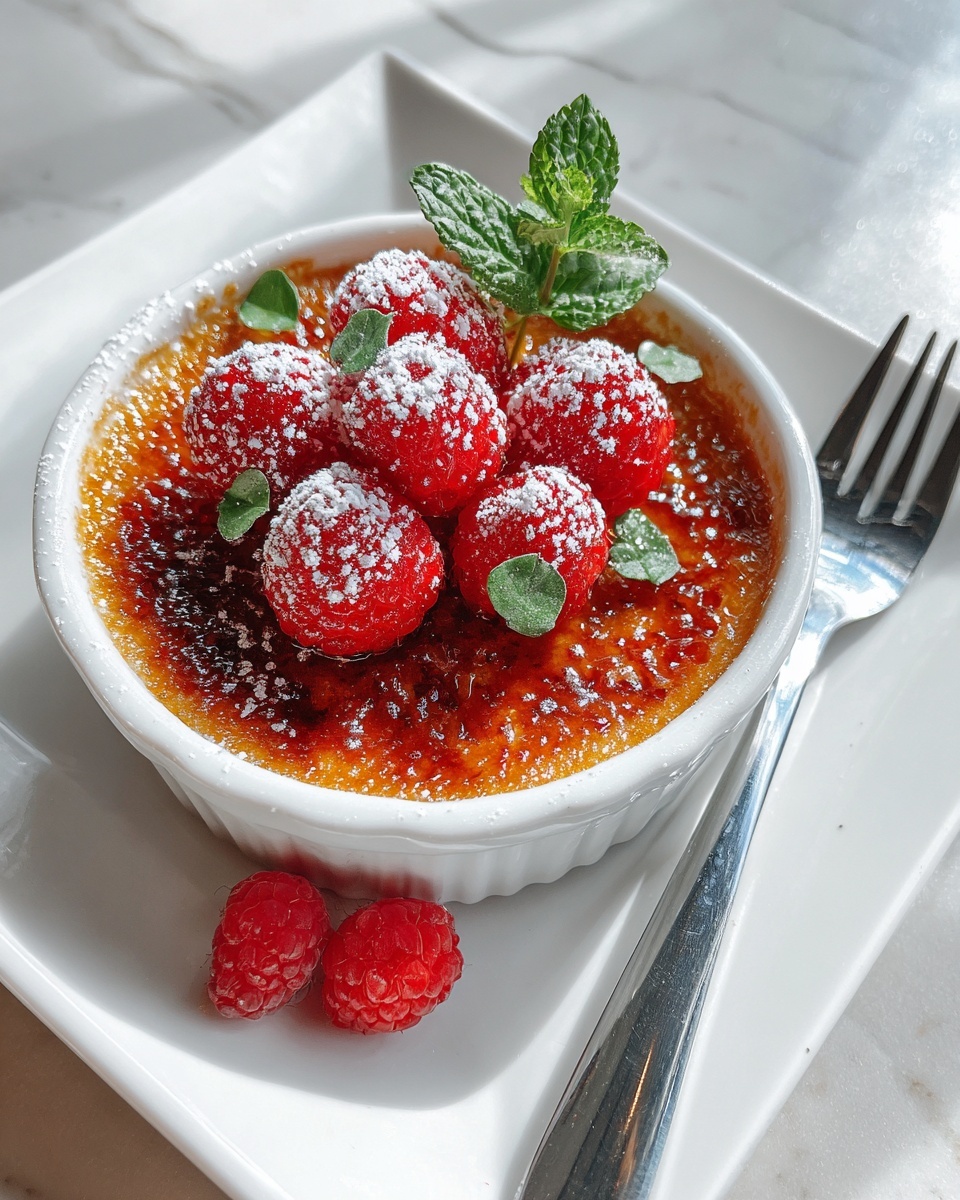
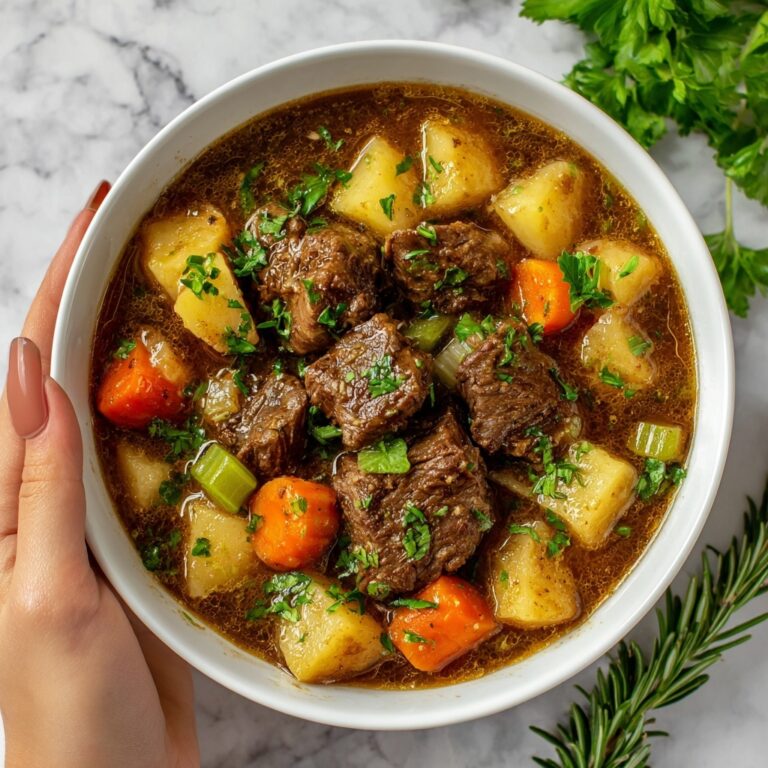
If you’re on the hunt for a dessert that feels indulgent but isn’t weighed down by heavy cream or long baking times, you absolutely must try this Berry Brûlée Recipe. It’s a delightful marriage of fresh, juicy berries nestled under a smooth vanilla Greek yogurt or custard base, all crowned by a crunchy, caramelized sugar crust that adds a perfect touch of sweetness and texture. This dessert perfectly balances brightness with creamy richness, making it an effortless showstopper for any occasion or a quick treat to brighten your weeknight meals.
Ingredients You’ll Need
The beauty of this Berry Brûlée Recipe lies in its simplicity and the care put into each ingredient. Every component plays a vital role in layering flavors and textures that make this dessert sing. From the vibrant berries to the silky base and crispy brûlée topping, these ingredients are both easy to find and essential for that authentic experience.
- Mixed fresh berries: A vibrant medley like strawberries, blueberries, raspberries, and blackberries provides juicy bursts of natural sweetness and color.
- Vanilla Greek yogurt or pastry cream: Adds a creamy, tangy base that contrasts beautifully with the fresh fruit and crisp topping.
- Granulated sugar (for brûlée topping): Creates the iconic crackling caramelized layer that gives each bite a delightful crunch.
- Fresh mint (optional, for garnish): Offers a fresh herbal note that brightens the presentation and flavor.
How to Make Berry Brûlée Recipe
Step 1: Prepare the fresh berries
Begin by washing and gently drying your mixed fresh berries to ensure they’re clean and ready to shine. Then, divide them evenly among four small ramekins or shallow dessert bowls. This base of fruit delivers sweet and tangy bursts in every bite, forming the heart of the dessert.
Step 2: Add the creamy layer
Next, spoon about ¼ cup of vanilla Greek yogurt or pastry cream evenly over the berries in each ramekin. Smooth out the surface with the back of a spoon to prepare for the brûlée topping. This creamy layer balances the natural freshness of the berries with subtle richness.
Step 3: Sprinkle the sugar topping
Sprinkle one teaspoon of granulated sugar evenly over the surface of each dish. The sugar is what will achieve that signature brûlée crust after caramelization, so even coverage is essential for the perfect crackle.
Step 4: Caramelize the sugar crust
Use a kitchen torch to carefully melt the sugar until it bubbles and turns a gorgeous golden brown, forming a crisp, caramelized crust. Take your time to avoid burning and enjoy watching the transformation—it’s honestly so satisfying! If you don’t have a torch, placing the ramekins under a broiler for 1–2 minutes works well, just keep a close eye on them to prevent burning.
Step 5: Cool and serve
Let the brûlée topping cool for 1 to 2 minutes so it can harden into that perfect crunchy shell. If you like, garnish with fresh mint leaves for a lovely pop of green and an aromatic touch, then serve immediately while the contrast of textures is at its best.
How to Serve Berry Brûlée Recipe

Garnishes
Fresh mint is the classic garnish here, adding a subtle herbal brightness that complements the berries. For an extra special touch, consider a dusting of powdered sugar or a few edible flowers to elevate the presentation when entertaining guests.
Side Dishes
This dessert stands beautifully on its own but pairs wonderfully with a light biscuit or a crisp cookie like a shortbread or biscotti. If you’re serving a full meal, a simple, mild cheese plate beforehand or a refreshing sparkling wine can round out the experience perfectly.
Creative Ways to Present
Try layering the berries and yogurt in clear glass jars or small parfait cups for a casual, rustic look. For a party, serve the Berry Brûlée Recipe in mini mason jars adorned with colorful ribbons. You can even sprinkle a pinch of crushed nuts, like pistachios, on top of the brûlée crust for an unexpected crunch and nutty flavor.
Make Ahead and Storage
Storing Leftovers
If you have any leftovers, cover each ramekin tightly with plastic wrap and store them in the refrigerator. The brûlée crust will soften over time, so it’s best to enjoy within 24 hours for optimal texture and flavor.
Freezing
This Berry Brûlée Recipe is best served fresh and isn’t ideal for freezing because the texture of both the berries and the brûlée topping can suffer. The custard or yogurt base may separate upon thawing, so it’s recommended to skip freezing if you want that perfect balance.
Reheating
Since this dessert is served chilled with a crisp topping, reheating isn’t necessary or recommended. Instead, prepare the brûlée topping fresh before serving to maintain that signature crunch and the contrast between cool cream and warm caramelized sugar.
FAQs
Can I use other fruits besides berries in this Berry Brûlée Recipe?
Absolutely! While berries bring bright flavor and texture, stone fruits like peaches or plums, or even tropical fruits like mango, can be delicious alternatives. Just keep in mind their moisture content, as juicier fruits might affect the custard layer.
What if I don’t have a kitchen torch?
No worries! You can achieve the brûlée crust under a broiler. Place the ramekins on a baking sheet and broil for 1–2 minutes, watching carefully so the sugar caramelizes without burning. It’s a handy trick many home cooks use successfully.
Can I make this recipe vegan?
Definitely! Swap the Greek yogurt or pastry cream for a plant-based alternative, such as coconut yogurt or a vegan custard. The brûlée topping remains the same. Just choose your favorite berry mix for a fresh and vibrant dessert all around.
How many servings does this Berry Brûlée Recipe make?
This recipe yields four individual servings, perfect for small gatherings or family desserts. You can easily scale it up to serve more by adjusting the ingredients accordingly.
Is this dessert gluten-free?
Yes! The Berry Brûlée Recipe as described contains no gluten. Just be sure any additional garnishes or side dishes you serve alongside are gluten-free, too.
Final Thoughts
There’s something truly special about a dessert that feels fancy but is incredibly simple to prepare, and this Berry Brûlée Recipe hits that sweet spot perfectly. Whether you’re impressing guests or treating yourself after a long day, this dessert’s fresh fruit brightness combined with creamy smoothness and crisp brûlée topping is sure to delight. Give it a try and see how quickly it becomes your go-to for an elegant, effortless sweet treat.
Print
Berry Brûlée Recipe
- Prep Time: 10 minutes
- Cook Time: 2 minutes
- Total Time: 12 minutes
- Yield: 4 servings
- Category: Dessert
- Method: Torching
- Cuisine: French-Inspired
- Diet: Vegetarian,Gluten Free
Description
Berry Brûlée is a simple yet elegant dessert that combines juicy fresh berries with a creamy custard or yogurt base, finished with a caramelized sugar crust. It offers a sweet crunchy top layer paired with fresh, fruity brightness underneath, making it a lighter take on the classic crème brûlée perfect for entertaining or a quick weeknight treat.
Ingredients
For the Berry Base
- 2 cups mixed fresh berries (such as strawberries, blueberries, raspberries, blackberries)
For the Cream Layer
- 1 cup vanilla Greek yogurt or pastry cream
For the Brûlée Topping
- 4 teaspoons granulated sugar (for brûlée topping)
For Garnish (Optional)
- Fresh mint leaves
Instructions
- Prepare the berry base: Divide the mixed fresh berries evenly between 4 small ramekins or shallow dessert bowls, ensuring each serving has a balanced portion of the variety of berries.
- Add the cream layer: Spoon about ¼ cup of vanilla Greek yogurt or pastry cream over the berries in each ramekin, smoothing the top with the back of the spoon for an even, creamy surface.
- Sprinkle sugar: Evenly sprinkle 1 teaspoon of granulated sugar over the surface of the cream layer in each ramekin. This sugar will form the caramelized crust.
- Caramelize the sugar: Using a kitchen torch, carefully melt the sugar until it bubbles and forms a golden, crisp caramel crust. If you do not have a torch, place the ramekins under a broiler for 1–2 minutes, watching closely to prevent burning.
- Cool and serve: Let the caramel crust cool and harden for 1–2 minutes before garnishing with fresh mint leaves if desired. Serve immediately for the best texture contrast and flavor.
Notes
- If you don’t have a kitchen torch, you can caramelize the sugar under a broiler for 1–2 minutes—watch closely to avoid burning.
- Swap the Greek yogurt for mascarpone, whipped ricotta, or a light custard to vary the flavor and texture of the creamy base.
- This dessert is best served immediately after caramelizing as the sugar crust softens over time.


