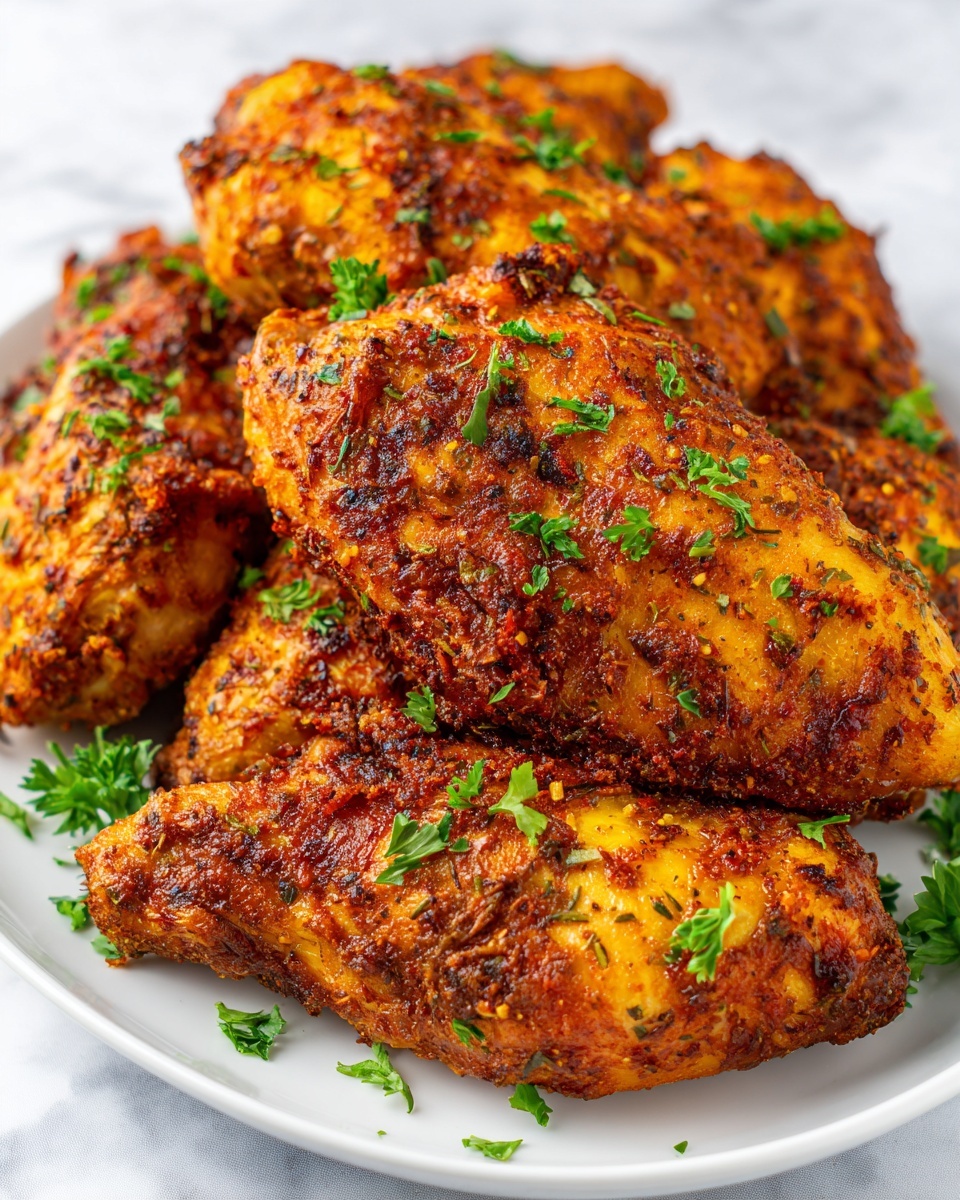
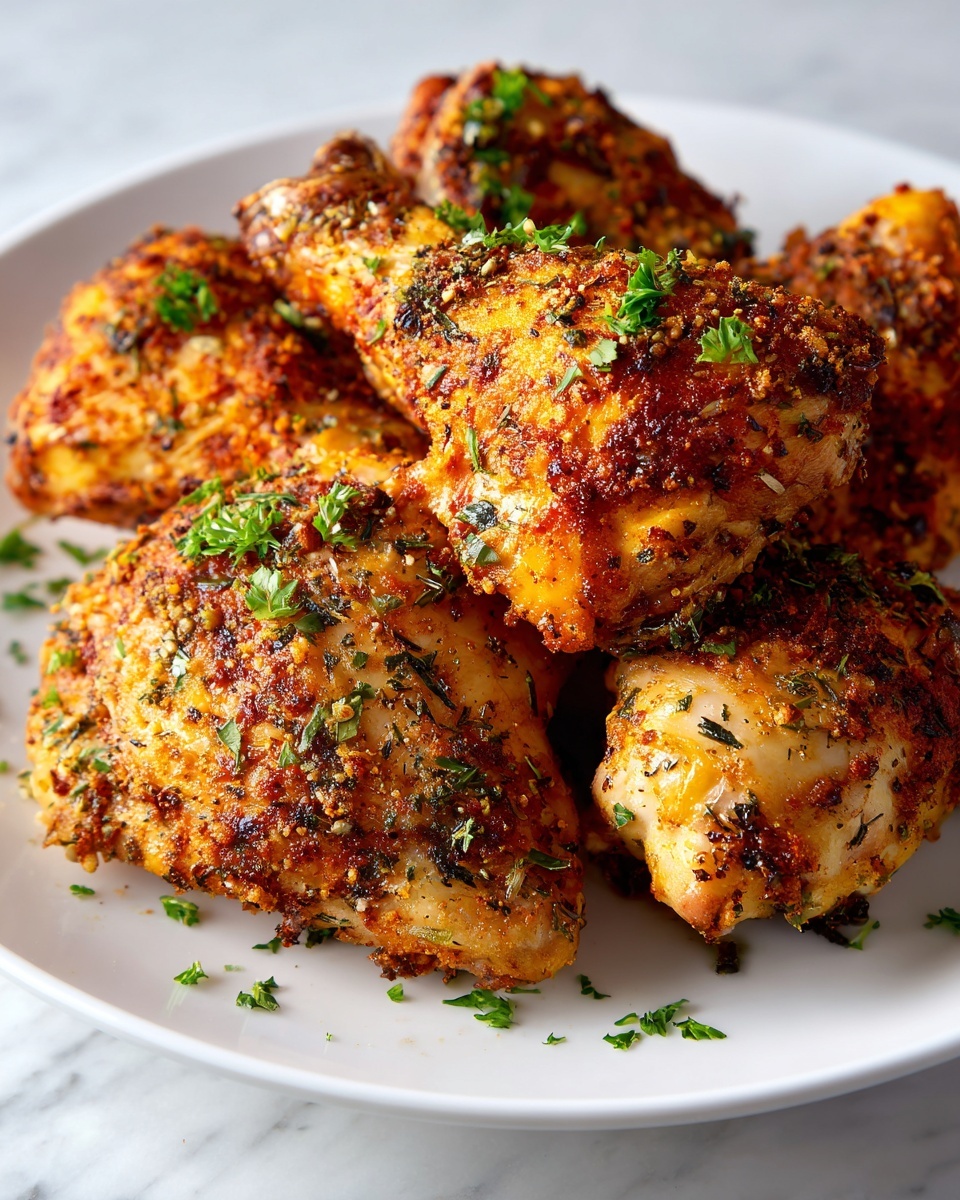
If you’re craving a crunchy, flavorful chicken dish without the guilt of deep frying, you’ve come to the right place. Air Fried Chicken Tenderloin: The Crispiest, Healthier Recipe brings that perfect golden crunch to the table using an air fryer, combining bold spices, Parmesan, and panko breadcrumbs for a mouthwatering bite every single time. This recipe is a total game-changer for anyone who loves tender chicken with a flavorful crust but wants to keep things lighter and easier on the cleanup.
Ingredients You’ll Need
Each ingredient in this recipe plays a starring role in creating the perfect balance of crispy texture, savory flavor, and irresistible aroma. You’ll find these simple, everyday pantry staples come together to make something truly special.
- Chicken Tenderloins: The star of the show, trimmed for tenderness and quick cooking.
- All-Purpose Flour: Essential for the initial coating to help the egg wash stick perfectly.
- Large Eggs: Act as the glue that holds the coating in place while adding moisture.
- Panko Bread Crumbs: Provide that signature airy crispness that regular breadcrumbs just can’t match.
- Grated Parmesan Cheese: Introduces a subtle savory depth and aids in browning beautifully.
- Garlic Powder: Adds a warm, mellow garlic flavor without overpowering the chicken.
- Onion Powder: Enhances the overall savory profile with its gentle sweetness.
- Smoked Paprika: Brings a smoky undertone and a lovely color to the crust.
- Dried Oregano: Gives an herbal brightness that lifts the seasoning mix.
- Salt and Black Pepper: Season the chicken perfectly to enhance all the flavors.
- Cooking Spray (Olive or Avocado Oil): Ensures a golden, crispy finish without deep-frying calories.
How to Make Air Fried Chicken Tenderloin: The Crispiest, Healthier Recipe
Step 1: Prepare the Chicken
Start by patting each chicken tenderloin dry with paper towels. This step is key because excess moisture can prevent the coating from sticking, so a dry surface helps build that perfect crust.
Step 2: Set up Your Breading Station
Get organized by placing the flour in one shallow dish, beaten eggs in a second, and in the third combine the panko breadcrumbs, Parmesan cheese, garlic powder, onion powder, smoked paprika, oregano, salt, and pepper. Mix the dry ingredients well to ensure every bite is flavorful.
Step 3: Flour Coating
Dredge each tenderloin in the flour, shaking off the excess to avoid clumps. This coating primes the chicken to hold onto the egg wash.
Step 4: Egg Wash Dip
Next, dip your floured chicken into the beaten eggs, letting any extra drip off—this helps the breadcrumb mixture stick better.
Step 5: Breadcrumb Coating
Press the chicken into the breadcrumb mixture firmly, ensuring it’s fully and evenly coated on both sides. This mixture is what makes this recipe so irresistibly crunchy and packed with flavor.
Step 6: Repeat for Remaining Chicken
Continue flouring, egg washing, and breading all tenderloins. Setting them aside on a plate while you prepare will keep your station tidy and manageable.
Step 7: Preheat Your Air Fryer
Preheat your air fryer to 400°F (200°C). This high heat is crucial to develop that golden-brown, crispy exterior quickly without drying out the juicy interior.
Step 8: Prepare Air Fryer Basket
Lightly spray the air fryer basket with cooking spray to prevent sticking and help the oil-based spray contribute to crispiness.
Step 9: Arrange the Chicken
Place the breaded tenderloins in a single layer in the basket. Avoid overcrowding to allow hot air to circulate properly for even cooking. Cook in batches if needed.
Step 10: Spray with Cooking Oil
Give the tops of the chicken a light spray with your cooking oil. This makes a big difference in achieving that golden, crispy finish without deep frying.
Step 11: Air Frying
Air fry the chicken for 8 to 10 minutes, flipping halfway through the cooking time. The chicken should be beautifully browned, and an internal temperature of 165°F (74°C) ensures it’s safe and juicy.
Step 12: Check and Adjust Cook Time
After 8 minutes, check on your chicken. If it’s not quite golden yet, continue cooking in 1 to 2 minute increments until perfectly crisp.
Step 13: Repeat with Remaining Chicken
If you cooked in batches, repeat steps 9 through 12 for the remaining tenderloins.
Step 14: Rest the Chicken
Let your crispy chicken rest a few minutes before serving. This allows juices to redistribute and helps the crust settle beautifully.
Step 15: Serve Immediately
Serve your Air Fried Chicken Tenderloin: The Crispiest, Healthier Recipe hot, accompanied by your favorite dipping sauces and sides for a satisfying meal that hits all the right notes.
How to Serve Air Fried Chicken Tenderloin: The Crispiest, Healthier Recipe
Garnishes
Fresh garnishes elevate this dish effortlessly. Sprinkle chopped parsley or cilantro for a burst of color and fresh flavor. A lemon wedge on the side adds a bright citrus zing that complements the crispiness wonderfully.
Side Dishes
This chicken pairs beautifully with a variety of sides. Consider a crunchy coleslaw, roasted vegetables, or even a light garden salad to keep the meal balanced and fresh. For a heartier approach, garlic mashed potatoes or sweet potato fries are fantastic choices.
Creative Ways to Present
For entertaining, try serving these tenders on a platter with an array of dipping sauces like honey mustard, spicy sriracha mayo, or a tangy barbecue sauce. You can also slice them and tuck them inside soft slider buns for a fun twist everyone will love.
Make Ahead and Storage
Storing Leftovers
Store leftover chicken in an airtight container in the refrigerator for up to 3 days. To keep the coating crispy as possible, avoid stacking pieces directly on top of each other.
Freezing
You can freeze the chicken tenderloins either cooked or uncooked. For maximum freshness, flash freeze on a tray first, then transfer to a freezer-safe bag or container. Frozen cooked chicken keeps well for up to 2 months.
Reheating
Reheat leftovers in the air fryer at 350°F (175°C) for 4 to 6 minutes to bring back that satisfying crispiness. Avoid microwaving if you want to preserve texture, as it can make the crust soggy.
FAQs
Can I use chicken breasts instead of tenderloins?
Absolutely! Slice chicken breasts into strips similar in size to tenderloins for even cooking times and enjoy the same crispy results.
Is the Parmesan cheese necessary in the breadcrumb mixture?
While optional, Parmesan adds a fantastic savory depth and helps the crust brown beautifully, so I highly recommend including it.
Do I need to flip the chicken while air frying?
Yes, flipping halfway through ensures each side gets even heat and crisping so that every bite is perfectly golden.
Can I prepare the chicken ahead of time and air fry later?
You can do the breading steps ahead and refrigerate the coated raw chicken for up to 24 hours before air frying. Just keep it covered to prevent the coating from drying out.
What dipping sauces go best with this Air Fried Chicken Tenderloin: The Crispiest, Healthier Recipe?
My favorites include honey mustard, ranch, barbecue sauce, or a spicy aioli. The crispy coating pairs beautifully with both creamy and tangy dips.
Final Thoughts
I can’t recommend this Air Fried Chicken Tenderloin: The Crispiest, Healthier Recipe enough for anyone wanting a deliciously crispy meal without the extra oil and mess of frying. It’s effortless, flavorful, and comes together with simple ingredients you likely have on hand. Trust me, once you try it, it will quickly become a dinner staple that you and your friends will rave about. So, go ahead and give it a whirl—you won’t regret that first crunchy bite!
Print
Air Fried Chicken Tenderloin: The Crispiest, Healthier Recipe
- Prep Time: 10 minutes
- Cook Time: 15 minutes
- Total Time: 25 minutes
- Yield: 6 servings
- Category: Main Course
- Method: Air Frying
- Cuisine: American
- Diet: Low Fat
Description
This Air Fried Chicken Tenderloin recipe delivers a perfectly crispy, golden crust with a juicy interior using a healthier air frying method. Coated in a seasoned panko and Parmesan mixture, these tenderloins are quick to prepare and ideal for a guilt-free, flavorful meal.
Ingredients
Chicken
- 1.5 lbs Chicken Tenderloins, trimmed of any excess fat
Breading Station
- 1 cup All-Purpose Flour
- 2 large Eggs, beaten
- 1 cup Panko Bread Crumbs
- 1/2 cup Grated Parmesan Cheese
- 1 tbsp Garlic Powder
- 1 tbsp Onion Powder
- 1 tsp Smoked Paprika
- 1 tsp Dried Oregano
- 1/2 tsp Salt
- 1/4 tsp Black Pepper
Cooking
- Cooking Spray (Olive Oil or Avocado Oil)
Instructions
- Prepare the Chicken: Pat chicken tenderloins dry with paper towels to remove moisture, ensuring better adhesion of coating and crispiness during air frying.
- Set up Breading Station: Arrange three shallow dishes: one with flour, one with beaten eggs, and one with a mixture of panko bread crumbs, Parmesan cheese, garlic powder, onion powder, smoked paprika, dried oregano, salt, and black pepper. Mix the dry ingredients well for even seasoning.
- Flour Coating: Dredge each chicken tenderloin in the flour, shaking off any excess to help the egg coat stick properly.
- Egg Wash: Dip the floured chicken into the beaten eggs, allowing any excess to drip off for a clean coating.
- Breadcrumb Coating: Transfer the egg-coated chicken to the panko mixture and press firmly to create an even, thorough crust on all sides. Repeat this step on the other side of the chicken.
- Repeat Coating: Continue steps 3 through 5 for all remaining chicken tenderloins.
- Preheat Air Fryer: Set your air fryer to 400°F (200°C) and let it preheat to ensure the chicken cooks evenly and crisps up nicely.
- Prepare Air Fryer Basket: Lightly spray the air fryer basket with your choice of cooking spray to prevent sticking and promote even browning.
- Arrange the Chicken: Place the breaded chicken tenderloins in a single layer inside the air fryer basket. Avoid overcrowding to allow hot air circulation; cook in batches if necessary.
- Spray with Oil: Lightly spray the tops of the chicken with cooking spray to enhance crispness and achieve a golden finish.
- Air Fry: Cook for 8-10 minutes, flipping the chicken halfway through the cooking time to ensure even browning on both sides. The chicken is done when the crust is golden brown and the internal temperature reaches 165°F (74°C).
- Check for Doneness: After 8 minutes, check the chicken’s color and temperature; if it needs more time, continue cooking in 1-2 minute increments, checking frequently to prevent overcooking.
- Repeat if Necessary: Cook any remaining chicken tenderloins by repeating steps 9 through 12.
- Rest the Chicken: Allow the chicken to rest for a few minutes after cooking to let the juices redistribute and keep the tenderloins moist.
- Serve Immediately: Serve the hot, crispy chicken tenderloins with your favorite dipping sauces and sides for a delicious meal.
Notes
- For extra crispiness, double-dip the chicken tenderloins by repeating the egg wash and breadcrumb coating once more.
- Use a meat thermometer to ensure chicken reaches a safe internal temperature of 165°F (74°C).
- Customize seasoning in the breadcrumb mixture to suit your taste, such as adding cayenne pepper for heat or dried basil for herbaceous notes.
- Make sure the chicken pieces are similar in size for even cooking.
- If you don’t have cooking spray, lightly brushing oil on chicken works as well.
- Pairs well with salads, roasted vegetables, or fries for a complete meal.

