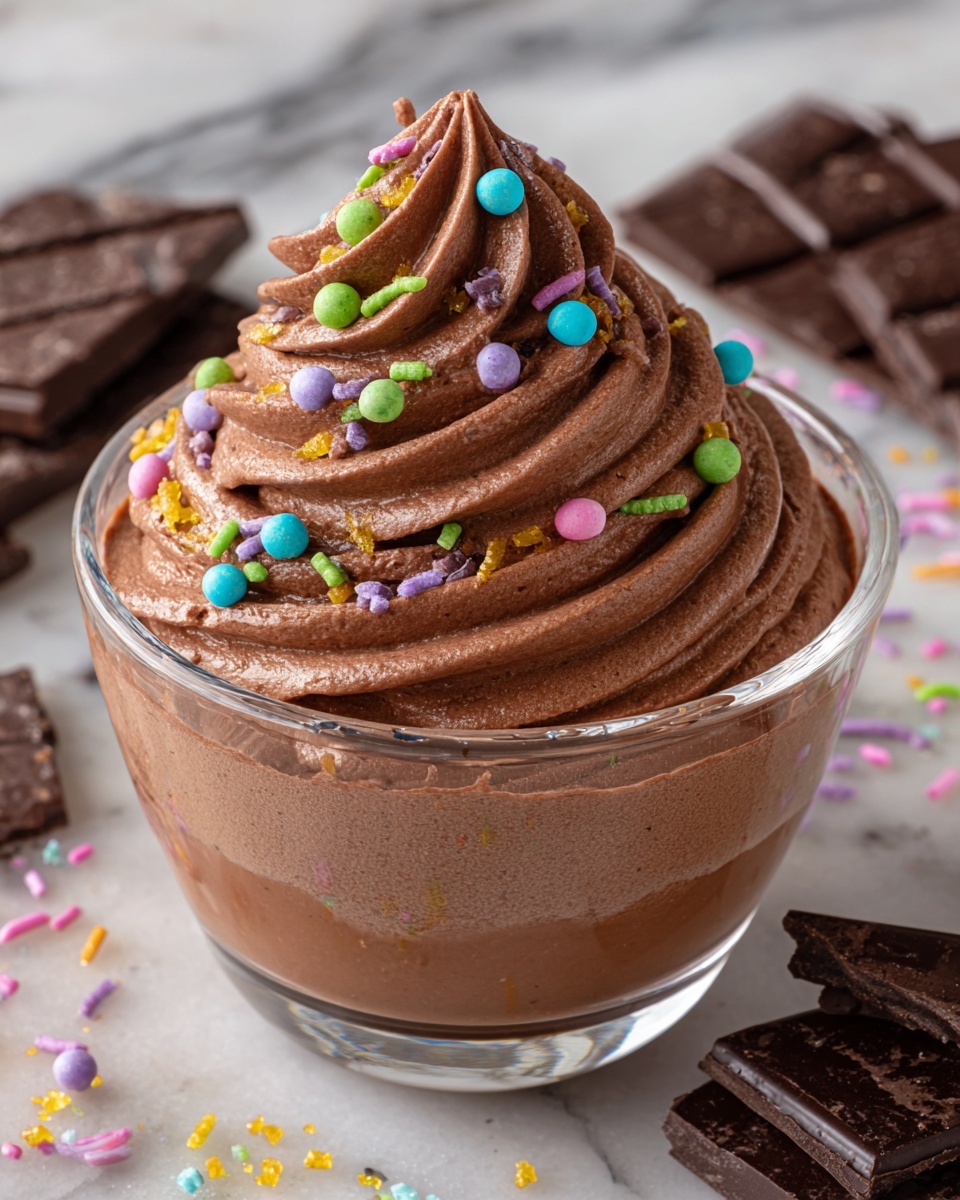
If you have a serious sweet tooth and love decadent treats, you are in for an absolute delight with this Chocolate Lovers Cool Whip Candy Recipe. This recipe combines the airy lightness of Cool Whip with rich, melty chocolate chips, and optional crunchy or gooey add-ins to create a candy experience that’s utterly addictive. Each bite melts in your mouth with a perfect balance of creamy texture and chocolatey goodness, making it the perfect treat to share or stash away for yourself. Whether you’re an experienced chocoholic or just love a quick, no-fuss dessert, this recipe is sure to become a beloved favorite.
Ingredients You’ll Need
Gathering these ingredients is a breeze, and you’ll love how each one plays a crucial role in building the texture and flavor of this candy. The Cool Whip brings fluffy lightness, chocolate chips add rich depth, and the powdered sugar sweetens and firms things up just right.
- Cool Whip (8 oz tub): The airy base that makes this candy light and creamy, not dense or heavy.
- Semisweet chocolate chips (1 1/2 cups): Adds that luscious chocolate punch every lover craves.
- Peanut butter (1/2 cup, optional): A wonderful flavor boost for those who enjoy a nutty twist with their chocolate.
- Powdered sugar (2 cups): Sweetens the mix while helping to create a firm yet soft consistency.
- Vanilla extract (1 tsp): Enhances the depth of flavor and rounds out the sweetness.
- Crushed graham crackers or mini marshmallows (1/2 cup, optional): For adding a touch of texture and fun surprise in every bite.
- Pinch of salt (optional): Perfect for balancing the sweetness and bringing out the chocolate flavor more vividly.
How to Make Chocolate Lovers Cool Whip Candy Recipe
Step 1: Melt the Chocolate
Start by gently melting your semisweet chocolate chips. Using a microwave-safe bowl or a double boiler, heat the chips in short bursts, stirring regularly until silky smooth. This step is crucial because the melted chocolate will blend seamlessly into the Cool Whip and sweetened mixture, giving your candy that rich, indulgent chocolate taste we all crave.
Step 2: Combine Cool Whip and Powdered Sugar
In a large mixing bowl, stir together the thawed Cool Whip and powdered sugar. This mixture should become thick and creamy, acting as the sweet and airy foundation of your candy. The powdered sugar not only sweetens but also helps firm up this base.
Step 3: Mix in the Chocolate
Slowly add the melted chocolate to the Cool Whip mixture, folding gently to create ribbons of chocolate throughout. The interplay between the fluffy Cool Whip and the dense chocolate creates a beautiful texture and taste — an essential moment in the Chocolate Lovers Cool Whip Candy Recipe process.
Step 4: Add Texture (Optional)
If you’re feeling adventurous, now is the time to stir in crushed graham crackers for a subtle crunch or mini marshmallows if you love gooey pockets of sweetness. A pinch of salt here can also elevate the flavor profile by balancing the sweetness and intensifying the chocolate’s richness.
Step 5: Shape the Candies
Grab a spoon or your hands and shape the candy into bite-sized rounds or squares. Lining a tray with parchment paper makes this step easier and ensures your treats don’t stick. This tactile part of the recipe is one of the most satisfying — forming these tender candies feels like crafting little pieces of chocolate magic.
Step 6: Chill
Place your shaped candies in the fridge and let them chill for at least a couple of hours. This resting time allows the candies to firm up perfectly, so they hold their shape but still melt deliciously on your tongue when you eat them.
Step 7: Serve
Once chilled, your Chocolate Lovers Cool Whip Candy Recipe treats are ready to enjoy! Whether you share them at a get-together or savor individually, they’re sure to bring smiles and satisfied chocolate cravings.
How to Serve Chocolate Lovers Cool Whip Candy Recipe
Garnishes
For an extra special touch, garnish your candies with a sprinkle of cocoa powder, a drizzle of warm chocolate sauce, or even a few toasted nuts. These additions add visual appeal and an extra layer of flavor that elevates your homemade candy to a fancy dessert worthy of any occasion.
Side Dishes
While these candies stand beautifully on their own, pairing them with a scoop of vanilla ice cream or a fresh berry salad can create a delightful dessert ensemble. The cold, fresh flavors contrast wonderfully with the creamy, chocolaty candies, making each bite more exciting.
Creative Ways to Present
Arrange your candies in colorful mini cupcake liners or on a pretty serving platter with edible flowers or mint leaves. You could even stack them in a decorative jar as a charming gift idea. Presentation can turn this simple recipe into a showstopper that your friends and family will rave about.
Make Ahead and Storage
Storing Leftovers
Keep any leftover candies stored in an airtight container in the refrigerator. This will preserve their shape and freshness for up to a week, although they rarely last that long with how irresistible they are!
Freezing
If you want to enjoy these candies over a longer period, you can freeze them. Place the candies on a parchment-lined tray to freeze individually, then transfer to a freezer-safe container or bag. Thaw in the fridge before serving to maintain the perfect texture.
Reheating
Since these candies are meant to be enjoyed chilled, reheating isn’t necessary or recommended. But if the texture feels too firm after storage, simply letting them sit at room temperature for about 10 minutes will soften them up beautifully.
FAQs
Can I use whipped cream instead of Cool Whip?
Whipped cream tends to be less stable than Cool Whip, which may affect the candy’s texture and firmness. Cool Whip is preferred for the best results due to its stability and lightness in this recipe.
Is peanut butter necessary?
Peanut butter is entirely optional and adds a lovely, nutty depth. If you’re a peanut butter fan, it’s a great addition, but the candy is delicious even without it for a pure chocolate experience.
Can I substitute different types of chocolate?
Absolutely! Dark chocolate or milk chocolate chips can be used depending on your preference. Adjust the sweetness accordingly if using darker varieties.
How long should I chill the candies?
Chilling for at least 2 hours ensures the candies set properly, but leaving them overnight can help them firm up even better for easier handling.
Can I make this recipe gluten-free?
Yes! Just omit the crushed graham crackers or use gluten-free alternatives. The rest of the ingredients are naturally gluten-free, making this candy safe for those with gluten sensitivities.
Final Thoughts
Giving this Chocolate Lovers Cool Whip Candy Recipe a try means treating yourself to a quick, satisfying, and utterly shareable dessert that’s bursting with chocolate goodness. It’s perfect for creating joyful moments with friends or indulging in your own little chocolate retreat. Once you make it, you’ll wonder how you ever lived without this simple but brilliant candy in your life. So go ahead, dive in, and enjoy every delicious bite!
Print
Chocolate Lovers Cool Whip Candy Recipe
- Prep Time: 15 minutes
- Cook Time: 5 minutes (melting chocolate)
- Total Time: 2 hours 20 minutes (including chilling)
- Yield: 20 servings
- Category: Dessert
- Method: No-Cook
- Cuisine: American
Description
Indulge in this easy and decadent Chocolate Lovers Cool Whip Candy recipe, perfect for satisfying your sweet tooth with a creamy, chocolaty treat. Combining smooth Cool Whip, rich semisweet chocolate, and optional peanut butter and crunchy textures, these no-bake candies are simple to make and perfect for parties or gifting.
Ingredients
Main Ingredients
- 1 (8 oz) tub Cool Whip, thawed
- 1 1/2 cups semisweet chocolate chips
- 2 cups powdered sugar
- 1 tsp vanilla extract
Optional Ingredients
- 1/2 cup peanut butter (optional, for added flavor)
- 1/2 cup crushed graham crackers or mini marshmallows (optional, for texture)
- Pinch of salt (optional, to balance sweetness)
Instructions
- Melt the Chocolate: Gently melt the 1 1/2 cups of semisweet chocolate chips in a microwave-safe bowl in 30-second intervals, stirring between each until smooth and fully melted. Alternatively, use a double boiler for even melting.
- Combine Cool Whip and Powdered Sugar: In a large mixing bowl, combine the 8 oz tub of thawed Cool Whip with 2 cups of powdered sugar and 1 teaspoon of vanilla extract. Mix until smooth and fully blended.
- Mix in the Chocolate: Gradually stir the melted chocolate into the Cool Whip mixture until fully incorporated. If using, add 1/2 cup peanut butter now and blend well for richer flavor.
- Add Texture (Optional): Fold in 1/2 cup crushed graham crackers or mini marshmallows along with a pinch of salt if desired to add an interesting texture and balance the sweetness.
- Shape the Candies: Using a spoon or small cookie scoop, portion the mixture into bite-sized rounds or shapes onto a parchment-lined baking sheet.
- Chill: Place the shaped candies in the refrigerator and chill for at least 2 hours or until firm enough to handle.
- Serve: Once chilled, serve the candies chilled or at room temperature. Store leftovers in an airtight container in the refrigerator for up to one week.
Notes
- Peanut butter is optional but adds a delicious nutty flavor and creaminess.
- You can substitute the graham crackers or marshmallows for chopped nuts or coconut flakes for different textures.
- Ensure Cool Whip is fully thawed before mixing for the best consistency.
- These candies do not require baking or cooking beyond melting chocolate, making them quick and simple to prepare.
- Store candies in the refrigerator to maintain their shape and freshness.


