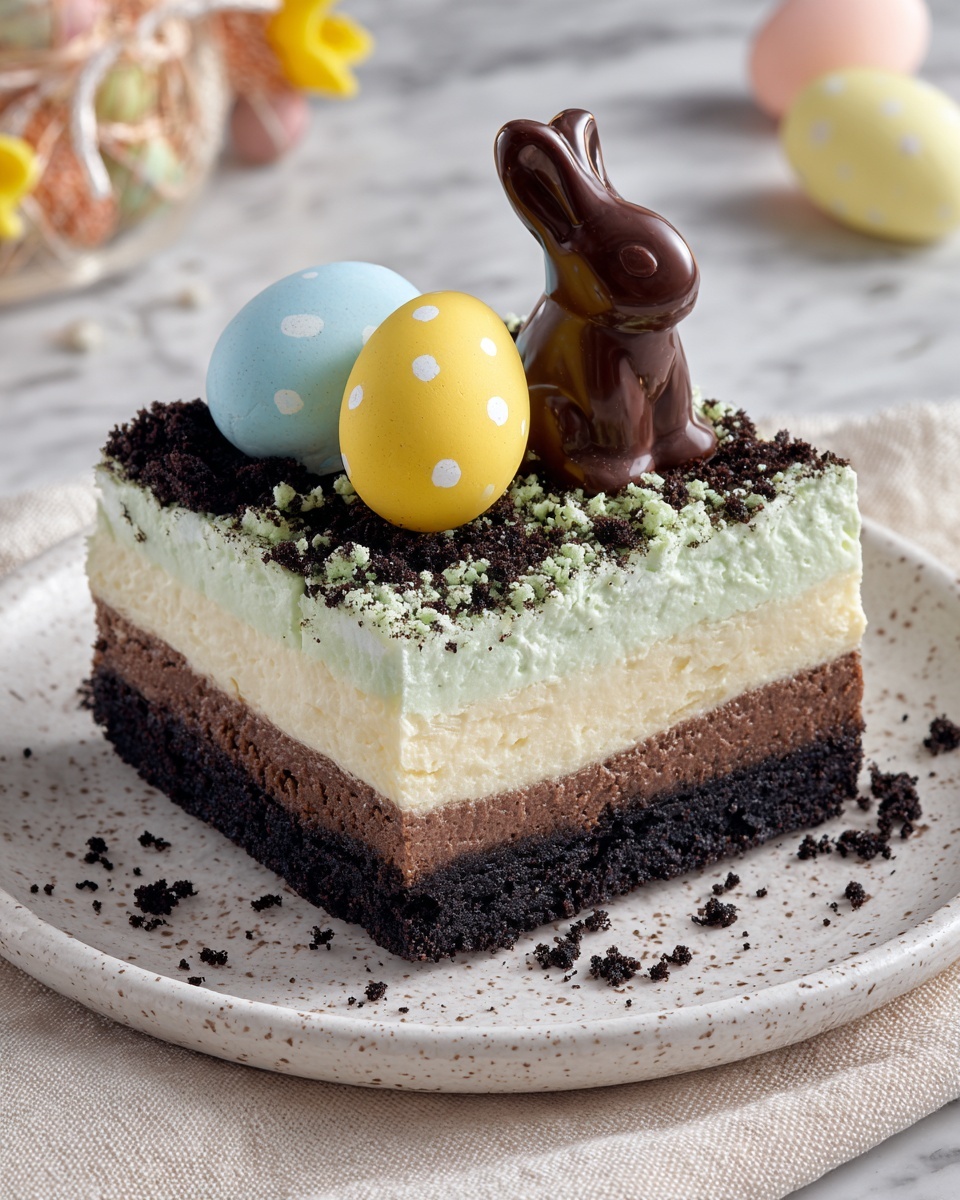
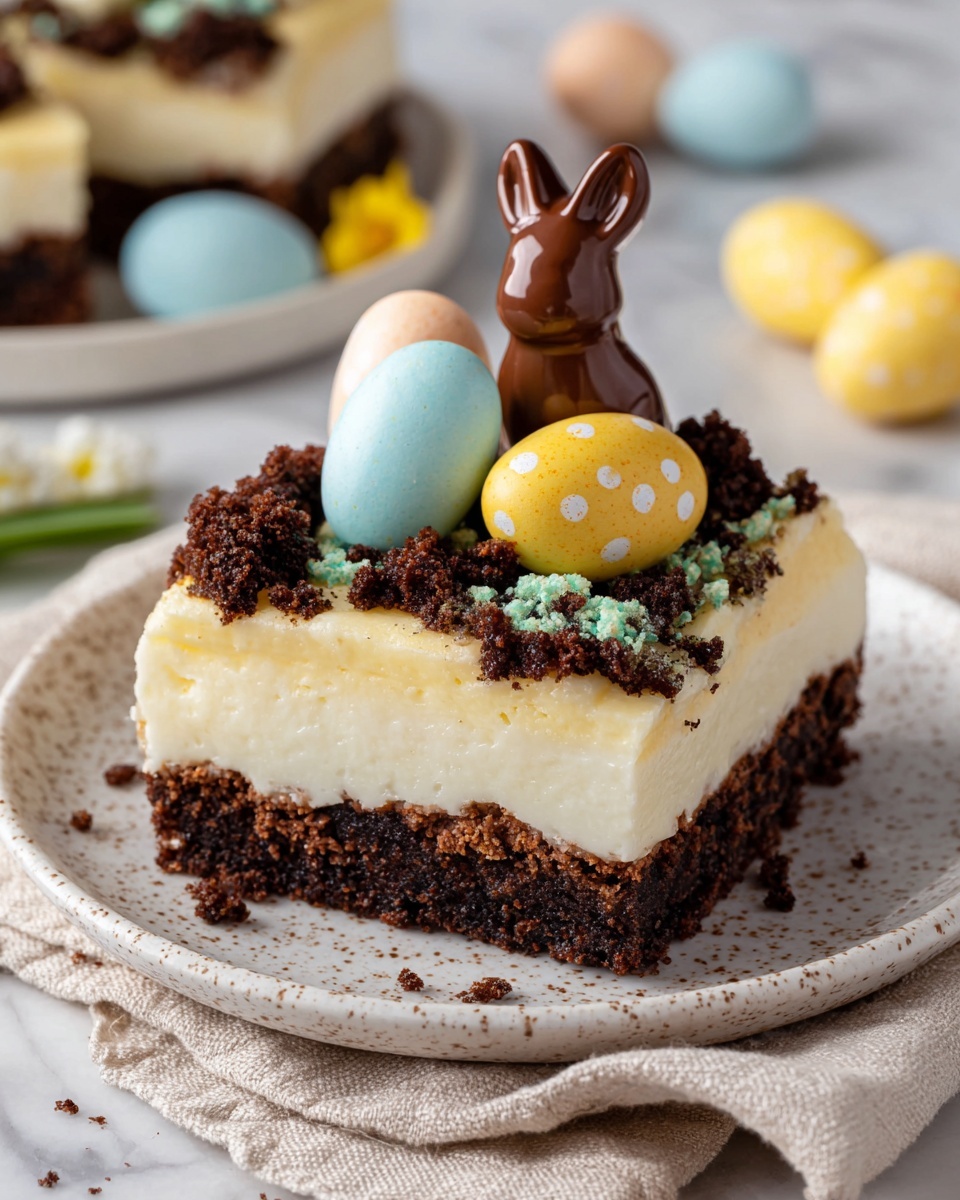
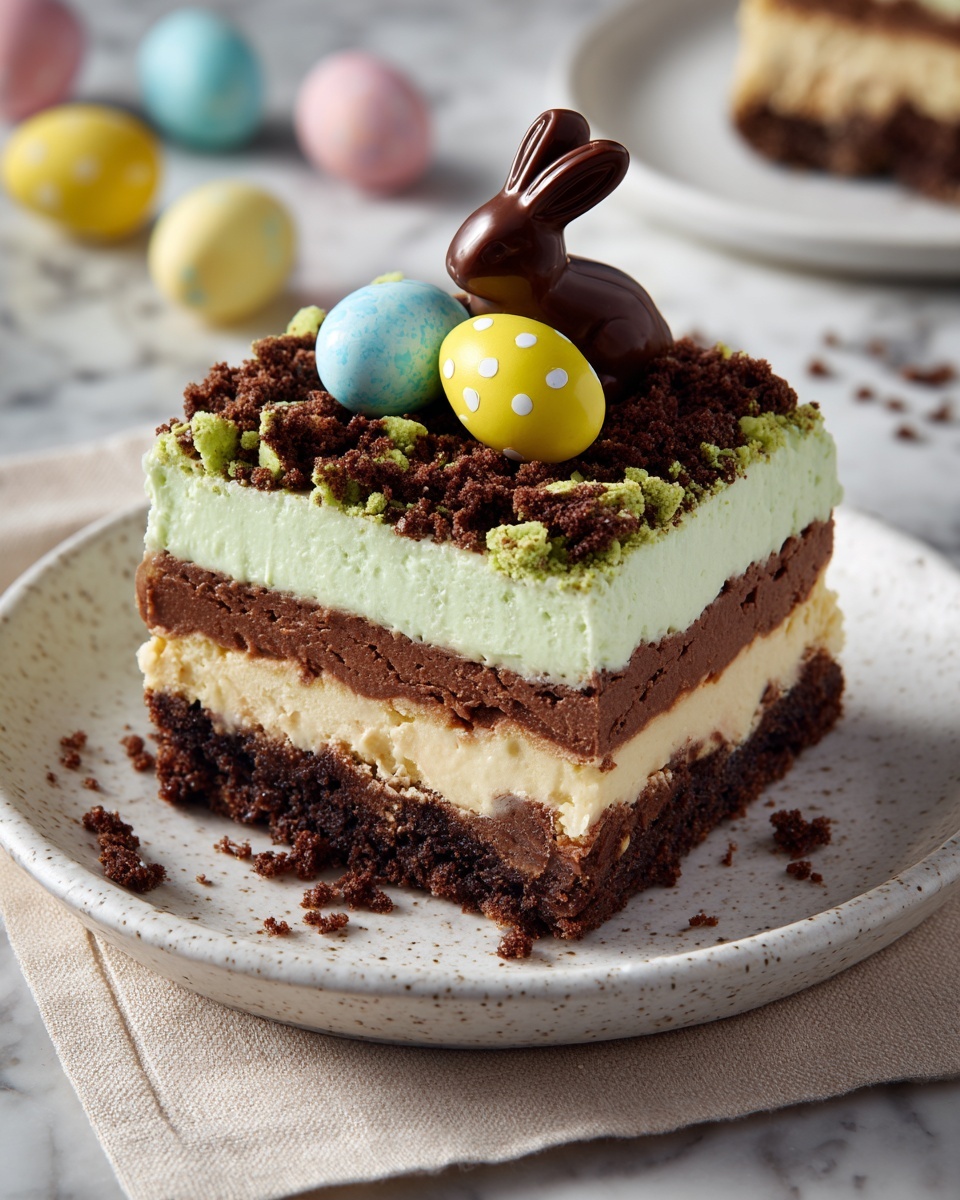
If you are looking for a festive and delightful dessert that brings springtime joy to your table, you have to try the Easter Bunny Dirt Cake Recipe. This no-bake treat is a magical combination of creamy pudding, fluffy whipped topping, and crunchy crushed Golden Oreos, layered to look just like a patch of garden dirt with vibrant green coconut grass and adorable Easter candies hiding on top. It’s easy to make, perfect for sharing with family and friends, and guaranteed to be a hit with kids and adults alike. Let me walk you through turning simple ingredients into a whimsical and scrumptious celebration of Easter!
Ingredients You’ll Need
The best part about this Easter Bunny Dirt Cake Recipe is how simple yet essential every ingredient is. Each one plays a special role in creating the creamy texture, sweet flavor, and colorful presentation that make this dessert irresistible.
- Golden Oreos (1 package, crushed): Adds a buttery crunch and a lovely golden color that stands out from the usual chocolate dirt cake.
- Cream cheese (8 oz, softened): Provides richness and a slight tang, balancing the sweetness.
- Unsalted butter (1/4 cup, softened): Enhances the creaminess and helps with smooth mixing.
- Powdered sugar (1 cup): Sweetens and blends effortlessly, ensuring no graininess in your filling.
- Instant vanilla pudding mix (2 packages, 3.4 oz each): Creates that luscious, fluffy body of the cake with a wonderful vanilla flavor.
- Cold milk (3 cups): Activates the pudding mix and keeps everything perfectly chilled.
- Whipped topping (12 oz, thawed): Adds lightness and volume, making the filling dreamy and airy.
- Green-tinted shredded coconut: Transforms plain coconut into fresh, grassy “dirt” covering.
- Assorted Easter candies: Jelly beans, chocolate eggs, marshmallow bunnies, or Peeps for a festive, playful finish.
- Bunny-shaped cookies or decorations (optional): For extra charm and an adorable Easter touch.
How to Make Easter Bunny Dirt Cake Recipe
Step 1: Prepare the Cream Cheese Mixture
Start by beating together the softened cream cheese, unsalted butter, and powdered sugar in a large bowl until the mixture is smooth, creamy, and fluffy. This combination forms the rich base that will balance the sweetness and provide a silky texture.
Step 2: Whisk the Instant Pudding
In a separate bowl, whisk the instant vanilla pudding mix with cold milk vigorously for about 2 minutes until it thickens. This thickened pudding will add that heavenly vanilla flavor and light firmness to the dessert, essential for the layers to hold well.
Step 3: Fold Pudding Into Cream Cheese Mixture
Gently fold the thickened pudding into the cream cheese blend until fully combined. The folding technique ensures the mixture stays airy and light, avoiding deflation and keeping your dessert fluffy.
Step 4: Incorporate Whipped Topping
Carefully fold in the thawed whipped topping to the pudding and cream cheese mix, which further lightens the filling, giving it that perfect balance of creaminess and fluffiness.
Step 5: Assemble the Layers
In a 9×13-inch dish or a pretty trifle bowl, spread half of the crushed Golden Oreos evenly on the bottom. Then gently spread the cream mixture over the cookie layer. Top this with the remaining crushed Oreos, creating the iconic “dirt” look.
Step 6: Add the Green “Grass” and Decorate
Sprinkle green-tinted shredded coconut over the top to mimic fresh grass. Then have fun decorating with your favorite Easter candies like jelly beans, chocolate eggs, and marshmallow Peeps or bunnies. This final step makes the dessert as joyful to look at as it is to eat.
Step 7: Chill and Set
Place the cake in the refrigerator for at least 2 hours to allow the layers to set perfectly. This chilling time helps the flavors meld beautifully and makes slicing easier.
How to Serve Easter Bunny Dirt Cake Recipe
Garnishes
The best garnish for this Easter Bunny Dirt Cake Recipe is vibrant, fresh-looking greenery. The green-tinted coconut adds a fantastic texture and a pop of color that contrasts delightfully with the golden cookie “dirt.” Adding colorful jelly beans and cute marshmallow bunnies on top instantly transforms your dessert from tasty to talk-of-the-table festive.
Side Dishes
Since this dessert is rich and creamy, lighter side dishes pair nicely with it. Fresh fruit salad, tangy citrus sorbet, or a crisp green salad with a citrus vinaigrette make lovely companions to balance out the indulgence and refresh your palate.
Creative Ways to Present
For a fun twist, try serving portions in individual clear cups or mini flower pots for a mini garden vibe. You can also place bunny-shaped cookies around the edges or use edible flowers to enhance the spring theme. Let kids join in the decorating to make it an extra special shared experience.
Make Ahead and Storage
Storing Leftovers
You can store leftover Easter Bunny Dirt Cake Recipe in the refrigerator, covered tightly with plastic wrap or an airtight lid, for up to 3 days. The layers and decorations will hold up nicely, making it a perfect dessert to enjoy over a few days.
Freezing
This dessert isn’t ideal for freezing as the creamy layers might separate and the texture can suffer. It’s best enjoyed fresh or refrigerated for a short period after making.
Reheating
No reheating needed here! This delightful no-bake dessert is served chilled. Just remove from the fridge shortly before serving to allow it to soften slightly for the best creamy texture.
FAQs
Can I make the green coconut grass without food coloring?
If you prefer to avoid food coloring, you can substitute with finely chopped fresh mint leaves for a natural green touch or leave the coconut plain for a snowy effect. Just note that plain coconut won’t mimic grass as closely.
Can I use chocolate Oreos instead of Golden Oreos?
Absolutely! Chocolate Oreos will give you a more traditional “dirt” look and richer chocolate flavor. The Easter Bunny Dirt Cake Recipe is flexible to suit your taste preferences.
Is it possible to use homemade pudding instead of instant mix?
You can make homemade vanilla pudding from scratch to use here, but make sure it’s fully chilled and thickened as the instant mix gives a reliable firm texture that holds up well in the layers.
How far in advance can I prepare this dessert?
This cake can be assembled and refrigerated up to a day in advance, making it very convenient for holiday gatherings. Just add the Easter candies right before serving to keep them fresh.
Can this recipe be made dairy-free?
For a dairy-free version, try using vegan cream cheese alternative, dairy-free butter, and coconut-based whipped topping. Be sure to check the pudding mix ingredients or make a dairy-free pudding from scratch.
Final Thoughts
This Easter Bunny Dirt Cake Recipe is a true celebration of spring charm combined with easy, scrumptious flavors. It’s a dessert that invites smiles, gets kids involved, and makes the holiday feel extra special. I can’t wait for you to whip it up and experience that fun layering, creamy goodness, and festive spirit in every bite. Give it a try—you might just find your new favorite Easter tradition!
Print
Easter Bunny Dirt Cake Recipe
- Prep Time: 25 minutes
- Cook Time: 0 minutes
- Total Time: 25 minutes (plus 2 hours chilling)
- Yield: 12 servings
- Category: Dessert
- Method: No-Cook
- Cuisine: American
- Diet: Vegetarian
Description
This Easter Bunny Dirt Cake is a delightful no-bake dessert featuring layers of crushed Golden Oreos, creamy vanilla pudding mixture, and green-tinted coconut ‘grass’ topped with festive Easter candies. Perfect for spring celebrations, it’s easy to prepare and fun for kids to decorate.
Ingredients
Crust and Topping
- 1 package (14.3 oz) Golden Oreos, crushed
- Green-tinted shredded coconut (for grass)
- Assorted Easter candies (jelly beans, chocolate eggs, marshmallow bunnies or Peeps)
- Bunny-shaped cookies or decorations (optional)
Filling
- 8 oz cream cheese, softened
- 1/4 cup unsalted butter, softened
- 1 cup powdered sugar
- 2 packages (3.4 oz each) instant vanilla pudding mix
- 3 cups cold milk
- 12 oz whipped topping, thawed
Instructions
- Prepare Cream Mixture: In a large bowl, beat together the softened cream cheese, unsalted butter, and powdered sugar until the mixture is smooth and fluffy, creating a creamy base.
- Make Pudding: In a separate bowl, whisk the instant vanilla pudding mix with cold milk vigorously for about 2 minutes until it thickens to a pudding consistency.
- Combine Mixtures: Gently fold the thickened pudding into the cream cheese mixture, then carefully fold in the thawed whipped topping until everything is fully combined and smooth.
- Layer the Dessert: In a 9×13-inch dish or trifle bowl, spread half of the crushed Golden Oreos evenly on the bottom to form the first layer.
- Add Cream Layer: Spread the creamy pudding mixture evenly over the cookie layer, creating the middle layer of the dessert.
- Top with Cookies: Sprinkle the remaining crushed Oreos over the cream layer to add texture and a dirt-like appearance.
- Create Grass and Decorate: Sprinkle green-tinted shredded coconut on top to resemble grass, then decorate with assorted Easter candies, marshmallow bunnies, chocolate eggs, and optional bunny-shaped cookies for a festive look.
- Chill to Set: Refrigerate the assembled dessert for at least 2 hours to allow the layers to set and meld flavors before serving.
Notes
- To tint the coconut, place 1 cup shredded coconut in a zip-top bag with a few drops of green food coloring and shake until evenly colored.
- This dessert is ideal for making ahead of time to let the flavors develop and the layers set properly.
- Kids can have fun helping with the decorating process, making it a family-friendly activity.


