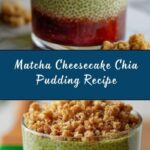
If you are craving something both refreshing and indulgent, you are going to fall head over heels for this Matcha Cheesecake Chia Pudding Recipe. This delightful creation combines the lush creaminess of cheesecake-inspired flavors with the earthy vibrancy of matcha, all tied together by the nutrient-packed chia seeds. It’s a dreamy, dairy-free treat that feels like a special dessert but is wholesome enough for any time of day. Trust me, once you try this matcha cheesecake chia pudding, it’ll become one of your favorite go-to recipes for a quick, satisfying, and stunningly green bowl of joy.
Ingredients You’ll Need
These ingredients are simple yet thoughtfully chosen to create a balance of creamy, tangy, and slightly sweet flavors, with the distinctive color and delicate bitterness of matcha shining through. Each element plays an important role in texture and taste, making this recipe a breeze to pull together.
- Plain plant-based yogurt: Provides creaminess and a subtle tang without dairy, soy works beautifully here.
- Dairy-free cream cheese: Adds that signature cheesecake richness in a vegan-friendly way.
- Agave syrup: A gentle sweetness that complements but does not overpower the matcha.
- Unsweetened plant-based milk: Acts as the perfect liquid base; soy milk blends seamlessly.
- Vanilla bean paste or extract: Brings depth and warmth to the overall flavor.
- Lemon zest and juice: Injects a fresh, zesty brightness which cuts through the richness.
- Kosher salt: Enhances all the flavors and balances the sweetness.
- Good quality matcha powder: The star element giving earthy, vibrant green color and antioxidants.
- Hot water (about 175°F): Essential for properly whisking and blooming the matcha powder.
- Chia seeds: The magic thickener that transforms the mixture into pudding while adding fiber and protein.
- Strawberry jam (optional): Offers a fruity contrast and pretty presentation.
- Almonds: Adds crunch and nuttiness to the crumble topping.
- Gluten-free oats or banana chips: Provides texture in the topping with extra flavor.
- Medjool dates: Natural sweetness to bind the crumble together beautifully.
How to Make Matcha Cheesecake Chia Pudding Recipe
Step 1: Blend the Creamy Base
First, combine the plant-based yogurt, dairy-free cream cheese, agave syrup, unsweetened plant-based milk, vanilla, the zest and juice of half a lemon, and kosher salt into your blender. This mixture is going to form the luscious and velvety cheesecake flavor that makes this dish truly special. Blending these ingredients together first ensures everything is smooth and perfectly combined.
Step 2: Prepare the Matcha
Set a small mesh sieve over a bowl and sift your matcha powder through it. This step prevents clumps that would spoil the silky mouthfeel of the pudding. Add the hot water (ideally around 175°F) to the sifted matcha and whisk briskly in a W-shape motion using a bamboo whisk or small whisk until the matcha is fully dissolved and a foamy layer forms on top. This traditional method blooms the tea’s flavor and creates a beautiful frothy base for the pudding.
Step 3: Combine Matcha and Creamy Mixture
Pour your whisked matcha into the blender with the creamy base, then blend everything again until perfectly smooth and bright green. This step harmonizes the flavors and pours the unmistakable vibrant hue into your pudding, making it almost too pretty to eat.
Step 4: Add Chia Seeds and Chill
Transfer the blended mixture into a large container and add your chia seeds. Whisk vigorously to combine and break up any potential chia clumps. Cover and let it set for 5 minutes, then give it a quick stir again to evenly distribute the chia before placing the container in the fridge. Refrigerate for at least an hour, preferably overnight, allowing the pudding to thicken and develop its signature creamy, slightly gelatinous texture.
Step 5: Prepare the Crunchy Topping
While the pudding sets, pulse the almonds, gluten-free oats (or banana chips), medjool dates, zest of the remaining lemon half, and a pinch of salt in a mini food processor until crumbly but with some texture. This crumble topping is just the right contrast to the smooth pudding, infusing it with nuttiness, a hint of citrus, and natural sweetness.
Step 6: Assemble and Serve
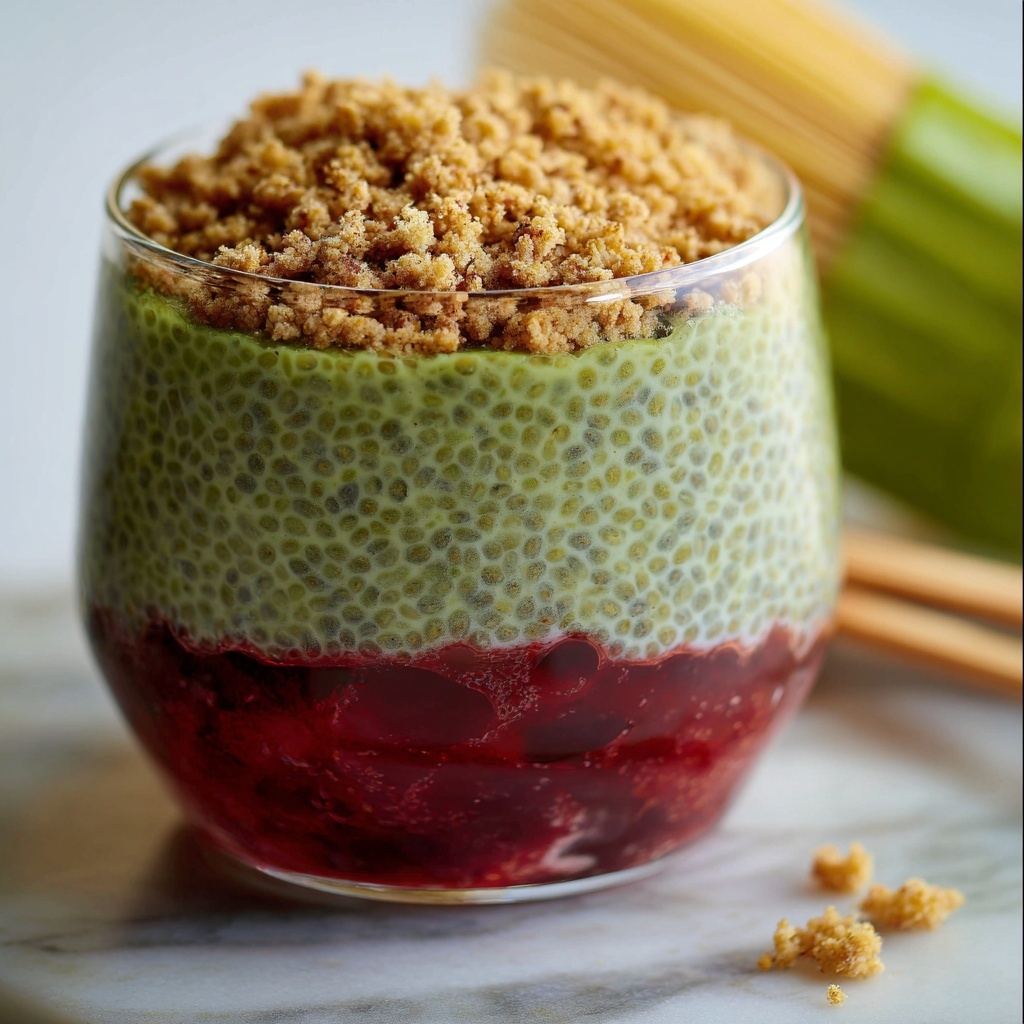
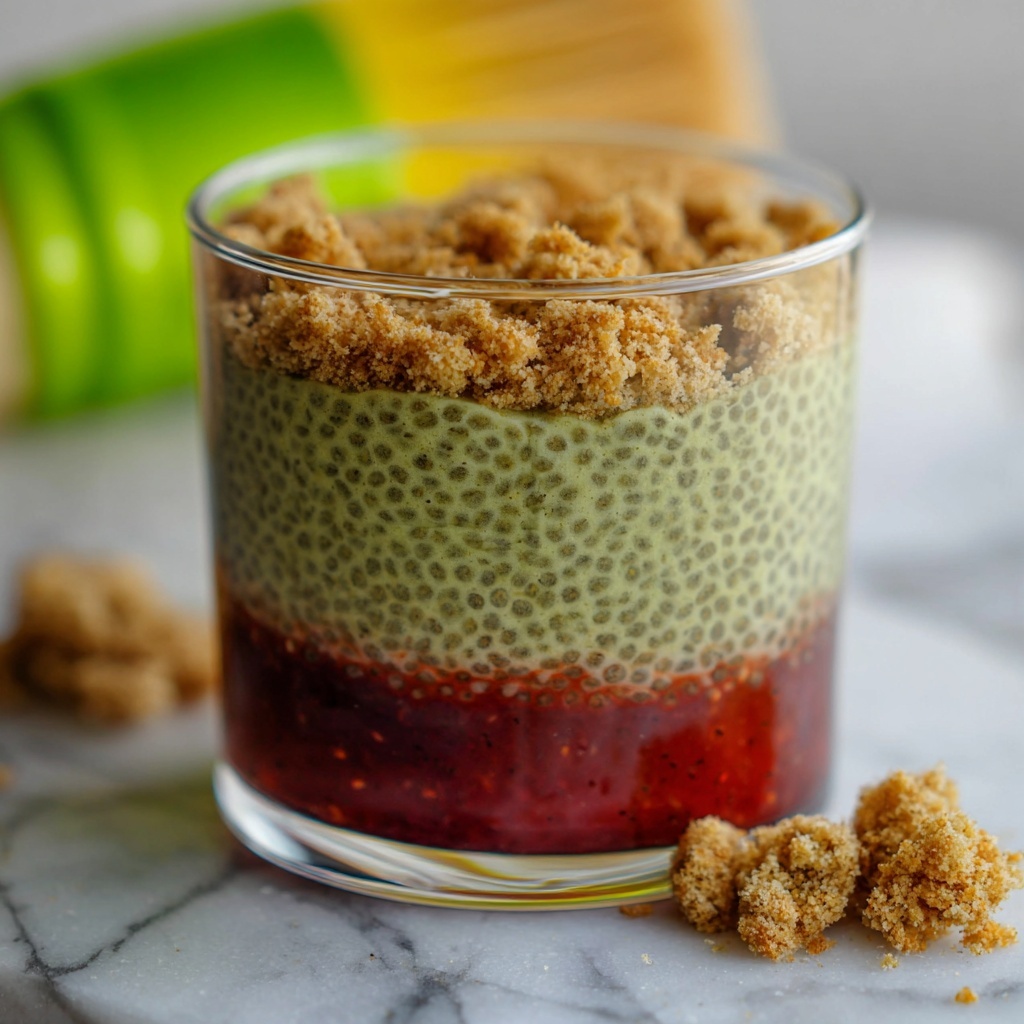
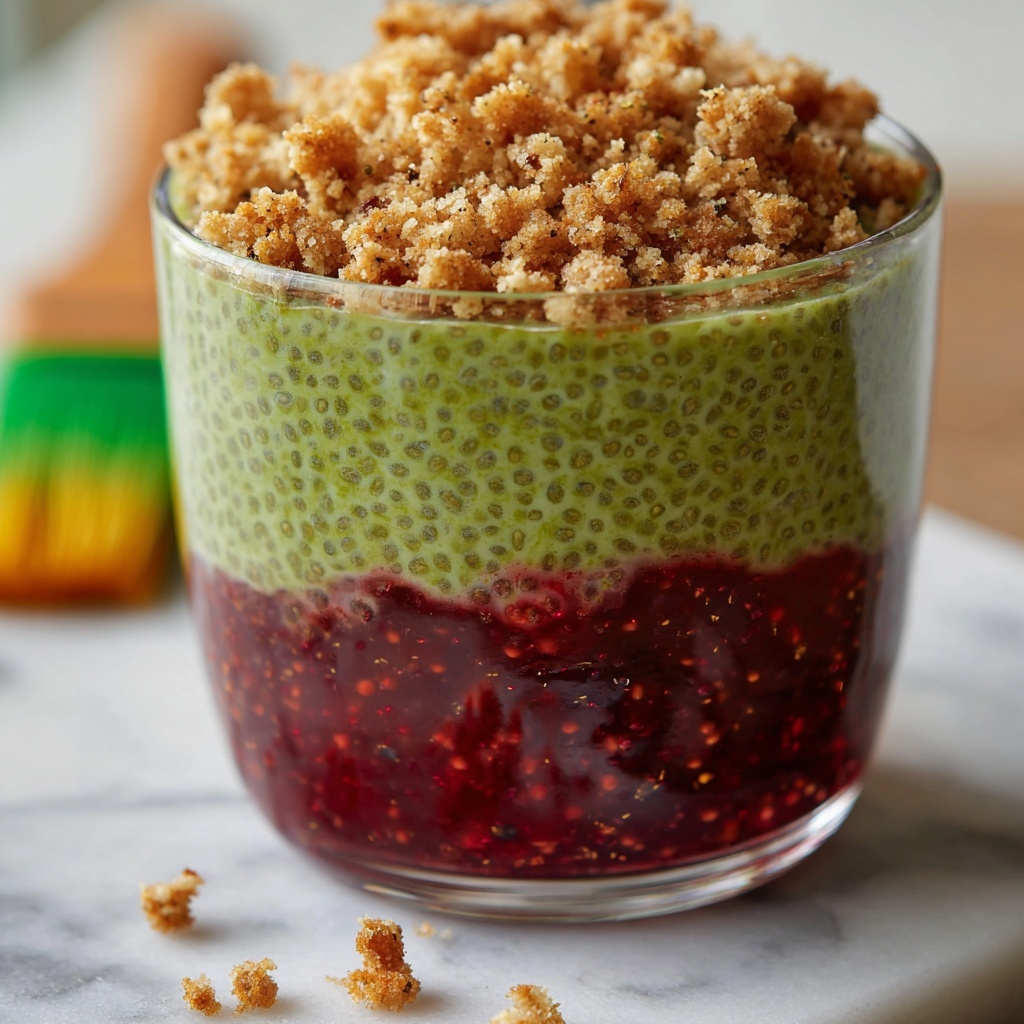
To serve, optionally spread a tablespoon of strawberry jam on the base of your serving dish to add a sweet, fruity layer. Spoon in the matcha cheesecake chia pudding, topping generously with the crumble mixture. This layering creates a stunning presentation and a delightful play of textures that’s utterly addictive.
How to Serve Matcha Cheesecake Chia Pudding Recipe
Garnishes
For a flourish, sprinkle a few fresh berries like strawberries or raspberries on top, or add a light dusting of extra matcha powder. If you adore nuts, toasted sliced almonds are perfect for crunch and visual appeal. Even a drizzle of almond butter or a little swirl of vegan yogurt makes a lovely, decadent touch.
Side Dishes
This pudding is quite versatile and pairs wonderfully with light fruit salads, a side of citrusy granola, or a small bowl of sliced kiwi or mango to complement the matcha’s earthiness. On cooler days, a warm cup of ginger tea or a dairy-free latte accentuates the comforting cheesecake feel.
Creative Ways to Present
Serve it in clear glass jars or pretty teacups to showcase the layered effect with the jam and crumble. Alternatively, transform this pudding into a parfait by layering it with additional plant-based yogurt and fresh fruit. For a party, miniature dessert cups topped with edible flowers will impress your guests and highlight the elegant green hue.
Make Ahead and Storage
Storing Leftovers
Leftover Matcha Cheesecake Chia Pudding can be stored in an airtight container in the refrigerator for up to 4 days. The chia will continue to absorb moisture, so stir well before serving to refresh its creamy texture. The crumble topping is best kept separate until serving to maintain its crunch.
Freezing
This pudding is not ideal for freezing because the texture can change after thawing, with the chia seeds becoming overly gelled or the cream cheese mixture separating slightly. For best results, prepare fresh or store refrigerated.
Reheating
Since this is a chilled dessert, reheating isn’t recommended. Instead, you can enjoy it cold straight from the fridge or let it sit at room temperature for about 10 minutes if you prefer a less chilled texture. Stir before serving to maintain smoothness.
FAQs
Can I use regular cream cheese instead of dairy-free?
Absolutely! If you don’t need the recipe to be dairy-free, regular cream cheese will work beautifully and add a classic richness. Just be mindful of the overall creaminess and adjust plant-based milk slightly if needed.
What is the best matcha powder for this recipe?
Look for a high-quality, culinary-grade matcha with a vibrant green color and a smooth, slightly sweet taste. Avoid cheap or low-quality powders that can taste bitter or grassy.
Can I substitute chia seeds with anything else?
Chia seeds are essential here for their unique gel-forming abilities. Flax seeds or other seeds won’t create the same pudding texture, so they are not recommended as direct substitutes.
Is this recipe suitable for breakfast?
Definitely! This Matcha Cheesecake Chia Pudding Recipe makes a fantastic and nourishing breakfast or snack. It’s packed with fiber, protein, and antioxidants to keep you energized and satisfied.
How sweet is the pudding? Can I adjust it?
The agave syrup provides gentle sweetness, but it’s easily adjustable. Feel free to add more or less based on your taste preference or swap in maple syrup or honey if not vegan.
Final Thoughts
This Matcha Cheesecake Chia Pudding Recipe is one of those rare gems that manages to be deliciously indulgent and healthfully satisfying at the same time. It’s easy to make, visually stunning, and perfect for anyone looking to brighten their day with a creamy, green-powered treat. I encourage you to give it a try and watch it become a beloved favorite in your recipe collection.
Print
Matcha Cheesecake Chia Pudding Recipe
- Prep Time: 15 minutes
- Cook Time: 5 minutes
- Total Time: 1 hour 20 minutes (including chilling time)
- Yield: 3 servings
- Category: Dessert
- Method: Blending
- Cuisine: Fusion, Plant-Based
- Diet: Vegan, Gluten Free
Description
This Matcha Cheesecake Chia Pudding is a creamy, dairy-free dessert combining the vibrant flavors of matcha green tea and tangy plant-based cream cheese. Blended with chia seeds for a nutritious texture, it’s naturally sweetened with agave and dates, making it a perfect make-ahead treat for breakfast or dessert with a delightful crumble topping.
Ingredients
Pudding Base
- 1/3 cup plain plant-based yogurt (soy recommended)
- 3 tbsp dairy-free cream cheese
- 2 tbsp agave syrup (adjust to taste)
- 3/4 cup unsweetened plant-based milk (soy recommended)
- 1/2 tsp vanilla bean paste or extract
- Zest and juice of 1/2 lemon
- 1/4 tsp kosher salt (or to taste)
- 1 1/2 tsp good quality matcha powder
- 1/3 cup hot water (about 175°F)
- 1/3 cup chia seeds
Crumble Topping
- 3 tbsp almonds
- 3 tbsp gluten-free oats or banana chips
- 3 medjool dates
- Zest of 1/2 lemon
- Pinch of salt
Optional Serving
- Strawberry jam
Instructions
- Prepare the Blender Mixture: In a blender cup, combine plain plant-based yogurt, dairy-free cream cheese, agave syrup, unsweetened plant-based milk, vanilla bean paste, the zest and juice of half a lemon, and kosher salt. This mixture will create the creamy cheesecake-like base for the pudding.
- Sift and Whisk Matcha: Place a small mesh sieve over a bowl. Sift matcha powder through it to avoid clumps. Add hot water (approx. 175°F) to the bowl. Using a bamboo whisk, briskly whisk the matcha and water in a W-shape motion for about one minute until frothy and smooth.
- Blend All Ingredients: Pour the whisked matcha into the blender cup containing the yogurt mixture. Blend everything until completely smooth, ensuring the matcha is fully incorporated without lumps.
- Mix with Chia Seeds and Refrigerate: Transfer 1/3 cup of chia seeds to a large storage container. Pour the blended matcha mixture over the chia seeds and whisk thoroughly to combine. Cover and let sit for 5 minutes. Whisk again to break up any clumps. Cover and refrigerate for at least one hour, preferably overnight to allow the chia seeds to absorb the liquid and thicken.
- Make the Crumble Topping: In a mini-food processor, pulse almonds, gluten-free oats or banana chips, medjool dates, lemon zest, and a pinch of salt until the mixture becomes crumbly to your preference. This topping adds texture and a sweet nutty crunch.
- Assemble and Serve: Optional: spread a tablespoon of strawberry jam into the serving dish for sweetness. Spoon in the chilled chia pudding and top generously with the crumble mixture. Enjoy immediately or keep refrigerated until ready to serve.
Notes
- Use a fine mesh sieve to sift matcha powder, preventing clumps and ensuring smooth flavor integration.
- Agave syrup sweetness can be adjusted according to personal preference.
- For best texture, allow chia pudding to set overnight for maximum thickening.
- Substitute gluten-free oats with banana chips for a different texture in crumble.
- The crumble topping can be customized by adding other nuts or dried fruits.
- If you do not have a mini-food processor, pulse the crumble ingredients by hand using a mortar and pestle but expect a coarser texture.
- This recipe is fully vegan and gluten-free when using gluten-free oats and dairy-free cream cheese.
