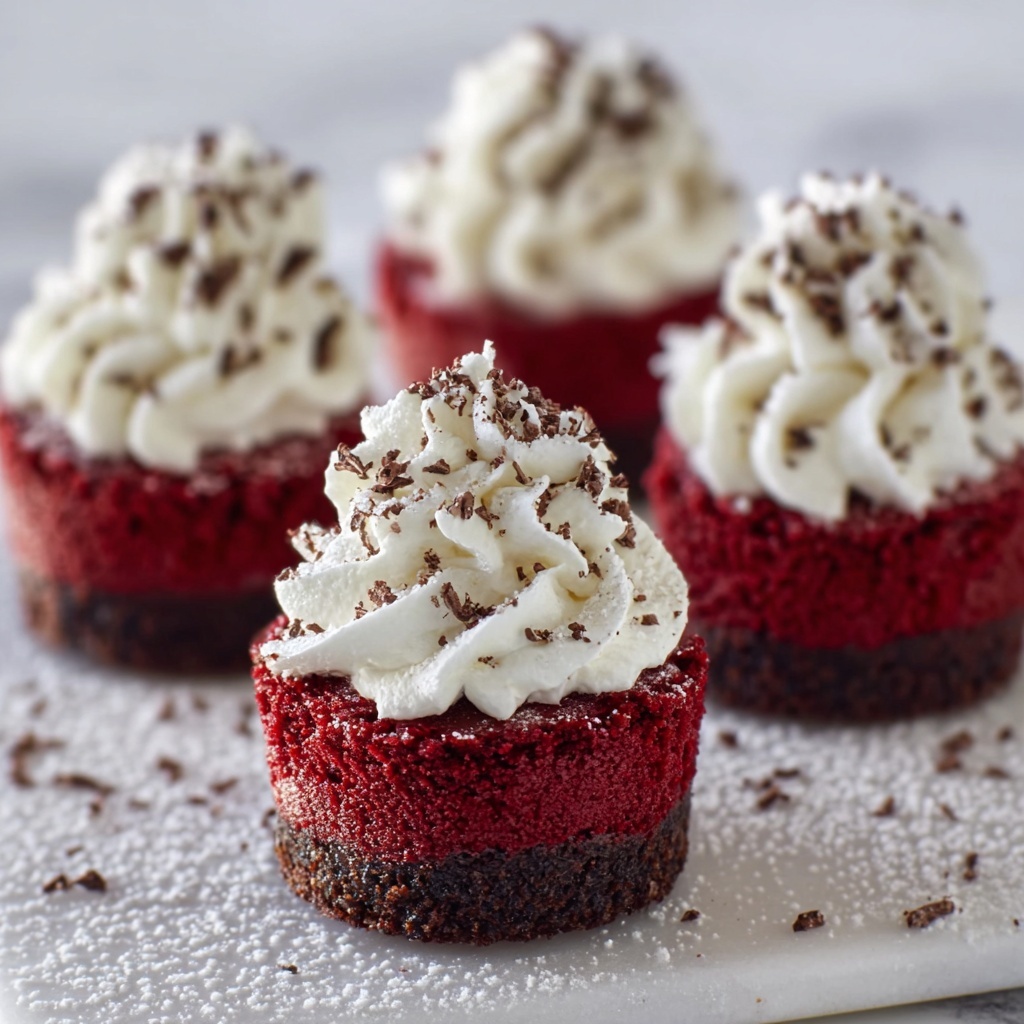
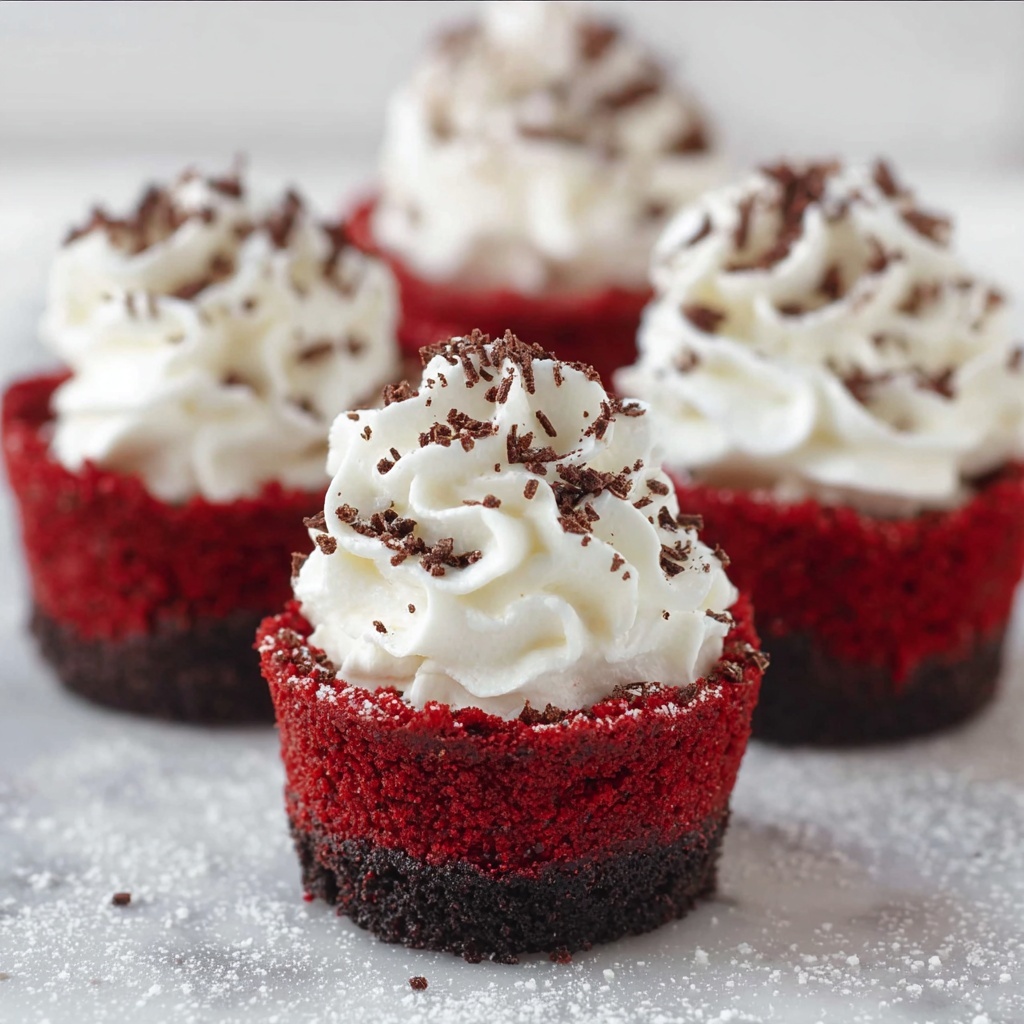
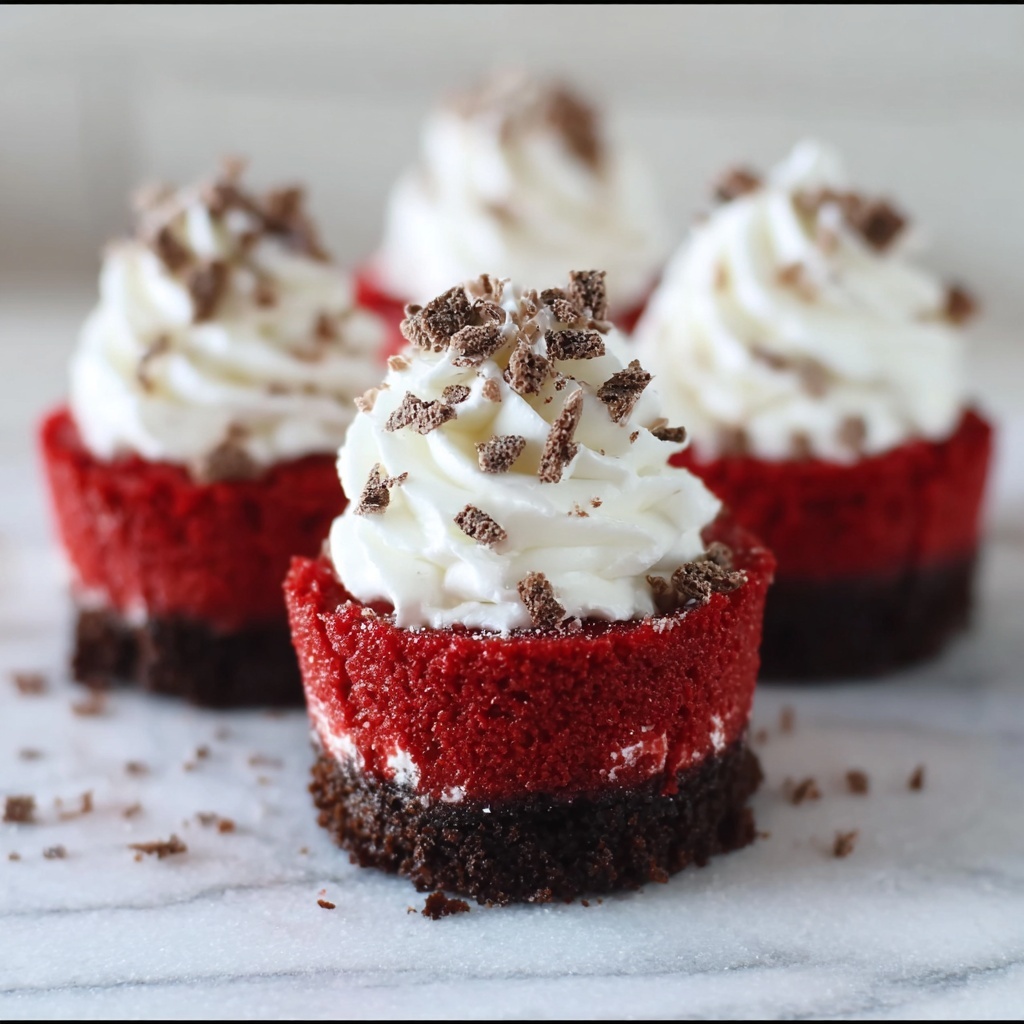
If you are craving a dessert that masterfully combines the rich flavors of classic red velvet cake with the creamy decadence of cheesecake, then this Red Velvet Cheesecake Mini Pies Recipe is going to become your new favorite. These irresistible mini pies are perfect for parties, holidays, or just a sweet treat to brighten your day. Each bite offers a luscious, velvety texture with a hint of cocoa, topped with light whipped cream and delicate chocolate shavings. You will love how easy they are to make and how stunning they look when served. Trust me, once you try this recipe, these mini pies will have a permanent spot in your dessert rotation!
Ingredients You’ll Need
Getting the perfect balance of flavors and textures in this recipe depends on a few simple but essential ingredients. Each one plays a vital role—from the crunchy chocolate wafer crust to the smooth and creamy cheesecake filling, and the fluffy whipped cream finish.
- Chocolate wafer cookies (36 crushed): These create a rich and firm crust that perfectly complements the cheesecake.
- Butter (4 1/2 tablespoons, melted): Binds the cookie crumbs together for a sturdy base with a buttery flavor.
- Corn syrup or honey (1 teaspoon): Adds a subtle sweetness and helps the crust hold its shape.
- Cream cheese (2 packages, 8 oz each, softened): The star ingredient that gives the pies their classic creamy texture.
- Granulated sugar (3/4 cup): Sweetens the cheesecake filling without overpowering the red velvet flavor.
- Vanilla extract (2 teaspoons): Enhances the overall flavor with a warm, aromatic touch.
- Red food coloring (2 tablespoons): Gives the cheesecake its iconic, vibrant red color.
- Eggs (2): Provide structure and richness to the cheesecake filling.
- Unsweetened baking cocoa (1/4 cup): Adds depth and that signature subtle chocolate note of red velvet.
- Original Bisquick™ mix (1/2 cup): Helps maintain the moist, tender texture and adds a little extra body.
- Milk (3/4 cup): Makes the filling silky smooth and creamy.
- Whipping cream (2 cups): Whipped to perfection for a light and airy topping.
- Powdered sugar (2 tablespoons): Sweetens the whipped cream delicately without weighing it down.
- Chocolate shavings (optional): Adds an elegant and tasty finishing touch with extra chocolate flair.
How to Make Red Velvet Cheesecake Mini Pies Recipe
Step 1: Prepare Your Baking Cups and Crust
Start by preheating your oven to 350°F and lining 18 regular muffin cups with paper baking cups. Next, crush your chocolate wafer cookies finely and combine them with melted butter and a touch of corn syrup or honey. This mixture will form your crust. Press a generous spoonful of the crumbs firmly into the bottom of each muffin cup using your fingertips to ensure a solid, flavorful base.
Step 2: Mix the Cheesecake Batter
In a large bowl, beat the softened cream cheese with an electric mixer until smooth and creamy. Gradually add granulated sugar, continuing to beat until the mixture is fluffy. Stir in the vanilla extract and the luscious red food coloring, blending everything until the color is uniform. Next, beat in the eggs one at a time, making sure they are fully incorporated before adding the next. Add the unsweetened cocoa and Bisquick mix, then pour in the milk, beating until you have a creamy, streak-free batter with a beautiful chocolaty hue.
Step 3: Fill and Bake the Mini Pies
Divide the cheesecake batter evenly among your prepared muffin cups, filling them almost to the top. Bake for 30 to 35 minutes, or until the centers are set and firm to the touch. After baking, allow the mini pies to cool for about 15 minutes—during this time, the centers will settle slightly, which is perfectly normal. Then, refrigerate the pies in the pan for at least 45 minutes to let them chill and fully set.
Step 4: Whip the Cream Topping
While your mini pies are chilling, whip the cold whipping cream in a chilled bowl on medium speed for 30 seconds, then increase to high speed until stiff peaks form. During the last minute of whipping, gradually add the powdered sugar to achieve a sweet but light and fluffy finish that’s just right for topping your mini pies.
Step 5: Assemble and Garnish
Carefully remove the chilled mini pies from the pan by gently loosening them with a butter knife, then peel off the paper liners. Top each cheesecake mini pie generously with a dollop of the sweet whipped cream and sprinkle with delicate chocolate shavings if you like. These little beauties are best served chilled to enjoy that perfect balance of textures and flavors.
How to Serve Red Velvet Cheesecake Mini Pies Recipe
Garnishes
Adding the right garnishes can elevate your Red Velvet Cheesecake Mini Pies Recipe to new heights. Fresh raspberries or a light dusting of cocoa powder make lovely colorful accents. You could also try a drizzle of chocolate or raspberry sauce for a gourmet touch. These finishing touches not only enhance the visual appeal but add nuanced flavors that complement the velvety cheesecake perfectly.
Side Dishes
These mini pies are so rich and fulfilling that they shine best on their own, but if you’d like to pair them with something else, consider fresh fruit salad or a scoop of vanilla bean ice cream to provide a refreshing counterbalance. A cup of robust coffee or a rich hot chocolate are excellent beverages to accompany these delightful treats.
Creative Ways to Present
For parties or festive occasions, arrange your mini pies on a beautiful tiered dessert stand to showcase their charming size and vibrant color. You can also serve them in individual clear dessert cups layered with crushed cookies and whipped cream for a playful twist. Personalizing each pie with edible gold flakes or custom cake toppers adds a bit of sparkle and makes your presentation truly unforgettable.
Make Ahead and Storage
Storing Leftovers
Leftover Red Velvet Cheesecake Mini Pies can be stored in an airtight container in the refrigerator for up to 3 days. Make sure to keep them covered well to prevent the cheesecake from drying out and to maintain the freshness of the whipped cream topping.
Freezing
If you want to prepare these mini pies in advance, they freeze beautifully. Wrap each mini pie individually in plastic wrap and place them in a freezer-safe container. They can be frozen for up to 1 month. When ready to enjoy, thaw the pies overnight in the refrigerator for best texture and taste.
Reheating
These mini pies are best enjoyed cold or at room temperature. Reheating is not necessary since the creamy texture is at its best when chilled. If you prefer, you can let them sit out for 15-20 minutes to soften slightly before serving.
FAQs
Can I use a different cookie for the crust?
Absolutely! While chocolate wafer cookies provide a rich, chocolatey flavor that complements red velvet wonderfully, you can substitute with graham crackers or even Oreo crumbs for a slightly different twist. Just make sure to keep the crumb size fine and press firmly for the best crust texture.
Is it possible to make this recipe dairy-free?
Making these mini pies completely dairy-free is a bit challenging due to the cream cheese and whipping cream. However, you could try using dairy-free cream cheese and coconut-based whipping cream substitutes, but expect some variation in taste and texture.
How important is the red food coloring?
The red food coloring is key for achieving that classic red velvet look that makes this recipe so special. You can use gel food coloring for a more vibrant color without altering the batter’s consistency.
Can I make these in a larger pie dish instead of mini pies?
Yes, you can adapt the recipe to a regular pie dish. Just increase the baking time accordingly and monitor until the center sets. The mini pies, however, are perfect for portion control and party settings!
What’s the best way to crush the cookies?
You can use a food processor for quick, even crumbs, or place the cookies in a sealed plastic bag and crush with a rolling pin. The key is to achieve fine crumbs that pack well into the muffin cup bases.
Final Thoughts
This Red Velvet Cheesecake Mini Pies Recipe is truly a gem that blends two beloved desserts into one irresistibly delightful treat. They are surprisingly easy to make and bring such joy to anyone who tries them. Whether it’s a special occasion or just a moment when you need something sweet and creamy, these mini pies will never disappoint. I encourage you to try this recipe soon and watch it become a beloved staple in your dessert repertoire!
Print
Red Velvet Cheesecake Mini Pies Recipe
- Prep Time: 30 minutes
- Cook Time: 35 minutes
- Total Time: 2 hours 30 minutes
- Yield: 18 mini pies
- Category: Dessert
- Method: Baking
- Cuisine: American
- Diet: Vegetarian
Description
These Red Velvet Cheesecake Mini Pies are delightful individual-sized treats combining a rich chocolate wafer crust with creamy red velvet cheesecake filling, topped with a fluffy whipped cream and chocolate shavings. Perfect for parties or special occasions, they offer a luscious blend of flavors with a striking red color that’s sure to impress.
Ingredients
Crust
- 36 chocolate wafer cookies, crushed (about 1 3/4 cups)
- 4 1/2 tablespoons butter, melted
- 1 teaspoon corn syrup or honey
Cheesecake Filling
- 2 packages (8 oz each) cream cheese, softened
- 3/4 cup granulated sugar
- 2 teaspoons vanilla
- 2 tablespoons red food color
- 2 eggs
- 1/4 cup unsweetened baking cocoa
- 1/2 cup Original Bisquick™ mix
- 3/4 cup milk
Topping
- 2 cups whipping cream
- 2 tablespoons powdered sugar
- Chocolate shavings, if desired
Instructions
- Prepare Oven and Muffin Cups: Heat the oven to 350°F. Place a paper baking cup in each of 18 regular-size muffin cups to line the pan and make removal easier.
- Make the Crust: In a small bowl, combine the crushed chocolate wafer cookies, melted butter, and corn syrup or honey. Divide this crumb mixture evenly among the muffin cups. Using your fingertips, firmly press the crumbs into the bottom of each cup to form a solid crust layer.
- Prepare the Cheesecake Filling: In a large bowl, beat the softened cream cheese with an electric mixer on medium speed until smooth. Gradually add the granulated sugar and continue beating until fluffy. Next, mix in vanilla and red food coloring. Add eggs one at a time, beating well after each addition. Then, add the cocoa powder and Bisquick mix, beating until the batter is chocolatey and streak-free. Finally, pour in the milk and beat until smooth and creamy.
- Fill the Cups: Evenly divide the cheesecake batter among the prepared crust-lined muffin cups, filling almost to the top.
- Bake the Mini Pies: Bake in the preheated oven for 30 to 35 minutes, or until the centers are firm to the touch. Once done, cool the mini pies for 15 minutes—the centers will naturally sink slightly as they cool. After cooling, refrigerate the pan with the mini pies for at least 45 minutes to set.
- Make the Whipped Cream Topping: In a chilled small bowl, beat the whipping cream on medium speed for 30 seconds. Gradually increase the speed to high and continue beating until stiff peaks form. During the last minute of beating, add the powdered sugar and mix until incorporated.
- Serve: Remove the chilled mini pies from the refrigerator. Using a butter knife, gently loosen and pop each cheesecake out of the muffin pan. Carefully peel away the paper liners. Top each mini pie with a generous dollop of whipped cream and sprinkle chocolate shavings over the whipped cream for garnish. Serve chilled and enjoy.
Notes
- Make sure the cream cheese is softened to room temperature to ensure a smooth batter without lumps.
- If you prefer a deeper red color, adjust the amount of red food coloring accordingly.
- The centers will sink slightly after baking—that is normal and does not indicate undercooking.
- Chocolate shavings are optional but add an elegant finishing touch.
- These mini pies can be stored in the refrigerator for up to 3 days in an airtight container.


