“`html
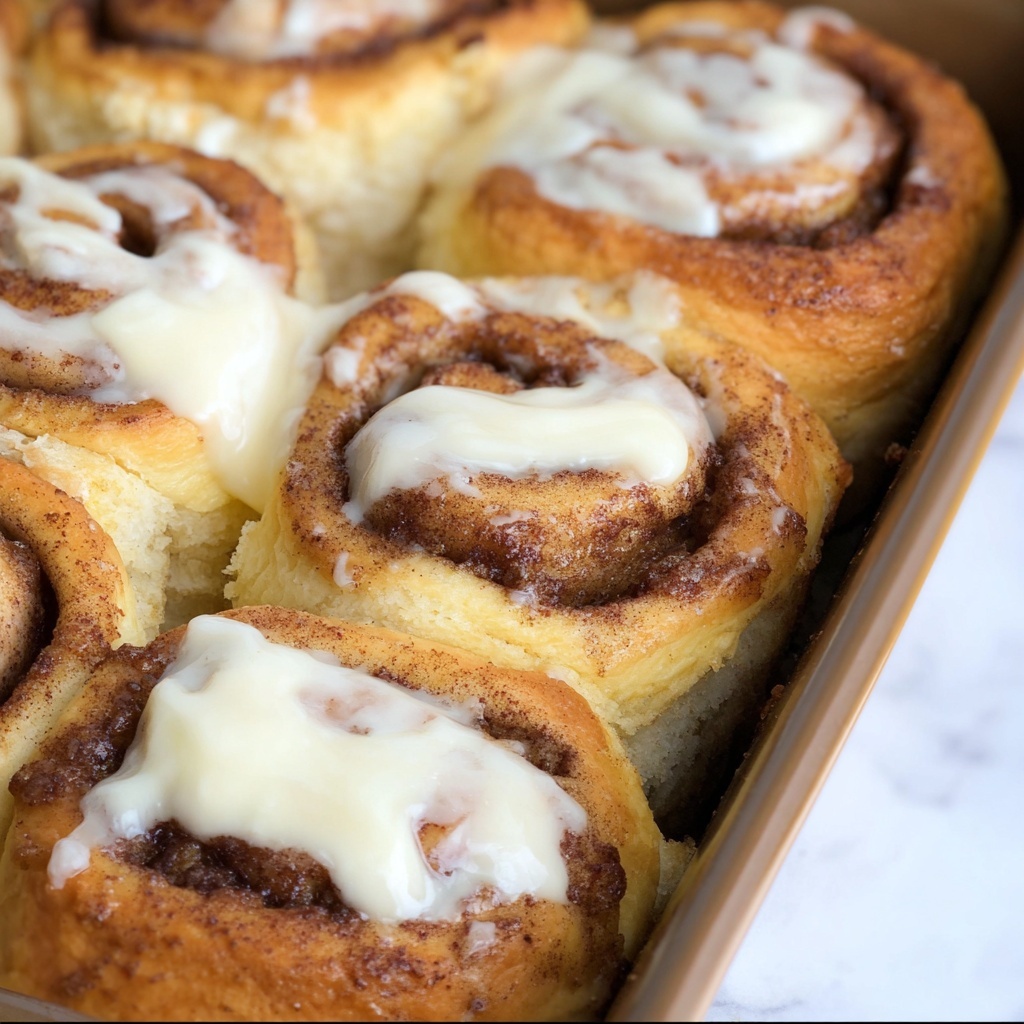
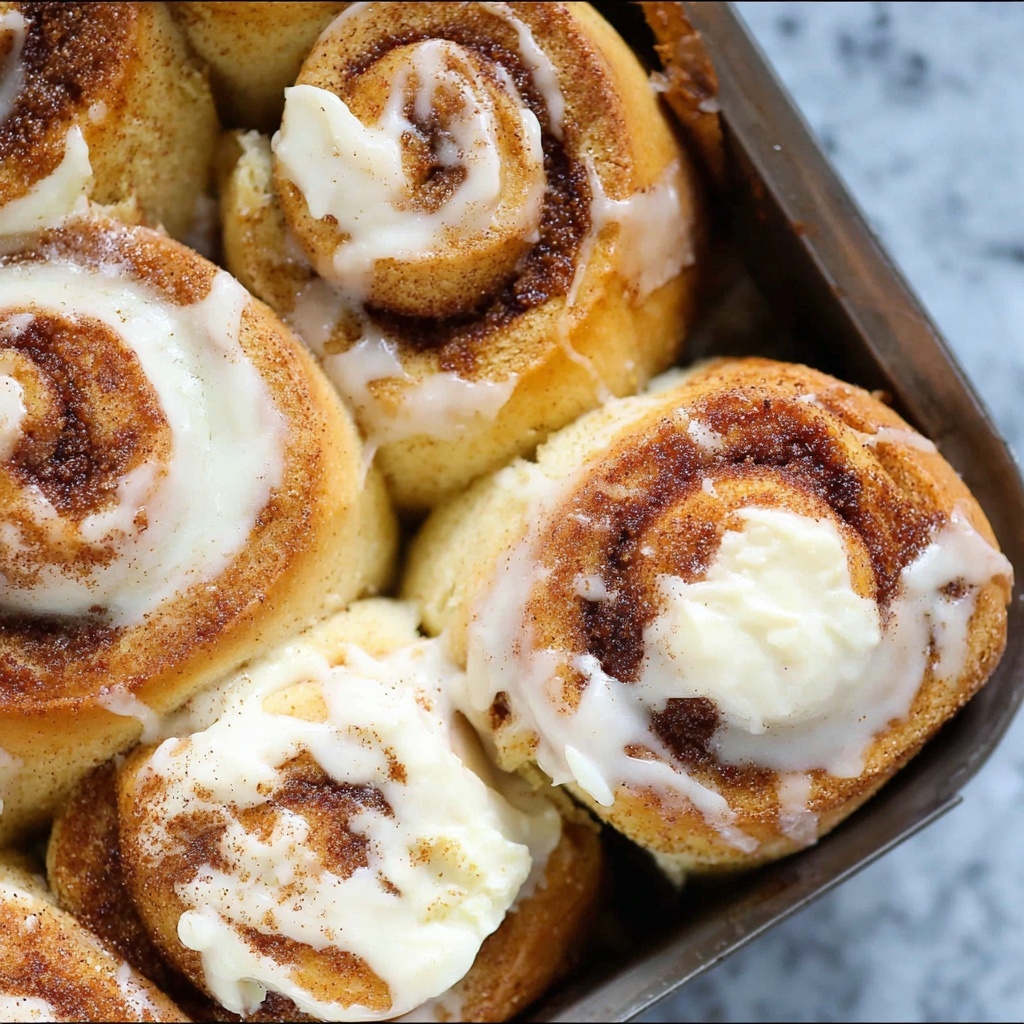
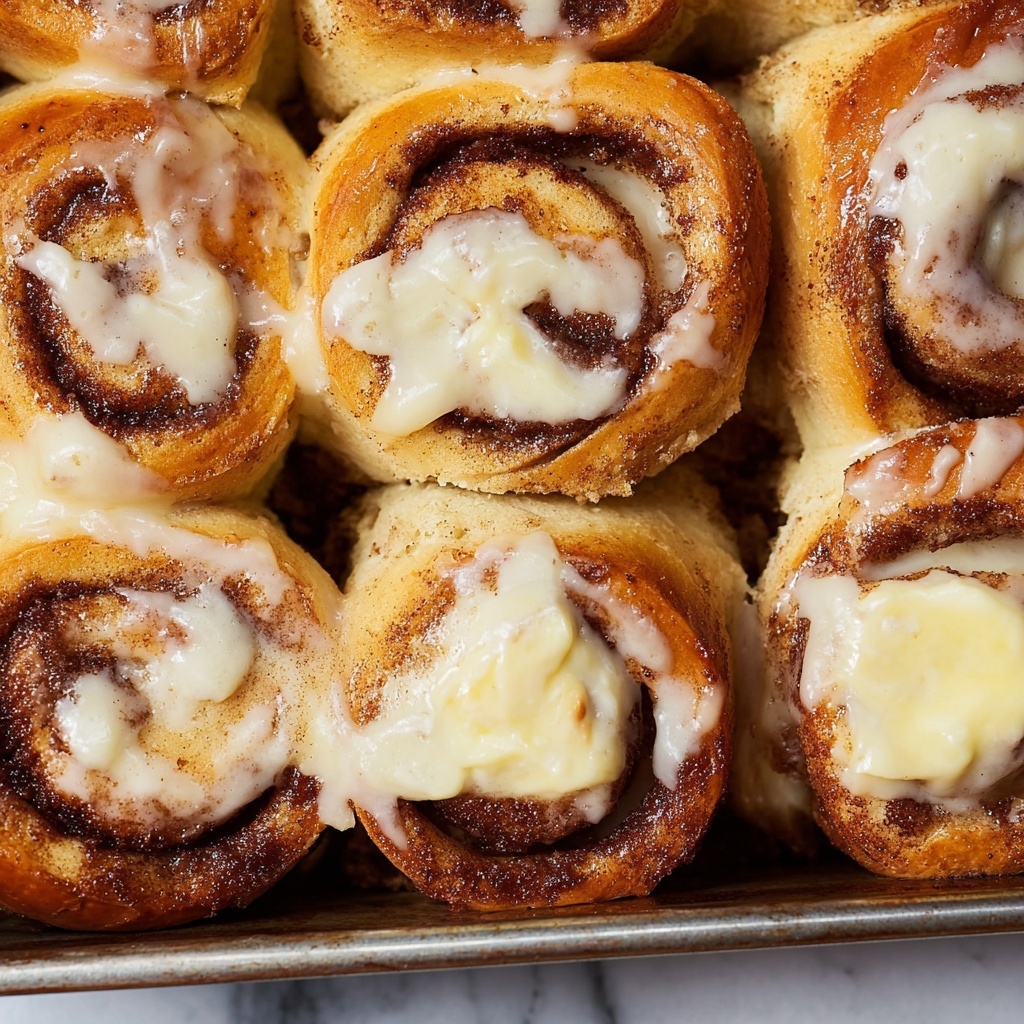
There is something truly magical about the King’s Hawaiian Cheesecake Danish Recipe that makes it a perfect treat any time of day. Imagine soft, sweet King’s Hawaiian rolls, brushed with rich melted butter and a heavenly cinnamon-brown sugar glaze, then hugging a luscious, creamy cheesecake filling that’s perfectly smooth and just the right amount of sweetness. This delightful blend of textures and flavors brings a cozy, bakery-fresh experience right to your kitchen, making it impossible not to smile with each bite. Whether it’s for a special brunch, an indulgent snack, or a dessert that steals the show, this recipe is guaranteed to become your go-to crowd pleaser.
Ingredients You’ll Need
You only need a handful of simple, everyday ingredients to create this enchanting King’s Hawaiian Cheesecake Danish Recipe. Each one plays an important role — the buttery sweetness of the rolls, the warm spices, and the creamy richness of the cheesecake filling all come together in perfect harmony.
- 1 tablespoon butter (melted): For greasing your baking dish and adding a hint of buttery goodness underneath the rolls.
- 12 pack Hawaiian sweet rolls: The star of the show, their soft, fluffy texture and signature sweetness make them ideal for this recipe.
- ⅓ cup butter (melted): Used to combine with sugar and spices to create a delicious glaze that coats the rolls.
- 2 tablespoons brown sugar: Adds a deep, caramel-like sweetness that perfectly complements the cinnamon and nutmeg.
- ½ tablespoon ground cinnamon: A warm, fragrant spice that brings comforting flavor to the glaze.
- ⅛ teaspoon freshly grated nutmeg: Adds subtle complexity and earthiness—feel free to skip or reduce if you’re not a fan.
- 8 ounces cream cheese: The rich and smooth base of the cheesecake filling, best if at room temperature for easy mixing.
- 1 large egg (beaten): Helps bind the cheesecake mixture, giving it a silky, custardy texture.
- 3 tablespoons granulated sugar: Sweetens the cream cheese filling just right without overpowering.
How to Make King’s Hawaiian Cheesecake Danish Recipe
Step 1: Prep Your Pan and Rolls
Start by preheating your oven to 375°F to get everything nice and ready. Melt 1 tablespoon of butter and spread it evenly over the bottom of a 9×13-inch baking dish or any pan with sides—that buttery layer will keep your rolls from sticking and add subtle flavor from below. Next, place your 12 Hawaiian sweet rolls side by side in the dish, making sure they sit snugly together. Then, take a sharp knife and cut an X into the top of each roll about two-thirds down, but don’t slice all the way through the bottom. This creates a little pocket that’s perfect for holding the creamy filling.
Step 2: Make the Cinnamon Sugar Glaze
In a small measuring cup or bowl, stir together ⅓ cup melted butter, 2 tablespoons brown sugar, the ground cinnamon, and freshly grated nutmeg. This mixture will become the luscious glaze that drapes over your rolls, infusing them with sweet spice and buttery richness. Pour this evenly over your prepared rolls, making sure each one gets a good coating—this step guarantees that lip-smacking exterior that keeps you reaching for more.
Step 3: Prepare the Cheesecake Filling
Take your cream cheese out so it’s at room temperature—it will mix up smoothly and without lumps. Stir the cream cheese until perfectly smooth, then add in the 3 tablespoons of granulated sugar and stir again. Next, beat the large egg and fold it into the mixture until it’s fully incorporated and silky. This cheesecake filling is the creamy heart of your King’s Hawaiian Cheesecake Danish Recipe and deserves a little gentle TLC to get it just right.
Step 4: Stuff the Rolls
Now comes the fun part! To fill each roll with the cheesecake mixture, the easiest method is using a piping bag fitted with a large tip. If you don’t have one handy, no worries—you can use a zip-top bag and snip a small corner off to mimic a piping effect, or even spoon the filling gently into the cut X pockets. The key is to get the cream cheese filling nestled down inside the rolls rather than just sitting on top, giving each bite that perfect balance of soft bread and creamy center. Don’t be discouraged if it takes a bit of patience; it’s worth the effort.
Step 5: Bake to Perfection
Place your filled pan of rolls into the preheated oven and bake uncovered for 12 to 15 minutes. You’re essentially setting the egg in the cream cheese mixture while getting the tops of the rolls golden and slightly crusty. If you prefer a softer roll, aim for the 12-minute mark; if you like a bit more golden texture, 15 minutes does the trick. If you have an instant-read thermometer, check that the filling hits approximately 145°F for safety. The aroma during baking will be irresistible—brace yourself!
Step 6: Cool and Serve
Once out of the oven, let your Danish cool for just a few minutes. The filling will be piping hot and a little runny at first, so a short rest lets everything set nicely without losing that warm, gooey charm. Serve your King’s Hawaiian Cheesecake Danish Recipe warm and watch as everyone’s faces light up with delight.
How to Serve King’s Hawaiian Cheesecake Danish Recipe
Garnishes
While this Danish is perfect on its own, a light dusting of powdered sugar adds a pretty finishing touch and a hint of extra sweetness. You could also drizzle a simple vanilla glaze or even a bit of honey for added shine and flavor. Fresh berries on the side or a sprinkle of toasted coconut can bring a vibrant contrast in texture and color, making your presentation feel extra special.
Side Dishes
This recipe pairs beautifully with a hot cup of coffee or tea for breakfast or brunch. For a heartier spread, consider serving it alongside fresh fruit salad or a crisp green salad with a tangy vinaigrette to balance the richness. If you’re turning this into dessert, a scoop of vanilla ice cream or a dollop of whipped cream will elevate the creamy indulgence factor to the next level.
Creative Ways to Present
Want to impress friends or family? Try serving individual rolls on small dessert plates with a garnish of mint leaves or edible flowers. You can also place the entire pan on the table for a cozy, family-style treat, letting everyone pull their own warm Danish. For gatherings, consider making mini versions by using slider-sized rolls—equally delicious and perfectly bite-sized.
Make Ahead and Storage
Storing Leftovers
If you have any leftovers from your King’s Hawaiian Cheesecake Danish Recipe, store them in an airtight container in the refrigerator. They will keep well for 3 to 4 days and maintain most of their delightful texture and flavor when properly stored. Just be sure to cool them fully before refrigerating to prevent sogginess.
Freezing
Although fresh is best, you can freeze unbaked rolls assembled with the cream cheese filling. Wrap the pan tightly with plastic wrap and aluminum foil before freezing for up to 2 months. When ready to enjoy, thaw overnight in the refrigerator and bake as directed, adding a few extra minutes if needed. Avoid freezing fully baked Danish as the texture may suffer.
Reheating
To bring your stored or leftover Danish back to life, reheat individual rolls gently in the microwave for 20 to 30 seconds or warm them in a preheated oven at 325°F for 5 to 7 minutes. This helps restore that delightful gooey cream cheese filling and soft roll texture, making it taste almost as fresh as straight from the oven.
FAQs
Can I use regular sweet rolls instead of Hawaiian rolls?
Absolutely! While Hawaiian rolls add a unique sweetness and softness, regular sweet dinner rolls can work as a substitute if that’s what you have on hand. Just keep in mind the flavor and texture will be slightly different.
Is it necessary to cut an X in the rolls?
Cutting an X on top of each roll creates pockets for the cream cheese filling, which helps the filling stay inside during baking. If you skip this step, the filling might spill over or sit on top rather than inside the rolls.
Can I make the cream cheese filling ahead of time?
Yes, you can prepare the cheesecake mixture a few hours ahead and keep it refrigerated until you’re ready to fill the rolls. Bring it back to room temperature before piping or spooning for best results.
What if I don’t have a piping bag?
No worries! A zip-top plastic bag with a small corner cut off works just as well. You can also carefully spoon the filling into the cuts, though it might take a bit more patience to get it evenly distributed.
How do I know when the Danish is done baking?
Look for golden brown tops on the rolls and a set cheesecake filling. The filling should reach at least 145°F if you use a thermometer. Typically, 12 to 15 minutes in a 375°F oven works perfectly.
Final Thoughts
If you’re looking for a recipe that combines comforting sweetness with creamy richness in a way that only King’s Hawaiian rolls can deliver, the King’s Hawaiian Cheesecake Danish Recipe is an absolute must-try. It’s approachable, rewarding, and fills your kitchen with an unforgettable aroma that invites relaxation and joy. So grab your ingredients, channel that warm, cozy feeling, and treat yourself and your loved ones to this wonderful homemade delight—you’ll be so glad you did!
“`
Print
King’s Hawaiian Cheesecake Danish Recipe
- Prep Time: 8 minutes
- Cook Time: 14 minutes
- Total Time: 22 minutes
- Yield: 12 servings
- Category: Breakfast, Brunch, Snack
- Method: Baking
- Cuisine: American
Description
A delightful and easy-to-make King’s Hawaiian Cheesecake Danish recipe featuring sweet Hawaiian rolls filled with a creamy cinnamon-spiced cream cheese mixture, baked to golden perfection. Perfect for breakfast, brunch, or a sweet snack.
Ingredients
Butter and Topping
- 1 tablespoon butter (melted)
- ⅓ cup butter (melted)
- 2 tablespoons brown sugar
- ½ tablespoon ground cinnamon
- ⅛ teaspoon freshly grated nutmeg
Main Ingredients
- 12 pack Hawaiian sweet rolls
- 8 ounces cream cheese (room temperature)
- 1 large egg (beaten)
- 3 tablespoons granulated sugar
Instructions
- Preheat and prepare pan: Preheat your oven to 375°F. Melt 1 tablespoon of butter and spread it evenly in a 9×13-inch baking dish or similar pan to prevent sticking and add flavor.
- Arrange rolls: Place the 12 Hawaiian sweet rolls over the melted butter in the pan. Cut an X about two-thirds down into each roll, being careful not to cut completely through the bottom, to create spaces for the filling.
- Make topping mixture: In a measuring cup, combine ⅓ cup melted butter, brown sugar, ground cinnamon, and freshly grated nutmeg. Stir well and pour this mixture evenly over the tops of the rolls, allowing it to seep into the cuts.
- Prepare cream cheese filling: In a bowl, stir the room temperature cream cheese until smooth. Add granulated sugar and mix until fully incorporated. Then, add the beaten egg and blend thoroughly until the mixture is smooth and creamy.
- Fill the rolls: Using a piping bag fitted with a large tip, pipe the cream cheese mixture into the cuts in the rolls. Alternatively, use a zip-top bag with a corner snipped or spoon the filling carefully into each roll, working to get the filling inside rather than just on top.
- Bake: Bake the filled rolls uncovered in the preheated oven at 375°F for 12 to 15 minutes. The goal is to reach an internal temperature of 145°F to cook the egg safely. Bake for 12 minutes for softer rolls or longer if you prefer a crisper crust.
- Cool slightly and serve: Allow the rolls to cool for a couple of minutes after baking as the cream cheese filling will be very hot and runny right out of the oven.
- Store leftovers: Any leftover rolls should be stored in an airtight container in the refrigerator and will keep fresh for 3 to 4 days.
Notes
- Be careful not to cut the rolls completely through the bottom when making the X cuts.
- Using a piping bag makes filling the rolls much easier and neater.
- You can adjust baking time depending on whether you prefer softer or crustier rolls.
- Ensure cream cheese is at room temperature for easy mixing.
- Leftovers store well in the fridge and can be reheated gently.

