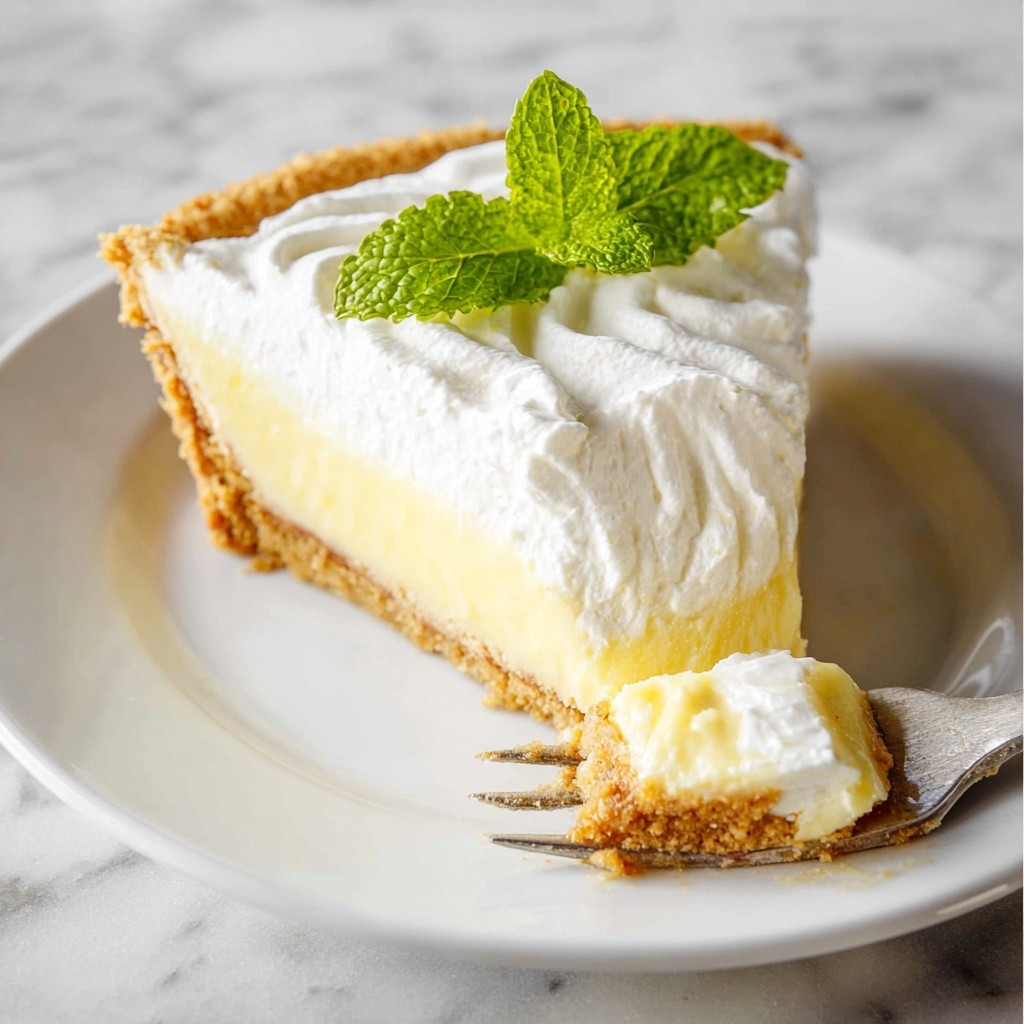
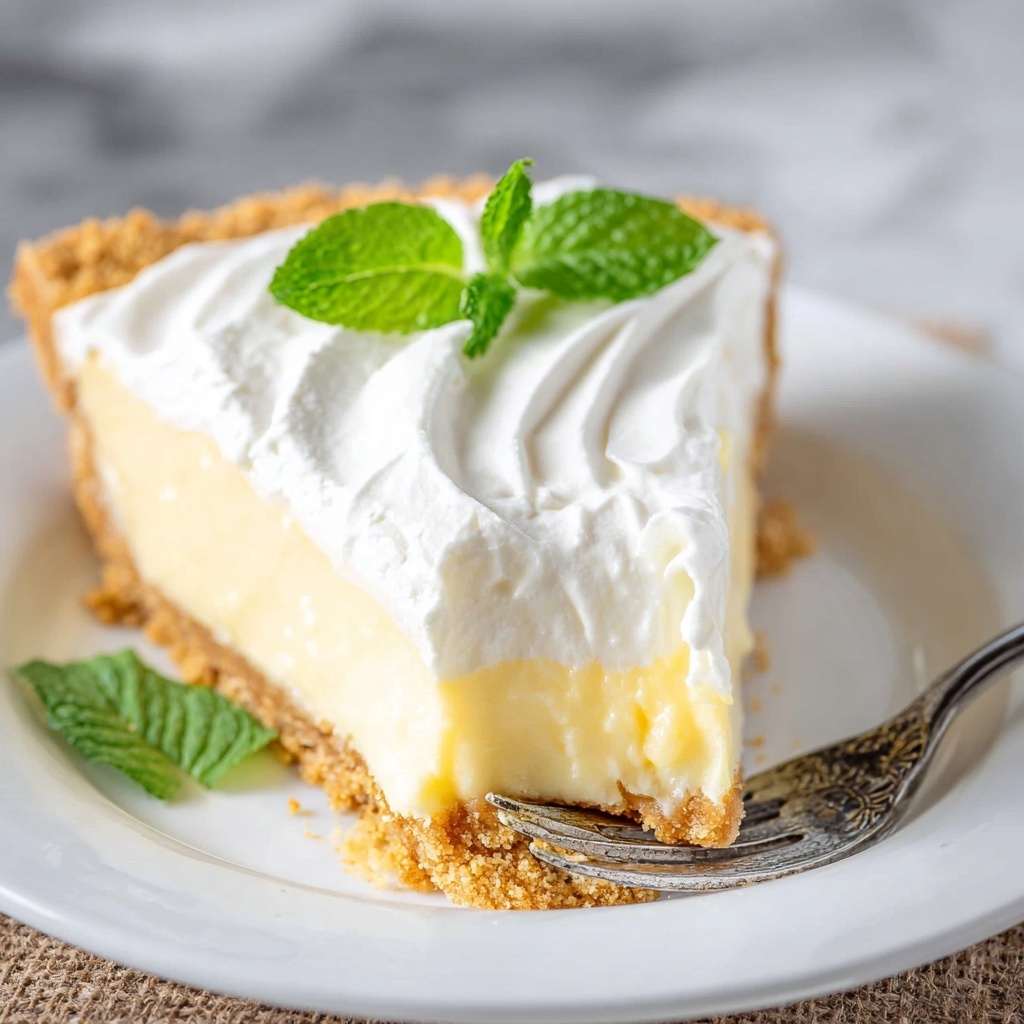
If you’re hunting for a dessert that feels like a sunny afternoon in every bite, this Lemon Buttermilk Icebox Pie Recipe is going to become your new best friend. With its perfect balance of tangy lemon, creamy buttermilk, and a sweet graham cracker crust, it’s refreshing, light, and utterly irresistible. Whether you’re whipping it up for family dinners or special occasions, this pie delivers a burst of citrusy goodness with a velvety texture that’ll have everyone asking for seconds.

Ingredients You’ll Need
Creating this Lemon Buttermilk Icebox Pie Recipe is delightfully simple, thanks to a handful of ingredients that each bring their own magic. The sweetness, tang, richness, and crunch all come together perfectly with these essentials.
- Sweetened condensed milk: Adds creamy sweetness and a silky texture that binds the filling beautifully.
- Fresh lemon zest: Packs a punch of bright, aromatic citrus flavor that really wakes up the palate.
- Lemon juice: The star for that refreshing tartness that balances sweetness perfectly.
- Egg yolks: Provide richness and help the filling set nicely during baking.
- Buttermilk: Adds tang and a luxurious creaminess that deepens the pie’s flavor complexity.
- Graham cracker crust: A buttery, crunchy base that complements the creamy filling with just the right texture contrast.
- Cool Whip: This whipped topping finishes the pie with a light, airy cloud that’s sweet and smooth.
How to Make Lemon Buttermilk Icebox Pie Recipe
Step 1: Preheat and Prepare Your Oven
Start by preheating your oven to 350ºF. This is key so the pie bakes evenly, giving the filling time to set without curdling. Using a consistent preheated oven makes the texture just right.
Step 2: Mix the Filling Ingredients
In a mixing bowl, whisk together the sweetened condensed milk, fresh lemon zest, lemon juice, egg yolks, and buttermilk. Take your time here to incorporate everything smoothly; the zest and juice add fresh brightness while the yolks and buttermilk build a rich, custard-like consistency.
Step 3: Pour Into the Crust
Pour your luscious lemon mixture into the graham cracker crust. Whether you’ve made your crust or grabbed a store-bought one, this step sets the stage for the amazing textures and flavors that follow.
Step 4: Bake and Cool
Bake the pie in your preheated oven for 20 to 25 minutes. You want the filling to be just set around the edges but still slightly jiggly in the middle—that’s where the magic happens, and it will firm up as it cools. After baking, let it cool to room temperature, then refrigerate for at least two hours to fully chill and develop flavor.
Step 5: Add the Finishing Touch
Once the pie is chilled, spread the thawed Cool Whip generously on top. This whipped layer adds a creamy, airy contrast that rounds out the sharpness of the lemon perfectly and makes every slice look as inviting as it tastes.
How to Serve Lemon Buttermilk Icebox Pie Recipe
Garnishes
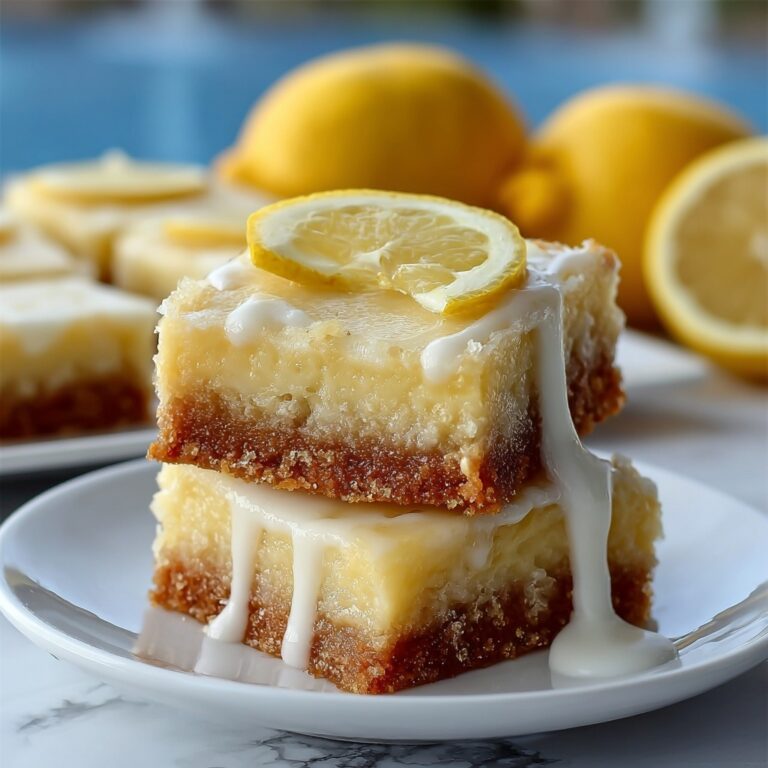
Garnishing your pie is a wonderful way to add an extra splash of color and texture. Fresh lemon slices or thin strips of lemon zest sprinkled on top provide a zingy visual cue to the flavor inside. A few fresh mint leaves can add a lovely subtle fragrance and a pop of green to brighten each slice.
Side Dishes
This pie shines as a standalone treat but pairs beautifully with light accompaniments like fresh berries or a simple berry compote. If you want to keep things extra creamy, a scoop of vanilla bean ice cream alongside adds indulgence without overpowering the pie’s citrus notes.
Creative Ways to Present
For a playful twist, serve individual mini icebox pies in small mason jars or clear dessert cups layered with crushed graham crackers and whipped topping. It’s a charming presentation that gives everyone their own personal taste of this Lemon Buttermilk Icebox Pie Recipe, perfect for parties or casual get-togethers.
Make Ahead and Storage
Storing Leftovers
Leftover pie keeps beautifully in the refrigerator, tightly covered with plastic wrap or stored in an airtight container. For best texture and flavor, enjoy it within 3 to 4 days. The filling remains creamy, and the crust holds its crunch up nicely with chilling.
Freezing
If you want to make this Lemon Buttermilk Icebox Pie Recipe ahead in bulk, it freezes well! Wrap the pie tightly in plastic wrap and then foil to prevent freezer burn. When ready, thaw overnight in the fridge before adding the Cool Whip topping just prior to serving for the best fresh taste and texture.
Reheating
Since this pie is best served cold, reheating isn’t recommended. Instead, simply allow it to come to fridge temperature or enjoy it chilled straight from the refrigerator. This keeps the filling firm and the crust crisp.
FAQs
Can I use regular milk instead of buttermilk?
Regular milk won’t provide the same tangy flavor or the slight acidity that buttermilk brings to the pie. If you don’t have buttermilk, you can make a simple substitute by adding 1 tablespoon of lemon juice or vinegar to 1 cup of milk and letting it sit for 5 minutes before using.
Is it safe to bake with raw egg yolks in this recipe?
In this recipe, the egg yolks are baked in the oven, which cooks them through safely. Just make sure to cook the pie for the full recommended time and bake at the correct temperature to avoid any safety concerns.
Can I make the crust from scratch?
Absolutely! A homemade graham cracker crust made from crushed graham crackers, melted butter, and sugar adds a lovely freshness. Just press it firmly into your pie dish and bake briefly before adding the filling to set it perfectly.
How tart will the pie be?
This Lemon Buttermilk Icebox Pie Recipe strikes a delightful balance between sweet and tart. The lemon juice gives a fresh tang, while the sweetened condensed milk and whipped topping mellow it out so it’s never too sharp.
Can I use a different whipped topping?
Yes! If you prefer, fresh whipped cream is a fantastic alternative that offers a richer, less sweet finish. Just whip some heavy cream with a bit of sugar and vanilla until soft peaks form and spread on top just before serving.
Final Thoughts
There really is something so joyful about making and sharing this Lemon Buttermilk Icebox Pie Recipe. It’s one of those desserts that feels both nostalgic and bright at the same time, perfect for any season. So go ahead, grab the ingredients, enjoy the simple process, and treat yourself and those you love to a slice of pure lemony bliss.
Print
Lemon Buttermilk Icebox Pie Recipe
- Prep Time: 10 minutes
- Cook Time: 25 minutes
- Total Time: 2 hours 35 minutes
- Yield: 6 servings
- Category: Dessert
- Method: Baking
- Cuisine: American
- Diet: Vegetarian
Description
This Lemon Buttermilk Icebox Pie is a refreshing, tangy dessert perfect for warm days. Featuring a creamy lemon custard baked in a crisp graham cracker crust and topped with light, fluffy Cool Whip, this pie is both easy to make and delightfully satisfying. The combination of sweetened condensed milk, fresh lemon juice, and buttermilk creates a luscious filling that sets beautifully in the oven, making it an ideal chilled treat for any occasion.
Ingredients
Filling
- 1 (14-oz) can sweetened condensed milk
- 1 tablespoon fresh lemon zest
- ½ cup fresh lemon juice
- 3 large egg yolks
- ¼ cup buttermilk
Crust
- 1 (9-inch) graham cracker crust (store-bought or homemade)
Topping
- 1 (8-oz) container Cool Whip, thawed
Instructions
- Preheat Oven: Preheat your oven to 350ºF (175ºC) to prepare for baking the pie.
- Prepare Filling: In a mixing bowl, whisk together the sweetened condensed milk, fresh lemon zest, lemon juice, egg yolks, and buttermilk until the mixture is smooth and well combined.
- Fill Crust: Pour the lemon custard mixture carefully into the prepared 9-inch graham cracker crust, spreading it evenly.
- Bake Pie: Place the pie in the preheated oven and bake for 20 to 25 minutes, or until the filling is set but still slightly jiggly in the center. Remove from oven and allow to cool completely.
- Chill: Once the pie has cooled to room temperature, refrigerate it for at least 2 hours to fully set and chill.
- Add Topping and Serve: Just before serving, spread the thawed Cool Whip evenly over the top of the chilled pie to add a light, creamy finish.
Notes
- Make sure not to overbake the pie; the center should remain slightly jiggly for a smooth texture once chilled.
- Fresh lemon juice and zest are key for the best bright, tangy flavor.
- Using a store-bought graham cracker crust saves time but homemade crust works equally well.
- For a firmer crust, you can pre-bake the graham cracker crust for 5 minutes before adding the filling.
- Keep the pie refrigerated until serving to maintain its texture and flavor.


