
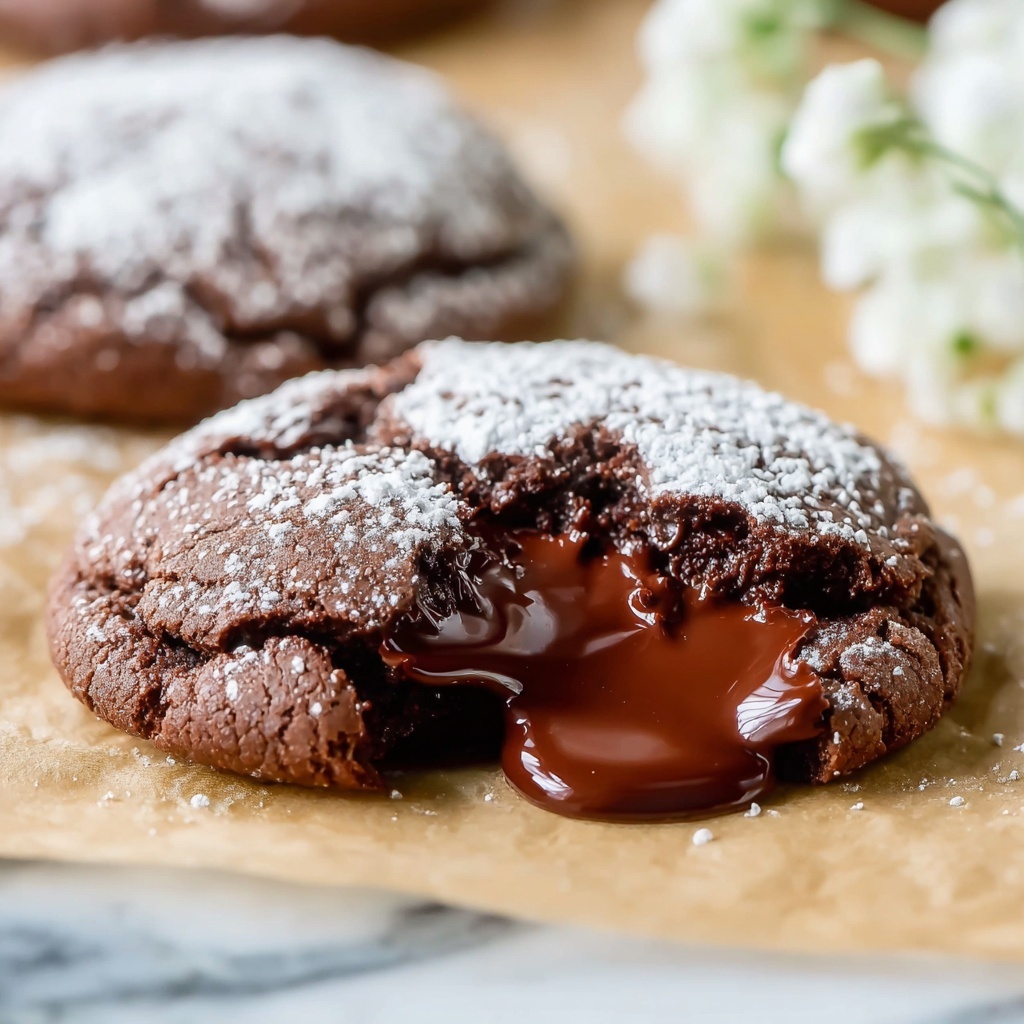
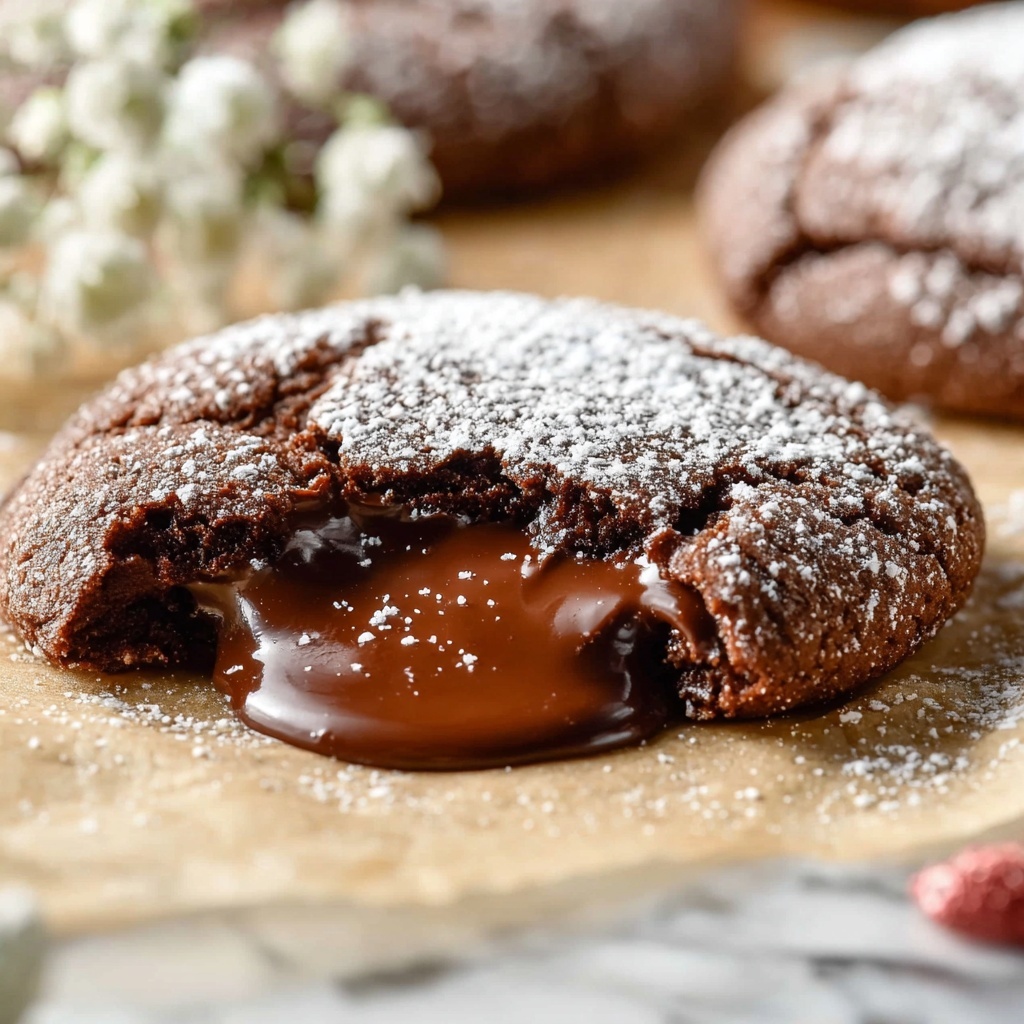
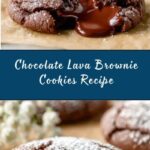
If you crave the perfect union of rich, fudgy brownie and molten chocolate centers oozing with every bite, this Chocolate Lava Brownie Cookies Recipe is your new best friend in the kitchen. These cookies deliver a heavenly chocolate experience with a gooey surprise tucked inside, combining the best of brownies and cookies into one irresistible treat. Whether you want a decadent dessert or an impressive snack for gatherings, these luscious, fudgy gems boast a delightful outer chew with a silky lava core that’s sure to wow everyone who tastes them.
Ingredients You’ll Need
Each ingredient in this Chocolate Lava Brownie Cookies Recipe has a purposeful role, contributing to the decadent texture, intense chocolate flavor, and those slightly crisp cookie edges you love. Keep these ingredients on hand for a straightforward but spectacular baking session.
- Semi-sweet chocolate chips: Melted with butter for a glossy, rich chocolate base that’s smooth and luscious.
- Unsalted butter: Adds creaminess and moisture for that perfect fudgy feel.
- Granulated sugar: Balances the bitterness of cocoa and chocolate while helping cookies crisp up slightly.
- Brown sugar: Brings a hint of caramel depth and keeps the cookie chewy and soft.
- Large eggs: Provide structure and richness to the dough, binding everything together.
- Vanilla extract: Enhances all the chocolate notes with a warm, subtle sweetness.
- All-purpose flour: The foundation that gives the cookies their form without overpowering the melt-in-your-mouth texture.
- Unsweetened cocoa powder: Boosts chocolate intensity and lends a beautiful dark color.
- Baking powder: Gently lifts the cookies for a tender but not cakey bite.
- Salt: Just a pinch to enhance all flavors, including the chocolate lava inside.
- Chocolate truffles or chocolate squares: The magical lava center that oozes warm chocolate when you bite in.
- Optional sea salt: A sprinkle on top to contrast the sweetness and intensify the chocolate.
How to Make Chocolate Lava Brownie Cookies Recipe
Step 1: Prepare Your Oven and Melt Chocolate
Start by preheating your oven to 350°F (175°C) and lining a baking sheet with parchment paper for easy cleanup. Next, gently melt the semi-sweet chocolate chips and unsalted butter together in a microwave-safe bowl, heating in 30-second bursts and stirring in between. This slow process ensures a velvety, lump-free chocolate base that’s both shiny and irresistible. Let it cool slightly to avoid cooking the eggs when you mix.
Step 2: Combine Sugars, Eggs, and Vanilla
In a separate bowl, whisk together the granulated sugar, brown sugar, eggs, and vanilla extract until everything is glossy and well mixed. This mixture will provide the lovely sweetness and structure to your dough, making the cookies tender yet chewy.
Step 3: Bring Wet and Dry Ingredients Together
Pour the melted chocolate mixture into the sugar and egg blend, stirring until smooth and darkly luscious. Then, in another bowl, sift the flour, cocoa powder, baking powder, and salt to evenly distribute and prevent lumps. Gradually add these dry ingredients to the wet mixture, folding gently until a thick dough forms that holds together but isn’t too sticky.
Step 4: Chill the Dough
Pop the dough into the refrigerator for 30 minutes. Chilling firms up the dough, making it easier to handle and helping the cookies keep their shape while baking. Trust me, this step is worth the wait for perfect results.
Step 5: Shape Cookies Around Chocolate Lava Centers
Once chilled, scoop about 2 tablespoons of dough and flatten it slightly in your palm. Place a chocolate truffle or square in the center, then carefully wrap the chocolate with dough, sealing it completely. Roll into a smooth ball and place on your prepared baking sheet, leaving about 2 inches apart so they have room to spread slightly without merging.
Step 6: Bake to Gooey Perfection
Bake the cookies for 9 to 11 minutes. You’re aiming for set edges but a soft center — that’s what keeps the lava molten when you bite in. Remove from the oven and let them cool on the baking sheet for 5 minutes; if you like, sprinkle a touch of sea salt while the cookies are still warm to add a perfect burst of flavor contrast.
How to Serve Chocolate Lava Brownie Cookies Recipe
Garnishes
A sprinkle of flaky sea salt on the warm cookies amps up the chocolate flavor and adds a sophisticated touch. You can also dust the cookies lightly with powdered sugar for a pretty, snowy effect or drizzle melted white chocolate for contrast and elegance.
Side Dishes
Serve these cookies alongside a scoop of vanilla bean ice cream for the ultimate dessert indulgence. Fresh berries or a dollop of whipped cream highlight the rich chocolate beautifully and balance the decadent sweetness with brightness and lightness.
Creative Ways to Present
Stack your Chocolate Lava Brownie Cookies Recipe on a pretty platter for a party centerpiece or arrange them in individual glass jars for gift-giving or party favors. For an extra-special touch, serve them warm inside mini ramekins with molten chocolate centers still bubbling beneath the crumbs.
Make Ahead and Storage
Storing Leftovers
You can keep leftover cookies fresh in an airtight container at room temperature for up to three days. This keeps the exterior chewy and soft, while the chocolate lava inside slightly firms but still melts when warmed.
Freezing
To save some for later, freeze the shaped dough balls on a baking tray first, then transfer them to a resealable freezer bag. When you want fresh cookies, just bake directly from frozen, adding a minute or two to the baking time for perfect molten centers.
Reheating
Warm leftover or frozen-baked cookies in the microwave for 15 to 20 seconds before serving to revive that gooey chocolate core. Alternatively, a quick 5-minute warm-up in a 300°F oven will also restore their fresh-baked texture and molten magic.
FAQs
Can I use different chocolates for the lava centers?
Absolutely! While chocolate truffles or squares work best for a gooey center, you can experiment with filled chocolates like caramel, hazelnut, or even peanut butter chocolates to customize your lava surprise.
What if I don’t have cocoa powder?
Cocoa powder enhances the brownie flavor and adds depth but if you’re out, you can substitute with melted extra chocolate chips, though the texture might be a bit less cakey and intense.
How do I know when the cookies are done?
Look for cookies with edges that appear set and slightly firm, while the centers remain soft and a bit underbaked. This ensures the lava core melts perfectly inside.
Can I make these cookies dairy-free?
Yes! Use dairy-free chocolate chips and vegan butter or coconut oil to make the dough, and choose dairy-free chocolate pieces for the centers to keep the magic alive.
Are these cookies gluten-free?
Not as written since they use all-purpose flour. However, substituting a gluten-free flour blend can work well, just make sure it’s suitable for baking and adjust as needed for dough consistency.
Final Thoughts
There is something truly special about biting into a warm, chewy cookie that reveals a molten chocolate heart, and this Chocolate Lava Brownie Cookies Recipe nails that experience perfectly. Whether for a cozy night in or an impressive dessert for friends, these cookies combine chocolatey richness and gooey delight like no other. Trust me, once you try them, they’ll become a kitchen favorite you’ll want to make again and again!
Print
Chocolate Lava Brownie Cookies Recipe
- Prep Time: 15 minutes
- Cook Time: 10 minutes
- Total Time: 25 minutes (plus 30 minutes chilling)
- Yield: 12–14 cookies
- Category: Dessert
- Method: Baking
- Cuisine: American
- Diet: Vegetarian
Description
Delight in these decadent Chocolate Lava Brownie Cookies that combine the fudgy richness of brownies with the molten surprise of a gooey chocolate center. Perfectly baked to have a set edge and soft center, these cookies feature a luscious chocolate truffle hidden inside, offering an irresistible warm lava flow with every bite. Ideal for chocolate lovers seeking a unique dessert treat.
Ingredients
Chocolate Mixture
- 1 cup semi-sweet chocolate chips
- 1/2 cup unsalted butter
Wet Ingredients
- 3/4 cup granulated sugar
- 1/4 cup brown sugar
- 2 large eggs
- 1 teaspoon vanilla extract
Dry Ingredients
- 3/4 cup all-purpose flour
- 1/4 cup unsweetened cocoa powder
- 1/2 teaspoon baking powder
- 1/4 teaspoon salt
Fillings and Toppings
- 12–14 chocolate truffles or chocolate squares (for lava center)
- Optional sea salt for topping
Instructions
- Preheat and Prepare: Preheat your oven to 350°F (175°C) and line a baking sheet with parchment paper to prevent sticking.
- Melt Chocolate and Butter: In a microwave-safe bowl, melt the semi-sweet chocolate chips and unsalted butter together in 30-second intervals, stirring well after each session until fully smooth. Let the mixture cool slightly so it doesn’t cook the eggs in the next steps.
- Mix Wet Ingredients: In a separate bowl, whisk together the granulated sugar, brown sugar, eggs, and vanilla extract until the mixture is well combined and slightly frothy.
- Combine Chocolate with Wet Mixture: Add the cooled melted chocolate and butter mixture into the wet ingredients and mix thoroughly until you achieve a smooth, uniform batter.
- Sift and Add Dry Ingredients: In another bowl, sift together the all-purpose flour, unsweetened cocoa powder, baking powder, and salt to ensure even distribution. Gradually fold these dry ingredients into the wet chocolate mixture until a thick, cohesive dough forms.
- Chill the Dough: Cover the dough and refrigerate it for 30 minutes to make it easier to handle and help prevent spreading during baking.
- Shape Cookies with Lava Center: Scoop about 2 tablespoons of dough and flatten it slightly in your palm. Place a chocolate truffle or square in the center, then carefully wrap the dough around it, ensuring the chocolate is fully sealed inside. Roll the dough into a ball and place it on the prepared baking sheet. Repeat for all cookies, spacing each about 2 inches apart.
- Bake: Bake in the preheated oven for 9–11 minutes, just until the edges are set but the centers remain slightly soft. Do not overbake to keep the lava center gooey.
- Cool and Serve: Allow the cookies to cool on the baking sheet for 5 minutes before transferring them to a wire rack to cool further. Optionally, sprinkle with a pinch of sea salt while still warm to enhance the chocolate flavor.
Notes
- To achieve a gooey lava center, avoid overbaking the cookies; the centers should remain slightly soft.
- For variety, substitute the chocolate truffles with filled chocolates such as caramel or hazelnut for a different flavor surprise.
- Store leftover cookies in an airtight container at room temperature for up to 3 days or refrigerate and gently reheat to maintain a melty center.


