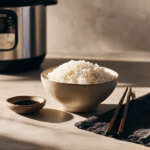
Why You’ll Love This Guide
The Instant Pot Rice setting takes the guesswork out of cooking perfect rice every time. With just the press of a button, you get fluffy, evenly cooked rice with no monitoring required. Ideal for busy kitchens, it works best with white rice and delivers consistent results quickly and efficiently.
ingredients
(Tip: You’ll find the full list of ingredients and measurements in the recipe card below.)
white rice (long grain, jasmine, or basmati recommended)water or broth (for added flavor)salt (optional)olive oil or butter (optional, for added richness)
directions
Rinse rice under cold water until the water runs clear to remove excess starch.
Add rice and water to the Instant Pot in a 1:1 ratio (e.g., 1 cup rice to 1 cup water).
Add a pinch of salt and a drizzle of oil or butter if desired.
Secure the lid, set the valve to “Sealing,” and press the Rice button.
The Rice setting automatically adjusts based on the amount of rice and pressure cooks on Low for about 12 minutes, then enters natural pressure release.
Allow the pressure to naturally release for 10–15 minutes, then switch the valve to “Venting” and carefully open the lid.
Fluff the rice with a fork and serve.
Servings and timing
This method yields approximately 3 cups of cooked rice per 1 cup dry rice.Preparation time: 5 minutesCooking time: 12 minutesNatural release time: 10–15 minutesTotal time: 25–30 minutes
Variations
Use broth instead of water for added flavor.
Add bay leaves, garlic, or herbs to infuse rice with aromatics.
Stir in lime juice and cilantro after cooking for a zesty twist.
Add frozen peas or corn before cooking for a one-pot side.
storage/reheating
Store leftover rice in an airtight container in the refrigerator for up to 4 days.Reheat in the microwave with a splash of water to restore moisture. Freeze for up to 1 month.
FAQs
Can I use the Rice setting for brown rice?
No, use Manual/Pressure Cook on High for brown rice, about 22–24 minutes with a 10-minute natural release.
Is rinsing the rice necessary?
Yes, it removes excess starch and prevents sticky or gummy texture.
Can I double the recipe?
Yes, the Rice setting adjusts the time automatically based on volume.
Can I quick release the pressure?
Natural release is best for fluffy texture—quick release may cause uneven cooking.
Do I need to use the Rice button?
You can use Manual/Pressure Cook instead for more control, but the Rice button works well for white rice.
Does it work with all rice types?
Best for white rice (long grain, jasmine, basmati). For other types, use manual timing.
Should I use the trivet?
No, add rice directly to the inner pot with water.
Why is my rice still undercooked?
Check the sealing ring and ensure the valve is set to “Sealing.” Use manual mode if needed.
How do I prevent burn warning?
Ensure proper water-to-rice ratio and avoid stirring thick ingredients into the rice.
Conclusion

Using the Instant Pot Rice setting is an easy, reliable way to make perfect white rice every time. With minimal prep and hands-off cooking, it’s a convenient solution for busy meals and meal prep—leaving you with soft, fluffy rice and zero hassle.
Print
How to Use the Instant Pot Rice Setting
- Prep Time: 5 minutes
- Cook Time: 12 minutes
- Total Time: 27 minutes (includes natural release)
- Yield: 2–3 servings 1x
- Category: Side Dish
- Method: Pressure Cooked
- Cuisine: Asian
- Diet: Gluten Free
Description
The Instant Pot Rice setting is a convenient function designed to perfectly cook white rice automatically. It adjusts pressure and cooking time based on internal sensors, making it ideal for beginners or anyone seeking hassle-free rice.
Ingredients
- 1 cup white rice (e.g., long grain, jasmine, or basmati)
- 1 cup water (or broth for added flavor)
- 1/2 teaspoon salt (optional)
Instructions
- Rinse the rice under cold water until the water runs clear to remove excess starch and prevent sticking.
- Add the rinsed rice, water, and optional salt to the Instant Pot inner pot.
- Close the lid and set the valve to the “Sealing” position.
- Press the “Rice” button. The Instant Pot will automatically set the time and pressure (typically low pressure for 12 minutes).
- Allow the Instant Pot to cook and switch to “Keep Warm” once done. Let the pressure naturally release for 10 minutes, then carefully switch the valve to “Venting” to release any remaining pressure.
- Fluff the rice with a fork and serve.
Notes
- The “Rice” setting is calibrated for white rice only. Use “Manual” or “Pressure Cook” for brown rice or other grains.
- Always maintain a 1:1 rice-to-water ratio when using the Rice setting.
- For firmer rice, reduce water slightly; for softer rice, add a bit more.
- You can double or triple the recipe without changing the cooking time.
Nutrition
- Serving Size: 1 cup
- Calories: 200
- Sugar: 0g
- Sodium: 290mg
- Fat: 0.5g
- Saturated Fat: 0g
- Unsaturated Fat: 0.5g
- Trans Fat: 0g
- Carbohydrates: 44g
- Fiber: 0.5g
- Protein: 4g
- Cholesterol: 0mg


Your email address will not be published. Required fields are marked *