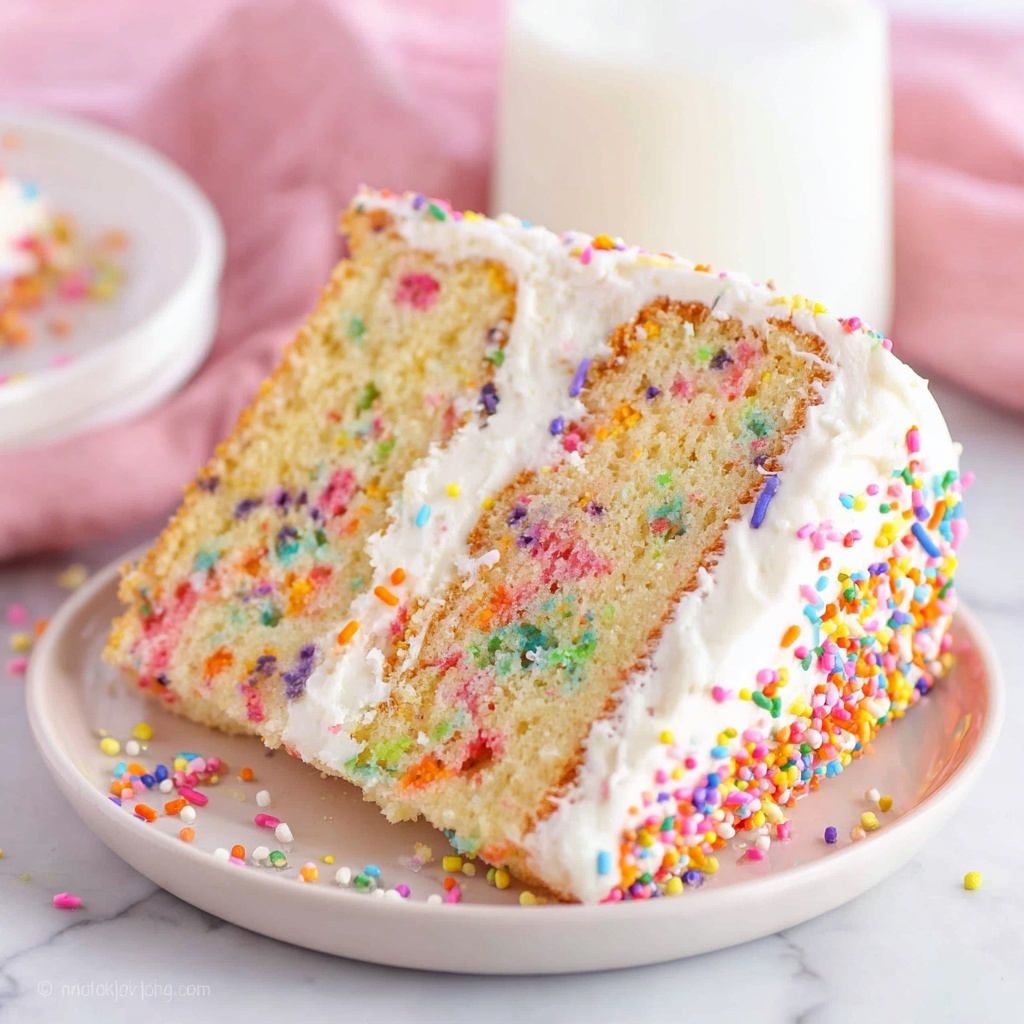
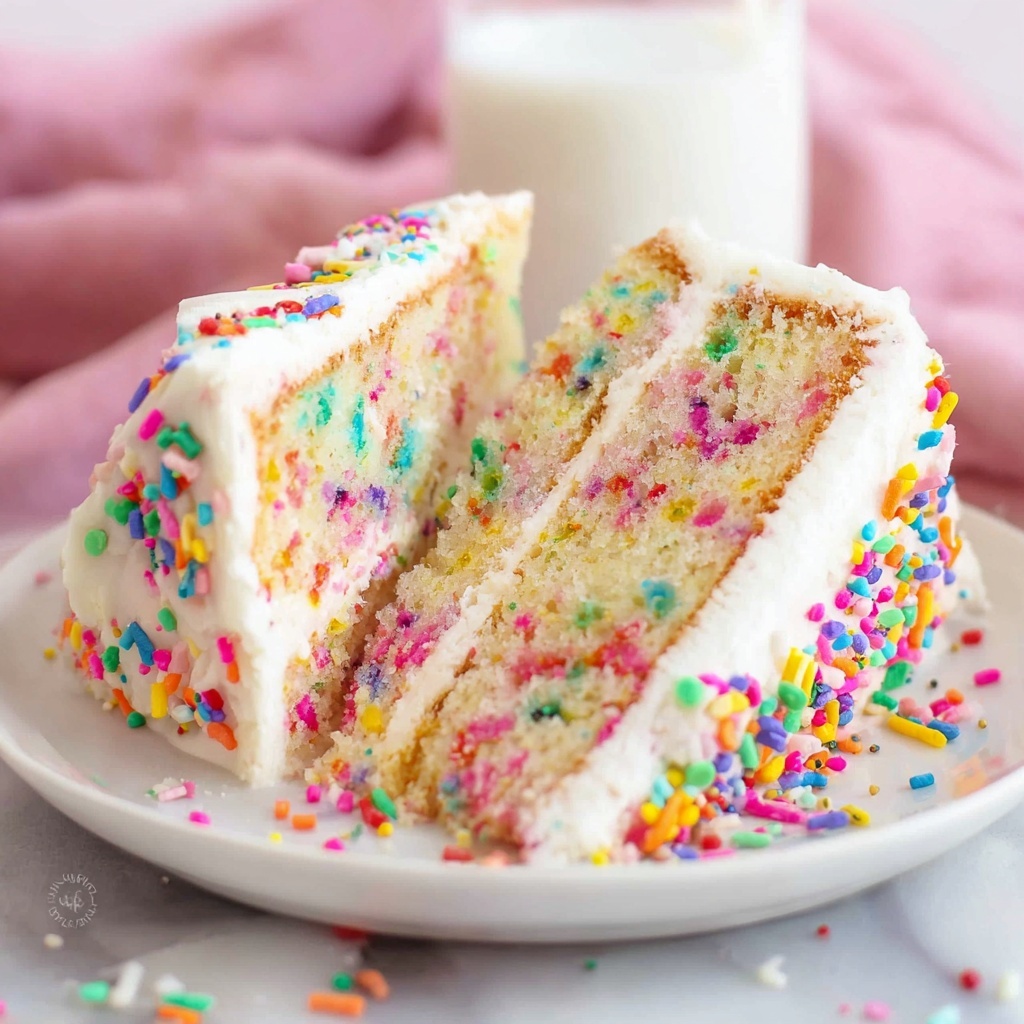
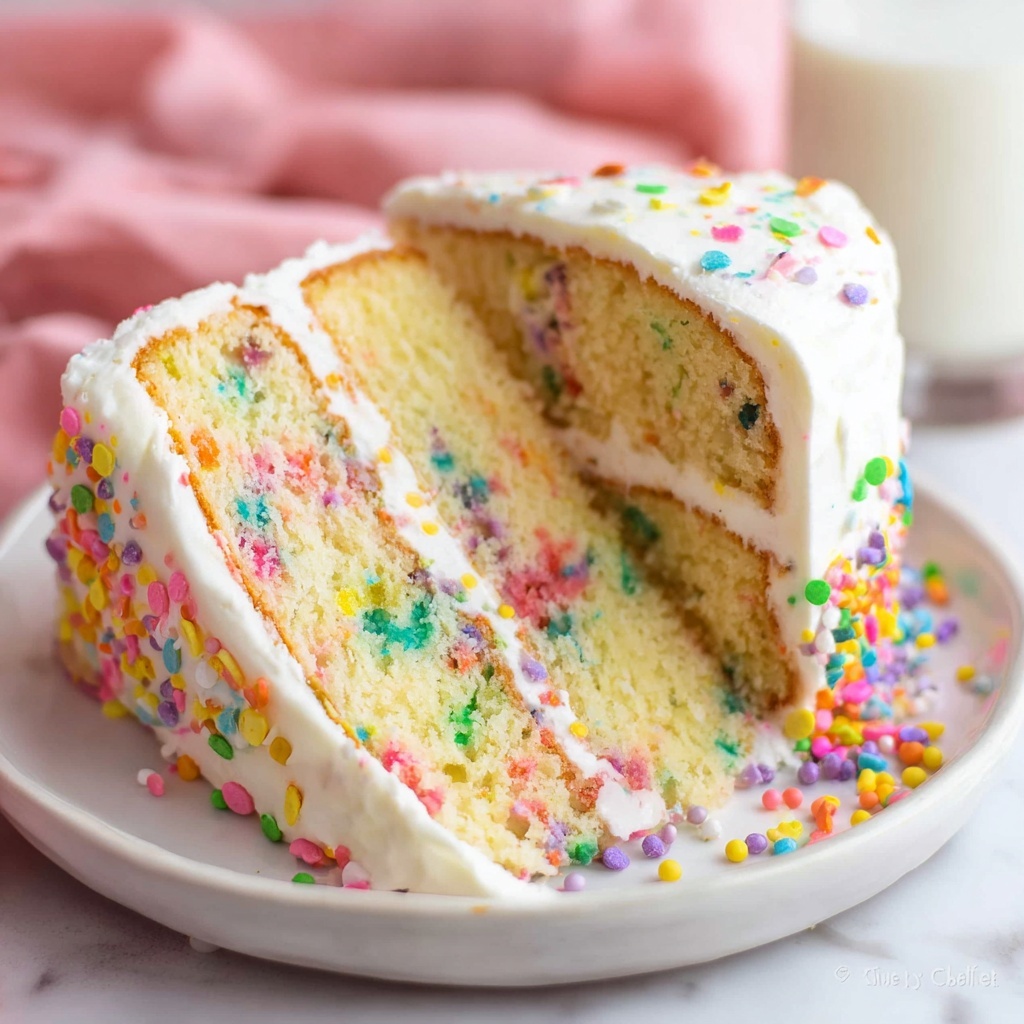
If you’re on the hunt for a show-stopping dessert that combines the best of celebration cake and creamy ice cream, you’ve just hit the jackpot. This Funfetti Ice Cream Cake Recipe is pure joy in slice form, bursting with colorful sprinkles and layers of soft, moist cake paired perfectly with luscious vanilla ice cream. It’s not only visually delightful but also a delightful treat for any party or special day, offering a perfectly balanced blend of sweet flavors and fun textures that never fails to impress.
Ingredients You’ll Need
This Funfetti Ice Cream Cake Recipe calls for simple ingredients that you likely already have or can easily grab at the store. Each element is essential to creating that perfect mix of flavor, softness, and festive color that makes this dessert so irresistible.
- 1 box funfetti cake mix (plus ingredients listed on box): The star of the show, bringing those iconic rainbow sprinkles right into the batter.
- 1/2 gallon vanilla ice cream (softened): Adds creamy richness and cool contrast to the cake layers.
- 1/2 cup rainbow sprinkles (divided): Sprinkle throughout for extra bursts of color and surprise.
- 1 cup whipped cream or whipped topping: For frosting the cake with a light, fluffy finish.
- 1/4 cup hot fudge or chocolate syrup (optional): Adds a decadent drizzle that pairs amazingly with the funfetti.
- Maraschino cherries for garnish (optional): Classic, bright red cherries offer a charming finishing touch.
How to Make Funfetti Ice Cream Cake Recipe
Step 1: Bake the Funfetti Cake Layers
Begin by preheating your oven as directed on the cake mix box, then prepare the funfetti cake batter following the package instructions. Pour the batter evenly into two 8-inch round cake pans and bake until a toothpick inserted in the center comes out clean. This step ensures your layers come out perfectly moist and ready to hug the ice cream later. Let the cakes cool completely to avoid melting the ice cream layer in the next steps.
Step 2: Prepare the Ice Cream Layer
While the cake cools, line a round cake pan with plastic wrap for easy removal later. Spread the softened vanilla ice cream evenly into the pan, smoothing the top for a neat layer. Scatter half of the rainbow sprinkles over the ice cream for a delightful crunch and visual fun, then freeze until firm—usually 2 to 3 hours works perfectly. Timing this well is key for a flawless assembly later.
Step 3: Assemble Your Funfetti Ice Cream Cake Recipe
Once your cake layers and ice cream layer have chilled fully, the magic assembly begins. Place one cake layer on your serving plate, then gently lift the ice cream layer out of the pan and place it on top of the cake. Crown with the second cake layer, creating that irresistible layered look. Finish by spreading whipped cream all over the top and sides, then sprinkle the remaining rainbow sprinkles over your frosted masterpiece.
Step 4: Add Optional Final Touches and Freeze
For an extra indulgent touch, drizzle hot fudge or chocolate syrup over the whipped cream and adorn with maraschino cherries if you like. Pop the entire cake back into the freezer for at least one hour so everything sets together perfectly. This chilling step ensures clean slices and a refreshing finish that’s ready to wow your guests.
How to Serve Funfetti Ice Cream Cake Recipe
Garnishes
Simple garnishes can take this Funfetti Ice Cream Cake Recipe from yummy to stunning. Rainbow sprinkles aren’t just inside the cake but also add that extra pop when dotted over whipped cream topping. Adding maraschino cherries and a drizzle of hot fudge makes it feel like a special celebration even if it’s a casual day.
Side Dishes
This dessert is a star all on its own, but pairing it with a fresh berry salad or a light fruit compote complements the sweetness beautifully and balances the richness. A scoop of fresh whipped cream or a couple of chocolate-dipped strawberries on the side can also elevate the treat and delight the senses.
Creative Ways to Present
Presentation makes all the difference! Try serving your Funfetti Ice Cream Cake Recipe on a colorful cake stand or slice it into smaller, individual portions in mini dessert dishes for a fun party platter. You can even get creative by layering different ice cream flavors with the cake to customize the taste and add visual layers of color.
Make Ahead and Storage
Storing Leftovers
Leftover Funfetti Ice Cream Cake Recipe? No worries. Simply cover the cake tightly with plastic wrap or store in an airtight container and keep it in the freezer to retain that fresh-from-the-fridge delight. Proper wrapping prevents ice crystals and keeps the cake moist and the ice cream creamy.
Freezing
This cake is made for freezing! After assembling, freezing is the best way to let the flavors meld and the cake firm up nicely. You can freeze the cake for up to a week in advance, making it a fantastic choice if you want to prepare your dessert ahead of a big event.
Reheating
No need to reheat this cake since it’s best enjoyed frozen or slightly softened from the fridge. Just let it sit at room temperature for a few minutes before slicing for easier cutting, and you’re good to go. Avoid microwaving as it will melt the ice cream and change the texture.
FAQs
Can I use a different ice cream flavor in this Funfetti Ice Cream Cake Recipe?
Absolutely! Vanilla is classic, but feel free to get creative with chocolate, strawberry, or even birthday cake flavored ice cream to add a unique twist to your cake.
How long can I store the Funfetti Ice Cream Cake in the freezer?
For the best flavor and texture, enjoy your cake within one to two weeks of freezing. Beyond that, the ice cream may develop freezer burn, and the cake might dry out, but it will still be edible.
Can I make the cake layers from scratch?
Definitely! If you prefer homemade cake, just keep the sprinkles in there to keep the funfetti vibe and bake your two layers as you normally would. The recipe is very flexible to suit your baking style.
What’s the best way to slice the cake?
Dip a sharp knife in warm water, wipe it dry, and then slice through the cake in smooth motions. This helps you cut clean layers without squishing the ice cream or smearing the whipped cream.
Can I prepare this recipe for a birthday party?
This Funfetti Ice Cream Cake Recipe is perfect for birthdays or any festive occasion! Its bright colors, fun toppings, and creamy texture make it a standout dessert that guests of all ages will love.
Final Thoughts
There’s something wonderfully nostalgic and joyful about this Funfetti Ice Cream Cake Recipe that makes every celebration feel even more special. Whether you’re planning a birthday bash or just want to treat yourself to a slice of happiness, this recipe is easy to make, delightful to serve, and simply unforgettable in flavor. So why wait? Grab your sprinkles and ice cream and start building your own rainbow-filled masterpiece today!
Print
Funfetti Ice Cream Cake Recipe
- Prep Time: 30 minutes (plus freezing time)
- Cook Time: 25 minutes
- Total Time: 3 hours 55 minutes
- Yield: 12 servings
- Category: Dessert
- Method: Freezing
- Cuisine: American
- Diet: Vegetarian
Description
This Funfetti Ice Cream Cake combines the colorful joy of funfetti cake with creamy vanilla ice cream, layered and frosted with whipped cream, making it a perfect festive dessert for birthdays or summer celebrations. The addition of rainbow sprinkles and optional hot fudge and cherries add visual appeal and extra sweetness.
Ingredients
Cake
- 1 box funfetti cake mix (plus ingredients listed on box)
Ice Cream Layer
- 1/2 gallon vanilla ice cream (softened)
- 1/4 cup rainbow sprinkles
Topping and Garnishes
- 1 cup whipped cream or whipped topping
- 1/4 cup hot fudge or chocolate syrup (optional)
- Maraschino cherries for garnish (optional)
- 1/4 cup rainbow sprinkles (reserved for garnish)
Instructions
- Prepare the Cake Layers: Preheat your oven according to the funfetti cake mix package instructions. Prepare the cake batter as directed, then divide it evenly between two 8-inch round cake pans. Bake until a toothpick inserted into the center comes out clean, about 25 minutes. Remove from oven and allow cakes to cool completely.
- Prepare the Ice Cream Layer: Line a round cake pan with plastic wrap for easy removal. Press the softened vanilla ice cream into the pan, smoothing the surface evenly. Sprinkle half of the rainbow sprinkles on top of the ice cream layer, then place the pan in the freezer. Freeze until the ice cream is firm, approximately 2 to 3 hours.
- Assemble the Cake: Once the cake layers and ice cream layer are fully chilled, remove the ice cream layer from the pan by lifting the plastic wrap. Place one cake layer on a serving plate, add the ice cream layer on top, then top with the second cake layer to create a sandwich of cake and ice cream.
- Frost and Garnish: Spread whipped cream evenly over the top and sides of the assembled cake. Decorate with the remaining rainbow sprinkles. Optionally, drizzle hot fudge or chocolate syrup over the top and garnish with maraschino cherries to enhance appearance and flavor.
- Final Freezing: Return the cake to the freezer and freeze for at least 1 hour to firm up before slicing and serving. For best slicing results, dip your knife in warm water before cutting through the cake.
Notes
- Soften ice cream sufficiently for spreading but avoid letting it melt completely.
- Try using different ice cream flavors to create fun variations of this cake.
- For clean slices, warm your knife under hot water and wipe dry before cutting.


