“`html
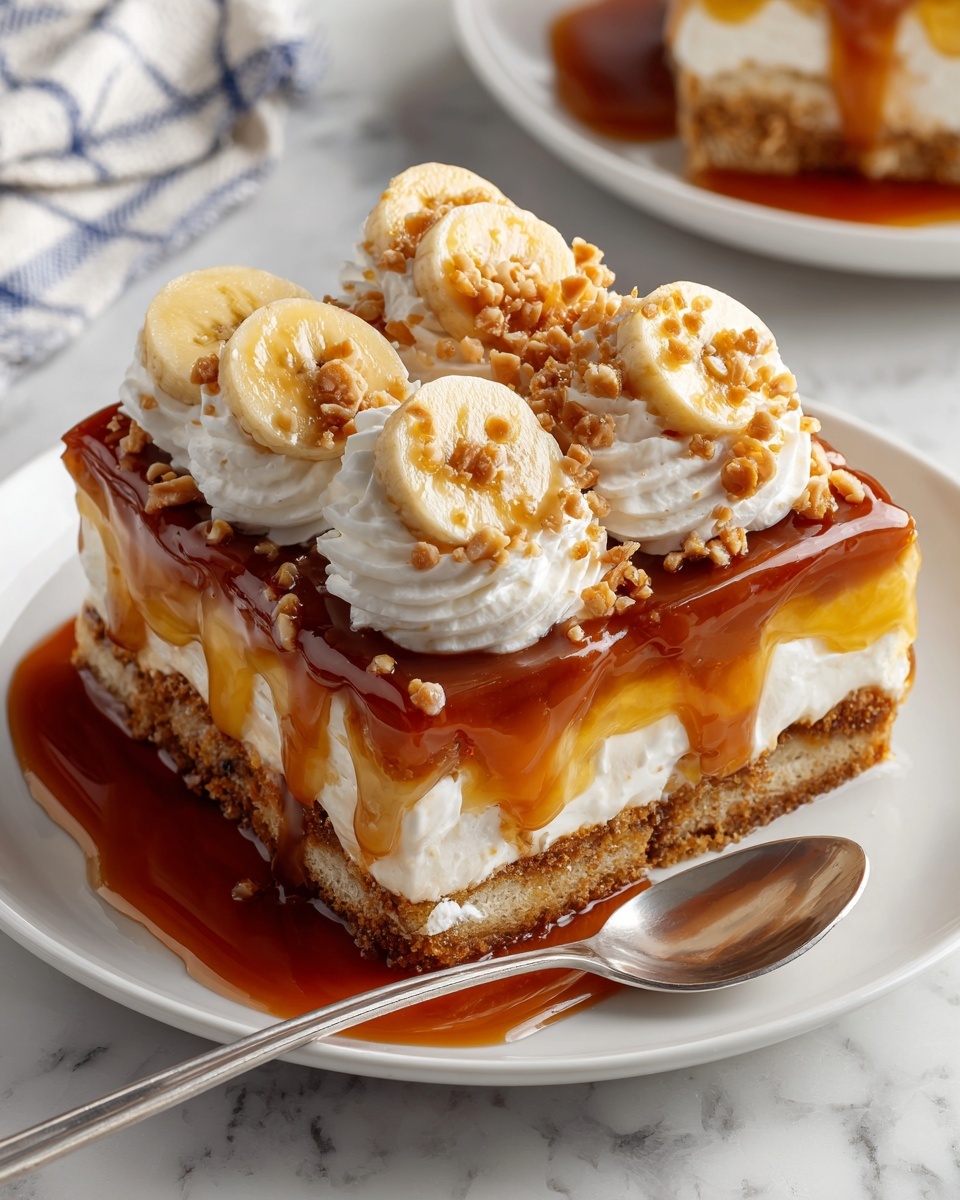
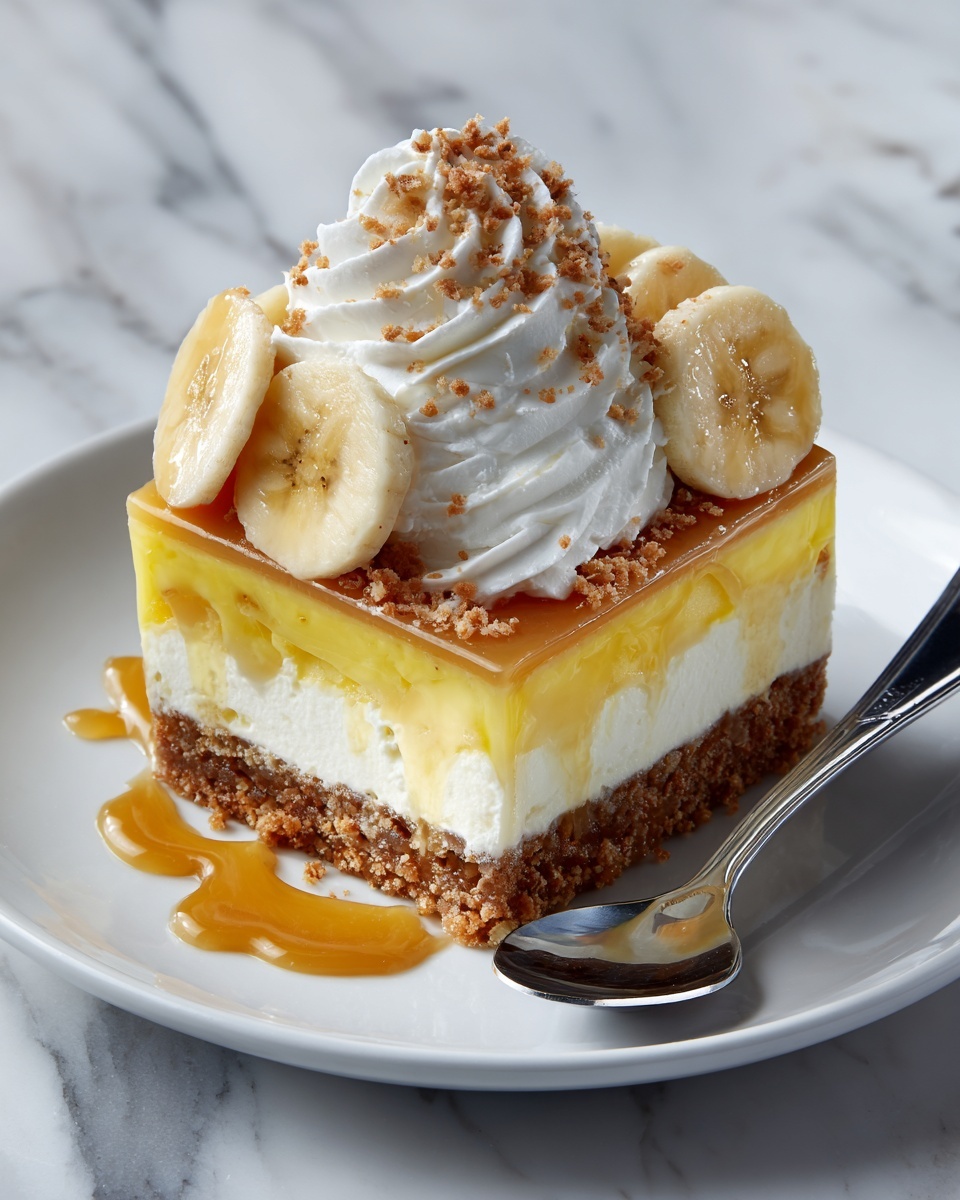
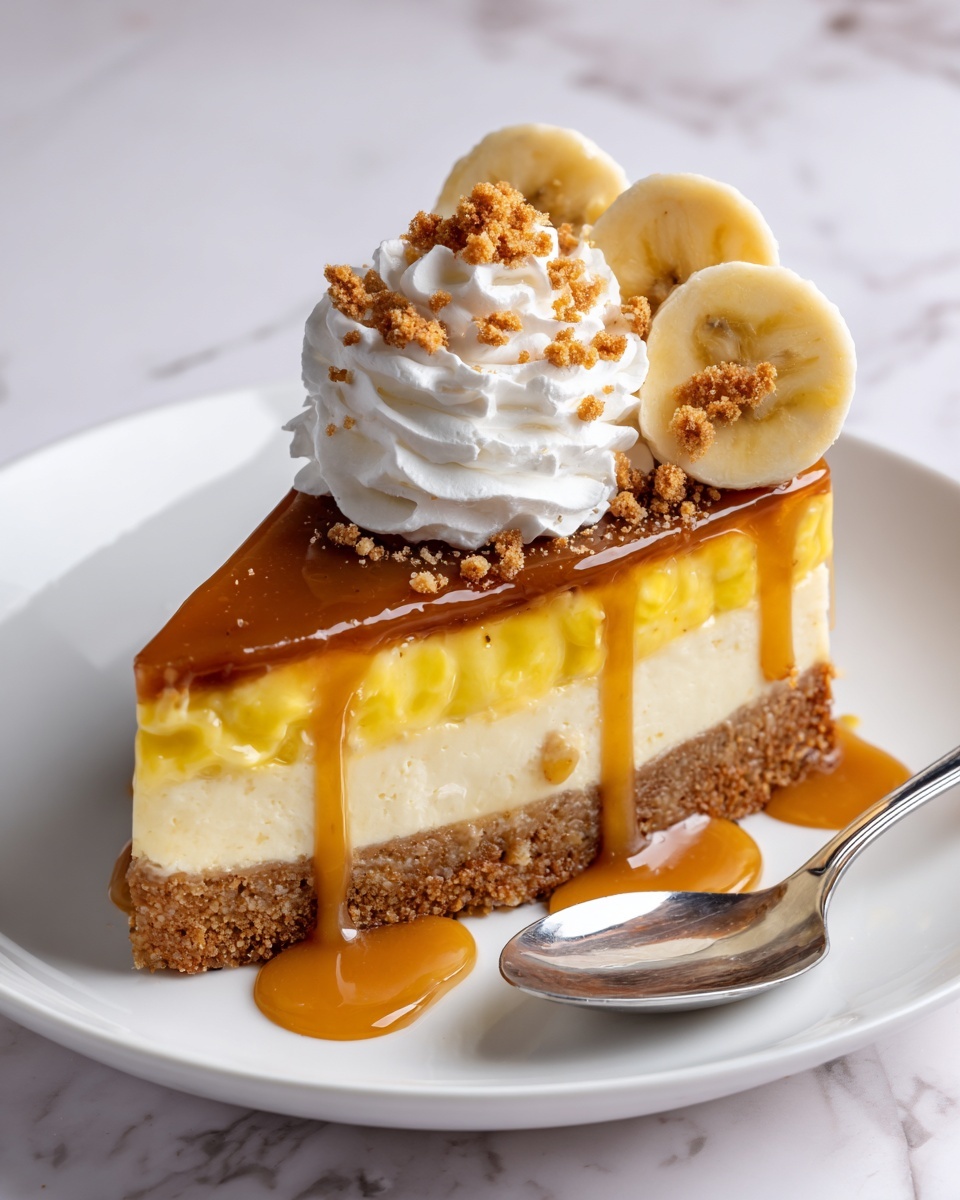
If you have a soft spot for classic desserts with a fresh twist, then you are absolutely going to love this Banana Upside-Down Cake Recipe. Imagine tender, caramelized bananas melting atop a buttery, moist cake that’s both comforting and exciting with every bite. It’s that beautiful balance of sweet and rich that makes this cake a total crowd-pleaser, perfect for an indulgent dessert or even a special breakfast treat that feels like a warm hug on a plate.
Ingredients You’ll Need
These simple yet essential ingredients come together to create the magic in this Banana Upside-Down Cake Recipe. Each one plays a key role—from the rich butter that creates golden caramel, to the perfectly ripe bananas that lend natural sweetness and moisture, and the buttermilk that makes the cake irresistibly tender.
- 3 ripe bananas, sliced: Choose bananas with plenty of brown spots for maximum sweetness and easy caramelization.
- 1/2 cup unsalted butter, melted: This is the base for the caramel layer that gives the cake its signature rich flavor.
- 1 cup brown sugar, packed: Provides the deep, molasses-like sweetness that caramelizes beautifully under the bananas.
- 1 1/2 cups all-purpose flour: The foundation of the cake’s light and fluffy texture.
- 1 teaspoon baking powder: Helps the cake rise and become airy.
- 1/2 teaspoon baking soda: Reacts with the buttermilk to add extra lift and tenderness.
- 1/4 teaspoon salt: Balances sweetness and enhances flavors.
- 1/2 cup granulated sugar: Adds sweetness and contributes to the cake’s beautiful crumb.
- 2 large eggs: Bind the ingredients together and add richness.
- 1 teaspoon vanilla extract: Brings warmth and depth to the cake’s flavor profile.
- 1/2 cup buttermilk: Adds moisture and tenderness; if you don’t have buttermilk, mix milk with a bit of vinegar as a perfect substitute.
How to Make Banana Upside-Down Cake Recipe
Step 1: Prepare the Caramel Base
Start by preheating your oven to 350°F (175°C) — this is essential to get everything baking evenly. Next, mix the melted butter with the brown sugar until smooth and pour this luscious caramel mixture evenly into the bottom of a 9-inch round cake pan. This will become the sweet, sticky foundation that your bananas sit on and slowly transform into golden caramel during baking.
Step 2: Arrange the Bananas
Slice your ripe bananas into even pieces and carefully arrange them in a single layer on top of the brown sugar caramel. This arrangement not only looks stunning once flipped but ensures every slice of cake will have a generous amount of that delicious caramelized banana topping.
Step 3: Mix the Dry Ingredients
In a large bowl, whisk together the all-purpose flour, baking powder, baking soda, and salt. This combination is key to giving your cake the perfect rise and texture without any heaviness. Take a moment to sift or whisk the flour well to avoid any lumps and ensure a light batter.
Step 4: Beat the Wet Ingredients
In a separate bowl, cream the granulated sugar and eggs together until the mixture looks light and fluffy—this usually takes about 2 to 3 minutes of energetic beating. This step is crucial as it incorporates air into your batter, helping create that delightful cake crumb. Then, add the vanilla extract and mix until beautifully blended.
Step 5: Combine Wet and Dry Mixtures with Buttermilk
Now comes the fun part! Gradually add the dry ingredients to the wet mixture while alternating with the buttermilk. Start with one-third of the flour mixture, followed by half of the buttermilk, another third of the flour, the remaining buttermilk, and finally the last of the flour. Gently fold everything together until just combined; be careful not to overmix, or the cake may turn dense.
Step 6: Bake the Cake
Pour the batter evenly over the beautifully arranged bananas in your prepared pan. Slide the pan into your preheated oven and bake for 30 to 35 minutes, or until a toothpick inserted into the center comes out clean. You’ll start to smell that intoxicating caramel aroma filling your kitchen, a lovely sign your Banana Upside-Down Cake is almost ready.
Step 7: Flip and Finish
Once baked, let the cake cool in the pan for about 10 minutes—this helps the caramel set slightly. Run a knife gently around the edges to loosen it, then place a serving plate upside down on top of the pan and flip them together in one swift move. Your cake will reveal its gorgeous caramelized banana top. If any bananas stick to the pan, carefully lift and reposition them on the cake for that picture-perfect presentation.
How to Serve Banana Upside-Down Cake Recipe
Garnishes
The cake is fantastic on its own, but to elevate it, top with a dollop of whipped cream or a scoop of velvety vanilla ice cream. For added texture and a nutty twist, sprinkle chopped toasted walnuts or pecans over the top. A light dusting of powdered sugar can add a delicate finishing touch that brightens its appearance.
Side Dishes
This Banana Upside-Down Cake pairs wonderfully with fresh berries or a citrus fruit salad for a refreshing contrast. If you’re serving it for breakfast or brunch, a strong cup of coffee or a spiced chai latte complements the cake’s sweetness beautifully and rounds out the experience.
Creative Ways to Present
For a stunning dessert centerpiece, serve individual slices with a drizzle of caramel sauce or a sprinkle of toasted coconut flakes. For a fun twist at gatherings, turn this into cupcake-sized portions baked in muffin tins, perfect for easy sharing and adorable presentation. Experimenting with these ideas keeps the Banana Upside-Down Cake Recipe fresh and exciting every time you make it.
Make Ahead and Storage
Storing Leftovers
Leftover Banana Upside-Down Cake stays moist and delicious when stored in an airtight container at room temperature for up to 2 days. If you plan to keep it longer, refrigerate for up to a week to maintain freshness, but bring it to room temperature before serving for the best flavor and texture.
Freezing
You can freeze slices of this cake wrapped tightly in plastic wrap and stored in a freezer-safe container. It keeps well for up to 2 months. When ready to enjoy, thaw overnight in the refrigerator, then warm slightly to recapture its original tender charm.
Reheating
To reheat, a quick zap in the microwave for about 20 to 30 seconds restores softness and revives the caramel notes. Alternatively, warm the slice gently in a low oven (about 300°F / 150°C) for 10 minutes. This process revives the cake’s homemade comfort and makes it taste freshly baked.
FAQs
Can I use frozen bananas for the Banana Upside-Down Cake Recipe?
Frozen bananas can work, but make sure they are fully thawed and drained well to avoid extra moisture making the cake too soggy. Overripe fresh bananas still provide the best texture and flavor.
What if I don’t have buttermilk? Can I substitute it?
Absolutely! If you don’t have buttermilk on hand, simply add half a tablespoon of vinegar or lemon juice to half a cup of milk. Let it sit for 5 minutes before using to mimic the acidity and tenderness that buttermilk adds to the cake.
Is it possible to make this cake gluten-free?
Yes, you can substitute the all-purpose flour with a gluten-free baking blend that measures cup-for-cup. Make sure it includes xanthan gum to help mimic the cake’s texture.
How ripe should the bananas be?
The riper, the better! Bananas with lots of brown spots are ideal as they’re sweeter and softer, which enhances the caramelization and overall moistness of the cake.
Can I add nuts or other fruits to the Banana Upside-Down Cake Recipe?
Definitely! Adding chopped walnuts or pecans into the batter gives a lovely crunch, and mixing in fruits like blueberries or pineapple chunks can bring refreshing pops of flavor. Just be mindful not to overload the batter so it bakes evenly.
Final Thoughts
This Banana Upside-Down Cake Recipe is a delightful treat that takes a classic dessert to a whole new level. With its simple ingredients and straightforward steps, anyone can create a luscious, caramelized cake that feels like a sweet little celebration each time you serve it. I can’t wait for you to try making it—you’re going to adore the warm aromas and delicious flavors that fill your kitchen and heart!
“`
Print
Banana Upside-Down Cake Recipe
- Prep Time: 15 minutes
- Cook Time: 30-35 minutes
- Total Time: 45-50 minutes
- Yield: 8 servings
- Category: Dessert
- Method: Baking
- Cuisine: American
Description
Indulge in this delightful Banana Upside-Down Cake, featuring a luscious layer of caramelized bananas atop a moist and fluffy cake. Perfect for dessert or a sweet breakfast treat, this recipe offers a delightful twist on a classic favorite that will impress friends and family.
Ingredients
For the Caramelized Banana Topping
- 3 ripe bananas, sliced
- 1/2 cup unsalted butter, melted
- 1 cup brown sugar, packed
For the Cake Batter
- 1 1/2 cups all-purpose flour
- 1 teaspoon baking powder
- 1/2 teaspoon baking soda
- 1/4 teaspoon salt
- 1/2 cup granulated sugar
- 2 large eggs
- 1 teaspoon vanilla extract
- 1/2 cup buttermilk (or milk with 1/2 tablespoon vinegar added)
Instructions
- Preheat Oven: Preheat your oven to 350°F (175°C) to ensure it reaches the right temperature for baking the cake evenly.
- Prepare Caramel: In a medium bowl, mix the melted butter and brown sugar until smooth. Pour this mixture evenly into the bottom of a 9-inch round cake pan to create the caramelized base layer.
- Arrange Bananas: Place the sliced bananas in a single layer over the brown sugar and butter mixture, covering the entire bottom of the pan for an evenly caramelized topping.
- Mix Dry Ingredients: In a large bowl, whisk together the all-purpose flour, baking powder, baking soda, and salt to combine and aerate the dry components.
- Beat Eggs and Sugar: In another bowl, beat the granulated sugar and eggs together until the mixture becomes light and fluffy, about 2-3 minutes, which will help create a tender cake texture.
- Add Vanilla: Stir the vanilla extract into the egg mixture, blending well to infuse the flavor throughout the batter.
- Combine Wet and Dry Ingredients: Gradually add the dry ingredients alternately with the buttermilk to the wet ingredients, starting and ending with the flour mixture. Mix gently until just combined to keep the batter light and avoid overmixing.
- Pour Batter: Pour the prepared batter evenly over the arranged banana slices in the cake pan, using a spatula to smooth the surface if needed.
- Bake: Place the pan in the preheated oven and bake for 30-35 minutes, or until a toothpick inserted into the center comes out clean, indicating the cake is fully cooked.
- Cool: Remove the cake from the oven and let it rest in the pan for about 10 minutes to allow it to firm up for easier removal.
- Loosen Edges: Carefully run a knife around the edges of the cake to separate it from the pan walls, preventing sticking during flipping.
- Flip Cake: Place a serving plate upside down over the cake pan and flip the entire assembly to release the cake. If bananas stick to the pan, gently remove and reposition them on the cake.
- Serve: Allow the cake to cool slightly before slicing. Serve warm or at room temperature, optionally accompanied by whipped cream or vanilla ice cream for extra indulgence.
Notes
- For added flavor and texture, mix in chopped nuts like walnuts or pecans into the batter before baking.
- Store leftovers in an airtight container at room temperature for up to 2 days or refrigerate for up to a week to maintain freshness.
- Reheat slices slightly in the microwave to restore softness and enhance flavor when serving leftovers.


