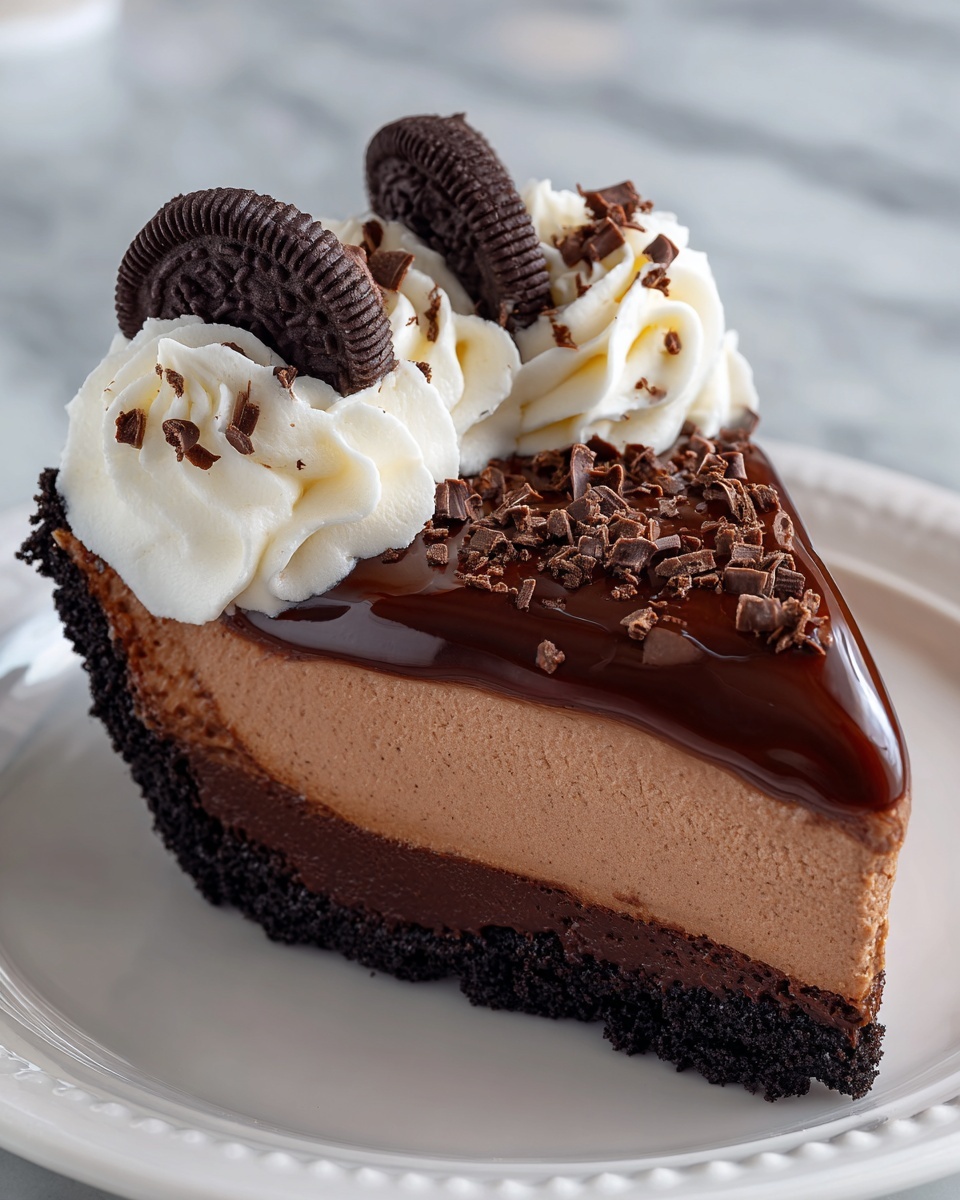
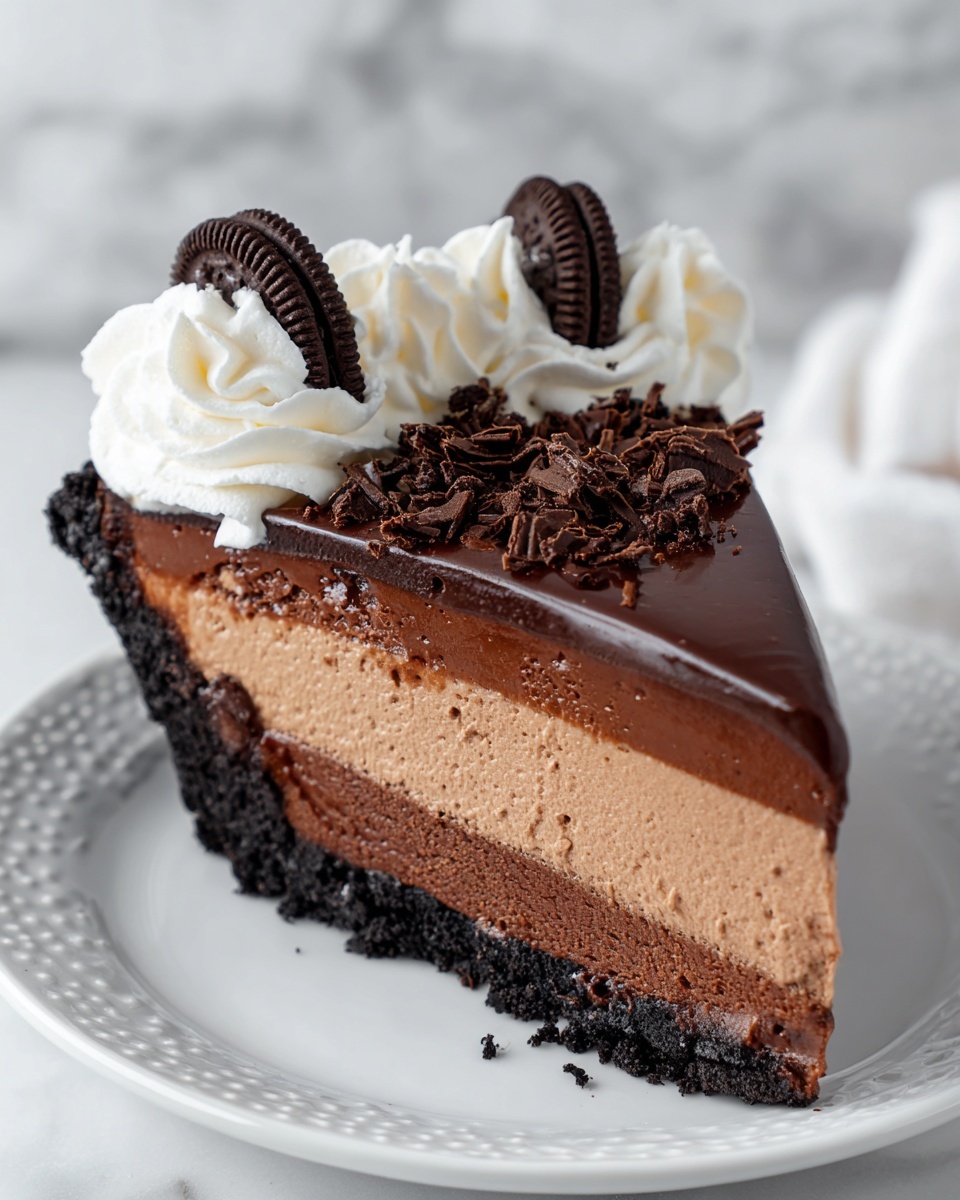
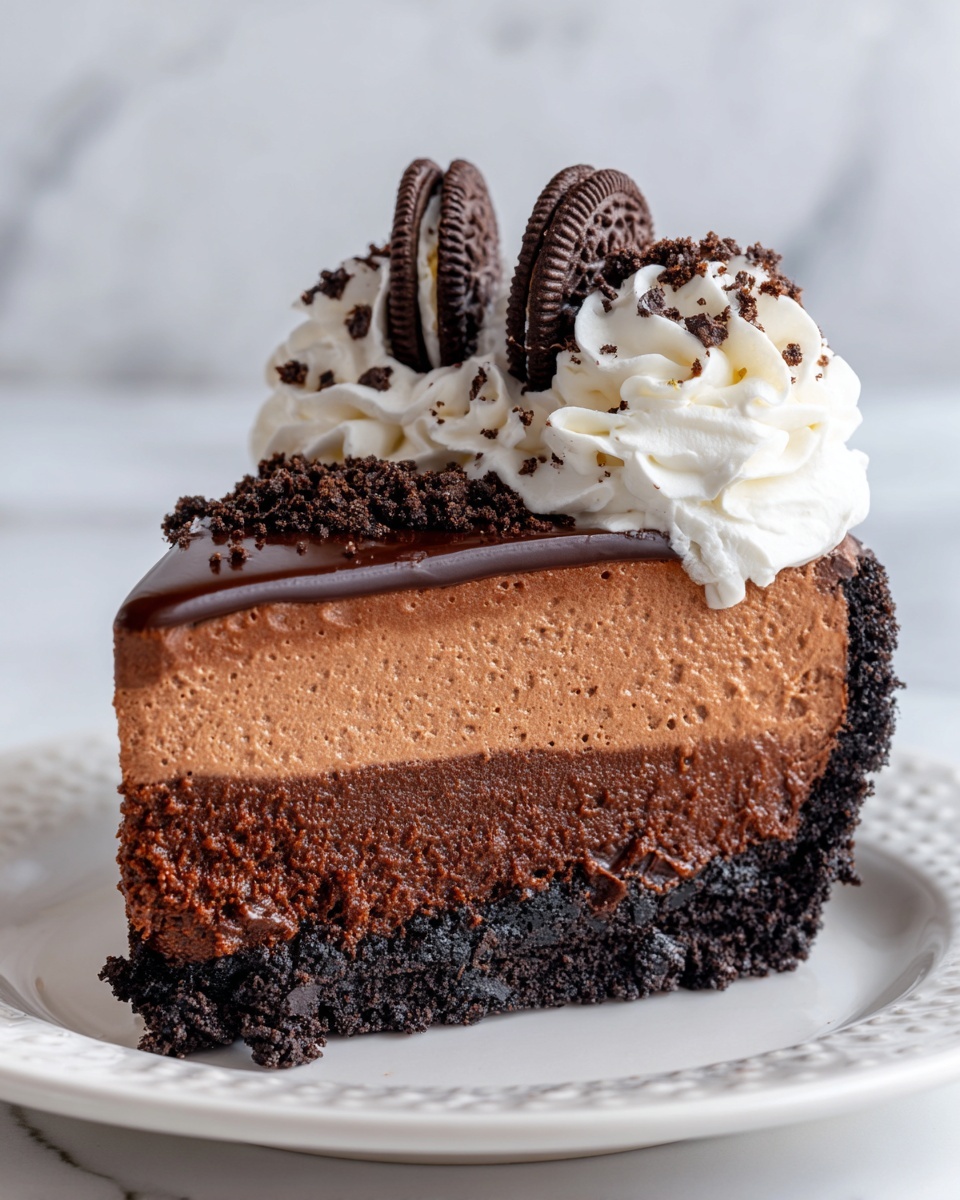
If you’re looking for a dessert that feels indulgent yet comes together with minimal fuss, this No Bake Chocolate Cheesecake Recipe is about to become your new best friend. Imagine a luscious, silky chocolate filling hugging a crunchy Oreo crust, all without turning on the oven. It’s rich but light, creamy yet delightfully textured, and perfect for impressing guests or treating yourself on any day of the week. The way the chocolate melts into the cream cheese gives this cheesecake a depth of flavor that’s simply irresistible.
Ingredients You’ll Need
Every ingredient in this No Bake Chocolate Cheesecake Recipe plays a vital role in building the perfect balance of flavor and texture. From the crumbly Oreo base providing the necessary crunch, to the smooth cream cheese and rich melted chocolate creating a velvety filling, each one is essential for that melt-in-your-mouth experience.
- Oreo cookie crumbs (2 3/4 cups / 369g): These form a chocolatey, creamy crust that’s both sturdy and delicious.
- Melted butter (5 tbsp / 70g): Binds the crumbs into a solid base with added richness.
- Cream cheese, room temperature (24 oz / 678g): Provides that signature dense, tangy cheesecake texture and taste.
- Sugar (1/2 cup / 104g): Sweetens the filling just right without overpowering the chocolate.
- Cocoa powder (3 tbsp / 22g): Intensifies the chocolate flavor and adds depth.
- Melted semi-sweet chocolate (8 oz): Gives the cheesecake its rich, luscious chocolate core.
- Cold heavy whipping cream (1 1/4 cups / 300ml): Lightens up the filling and adds creaminess when whipped.
- Powdered sugar (3/4 cup / 86g): Sweetens and stabilizes the whipped cream without grittiness.
- Vanilla extract (1 tsp): A small touch to brighten and enhance all the other flavors.
- Whipped cream: For topping and added indulgence.
- Chocolate shavings or other toppings: Adds texture and the perfect finishing flourish.
How to Make No Bake Chocolate Cheesecake Recipe
Step 1: Prepare the Crust
Start by combining the Oreo cookie crumbs with the melted butter in a bowl. This mixture needs to be pressed firmly into the bottom of a 9-inch springform pan, making sure it’s evenly spread and tightly packed. Pop it into the refrigerator while you prepare the filling — chilling the crust ensures it sets perfectly and gives you that satisfying crunch with every bite.
Step 2: Make the Filling
In a large mixing bowl, beat the cream cheese, sugar, and cocoa powder together until the mixture is silky smooth and free of lumps. Then slowly stir in the melted semi-sweet chocolate, folding it evenly through the batter for that deeply indulgent chocolate flavor. In a separate bowl, whip the cold heavy cream, powdered sugar, and vanilla extract into stiff peaks — this will add a light, airy texture to the otherwise rich filling. Gently fold the whipped cream into the cream cheese mixture, being careful not to deflate the fluffy whipped cream, creating a beautifully smooth and creamy filling.
Step 3: Assemble and Chill
Spread the luscious filling evenly over the chilled Oreo crust, smoothing the top carefully with a spatula. Cover the cheesecake with plastic wrap or a lid and refrigerate it for at least 5 hours — or even better, overnight. This waiting period allows the flavors to meld and the cheesecake to firm up to the perfect sliceable consistency.
Step 4: Serve and Enjoy
Once set, your cheesecake is ready to shine! Add a generous swirl of whipped cream and sprinkle chocolate shavings or your preferred toppings over the top. Now comes the best part — slice it up and dig in. Each bite is a perfect balance of buttery crust, creamy chocolate cheesecake, and heavenly toppings that will keep everyone asking for seconds.
How to Serve No Bake Chocolate Cheesecake Recipe
Garnishes
Adding garnishes elevates the cheesecake both in appearance and taste. Classic whipped cream swirls create a light contrast to the rich filling. Chocolate shavings, curls, or even a dusting of cocoa powder add texture and a hint of extra chocolate bliss. Fresh berries like raspberries or strawberries can also bring a burst of color and a subtle tartness that balances the sweetness.
Side Dishes
Serve this cheesecake alongside a simple fruit salad or a scoop of vanilla ice cream to enhance the dessert experience. A cup of rich coffee or a glass of smooth red wine also pair wonderfully, complementing the chocolate flavors without overpowering them.
Creative Ways to Present
Why not try serving slices on individual plates with a drizzle of caramel or raspberry sauce for a stunning presentation? You could also layer the filling and crust in wide-mouthed jars for a charming, rustic look that’s perfect for parties. Mini versions in cupcake liners are a fun, bite-sized take on this classic dessert that will wow guests without fuss.
Make Ahead and Storage
Storing Leftovers
This No Bake Chocolate Cheesecake Recipe keeps beautifully in the refrigerator for up to 4 days when covered tightly with plastic wrap or stored in an airtight container. Keeping it chilled preserves its creamy texture and full flavor, making it easy to enjoy leftovers anytime.
Freezing
If you want to extend the life of your cheesecake, it freezes wonderfully. Wrap it securely with plastic wrap and then aluminum foil or place slices in a freezer-safe container. Frozen cheesecake can last for up to 2 months and thawing it overnight in the fridge will restore its texture and flavor close to freshly made.
Reheating
Since this is a no bake cheesecake, it’s best enjoyed cold or at room temperature. Avoid microwaving or heating as it can ruin the texture and cause the filling to separate. Just let it sit out for about 15 minutes before serving if you prefer a slightly softer bite.
FAQs
Can I substitute the Oreo crust with another cookie?
Absolutely! Any sturdy, chocolate or plain cookie crumbs like graham crackers or digestive biscuits work well. Just make sure to adjust the amount of butter to ensure the crust holds together.
Do I really need to let the cheesecake chill for 5 hours?
Yes, chilling is key to allowing the filling to firm up properly. You can refrigerate it overnight for the best texture and flavor development.
Can I use low-fat cream cheese or whipped cream?
While you can, the texture and richness might be affected. Full-fat ingredients give the cheesecake that signature creamy and indulgent mouthfeel that makes it so special.
How do I prevent the filling from becoming grainy?
Make sure your cream cheese is fully softened before mixing, and beat it well with the sugar and cocoa powder to ensure smoothness before adding melted chocolate and whipped cream.
Is it possible to make this cheesecake dairy-free or vegan?
With some ingredient swaps like vegan cream cheese, dairy-free whipped topping, and vegan chocolate, you can experiment to create a dairy-free version. The texture will differ somewhat but still taste delicious!
Final Thoughts
This No Bake Chocolate Cheesecake Recipe is a total game changer for anyone craving a decadent dessert without the hassle of baking. The balance of crunchy crust and the irresistibly creamy chocolate filling creates a treat that feels luxurious yet surprisingly simple to make. I promise once you try it, it’ll become your go-to whenever you want to impress or indulge. So grab your ingredients and treat yourself to a slice of happiness!
Print
No Bake Chocolate Cheesecake Recipe
- Prep Time: 20 minutes
- Cook Time: 0 minutes
- Total Time: 5 hours 20 minutes (including chilling)
- Yield: 12 servings
- Category: Dessert
- Method: No-Cook
- Cuisine: American
Description
This No Bake Chocolate Cheesecake is a rich and creamy dessert featuring a chocolatey Oreo crust and a smooth chocolate-infused cream cheese filling. Easy to prepare without any baking required, it chills to perfection and is topped with whipped cream and chocolate shavings for an indulgent finish. Perfect for satisfying chocolate cravings with minimal effort.
Ingredients
Crust
- 2 3/4 cups (369g) Oreo cookie crumbs
- 5 tbsp (70g) melted butter
Filling
- 24 oz (678g) cream cheese, room temperature
- 1/2 cup (104g) sugar
- 3 tbsp (22g) cocoa powder
- 8 oz melted semi-sweet chocolate
- 1 1/4 cups (300ml) cold heavy whipping cream
- 3/4 cup (86g) powdered sugar
- 1 tsp vanilla extract
Toppings
- Whipped cream
- Chocolate shavings or other toppings
Instructions
- Prepare the Crust: In a mixing bowl, combine Oreo cookie crumbs and melted butter until the mixture resembles wet sand. Press this mixture firmly into the bottom of a 9-inch springform pan to form an even crust. Place the crust in the refrigerator to chill and set while you prepare the filling.
- Make the Filling: In a large bowl, beat the cream cheese, sugar, and cocoa powder together until the mixture is smooth and free of lumps. Gradually pour in the melted semi-sweet chocolate, mixing well to combine. In a separate bowl, whip the cold heavy cream, powdered sugar, and vanilla extract until stiff peaks form. Gently fold the whipped cream into the cream cheese mixture to keep the filling light and airy.
- Assemble: Spread the prepared chocolate filling evenly over the chilled Oreo crust. Smooth out the top with a spatula to create an even layer. Cover and refrigerate the cheesecake for at least 5 hours or preferably overnight to allow it to firm up properly.
- Serve: Once the cheesecake is set and firm, remove it from the refrigerator. Top with whipped cream and chocolate shavings or any other desired toppings. Slice into portions and enjoy this rich, creamy no bake treat!
Notes
- Ensure the cream cheese is at room temperature for easier mixing and a smoother filling.
- Melt the chocolate gently, either in a microwave in short bursts or over a double boiler to prevent burning.
- Be careful not to overfold when incorporating the whipped cream to maintain a light texture.
- Use a springform pan for easy removal of the cheesecake without damaging the crust.
- Chilling time is crucial for firmness; do not skip or reduce the refrigeration period.


