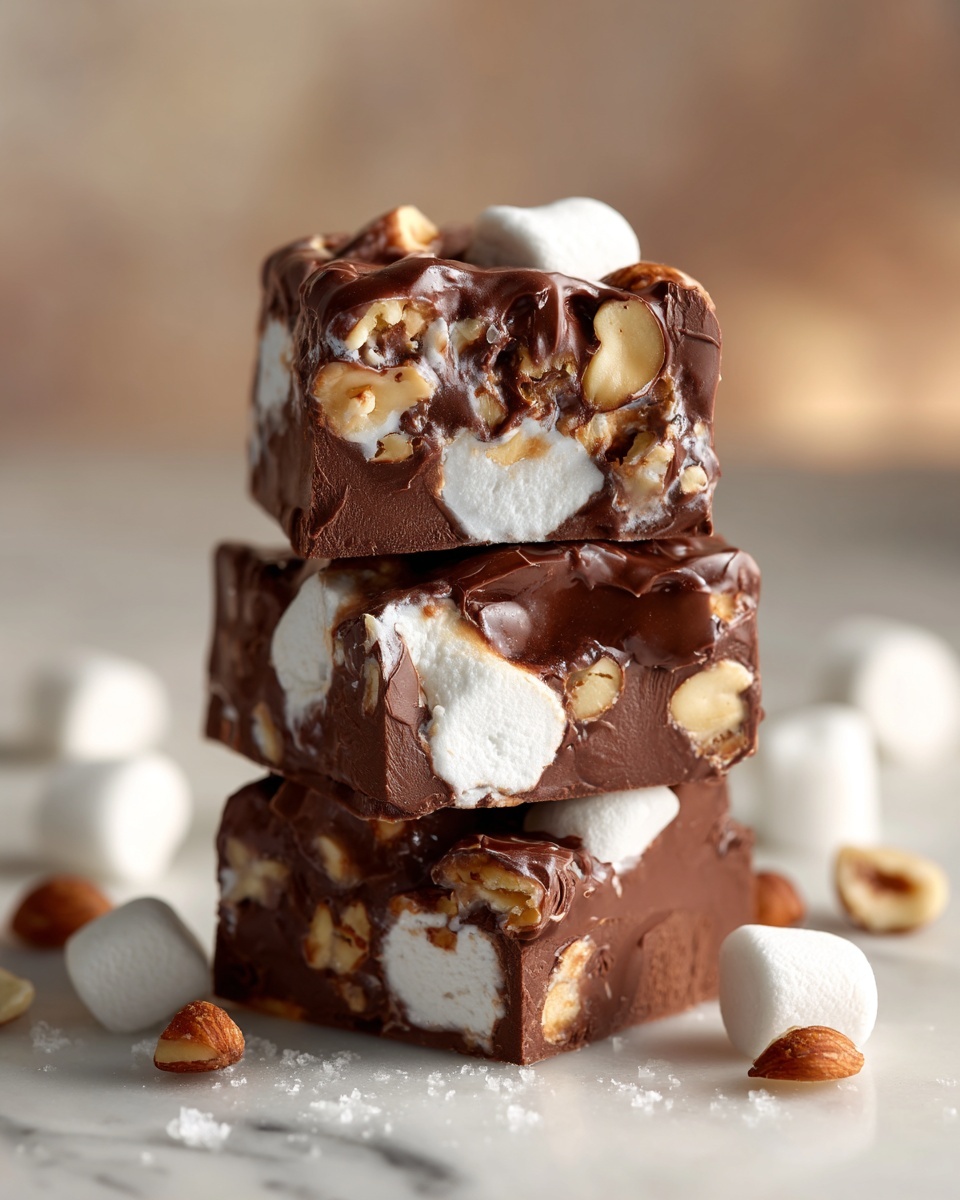
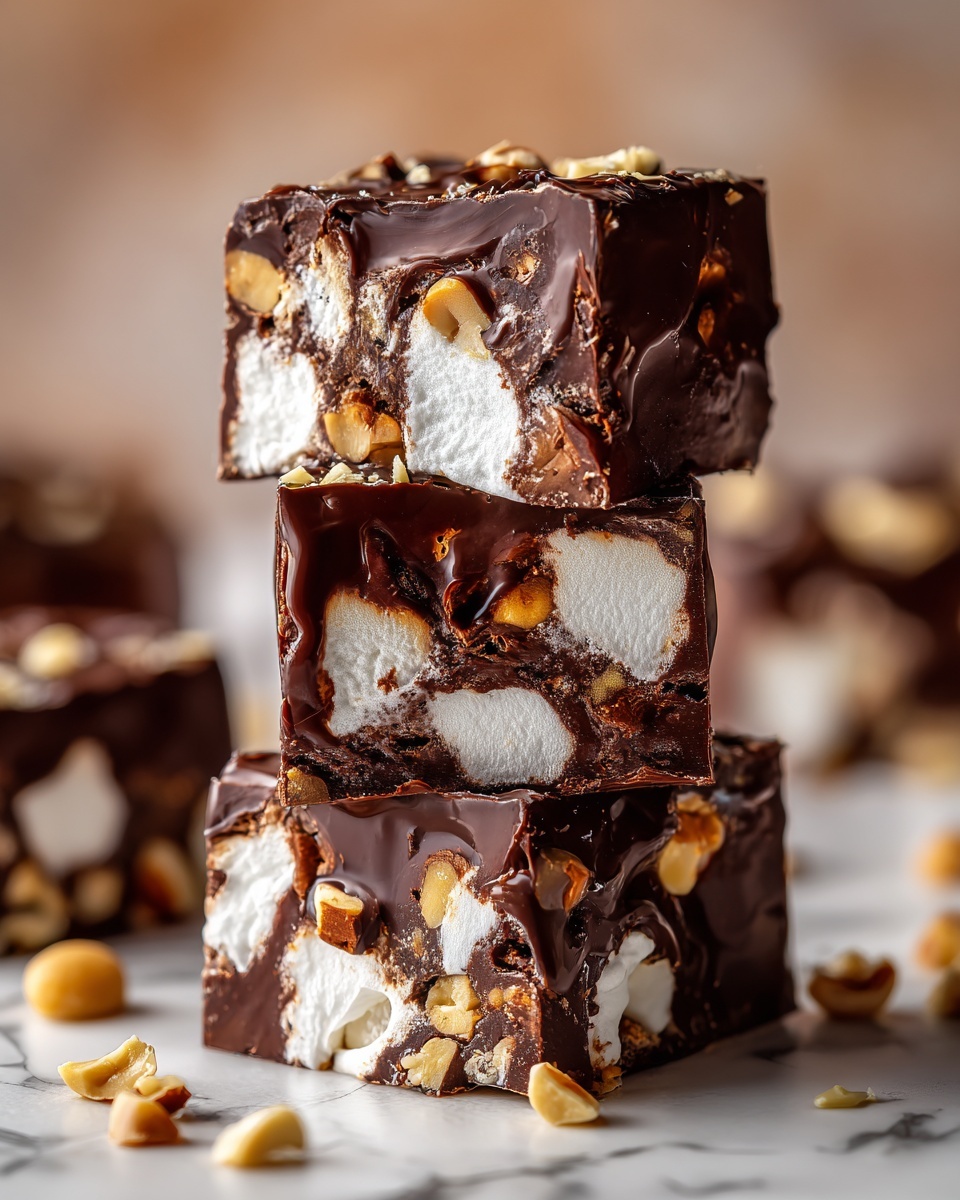
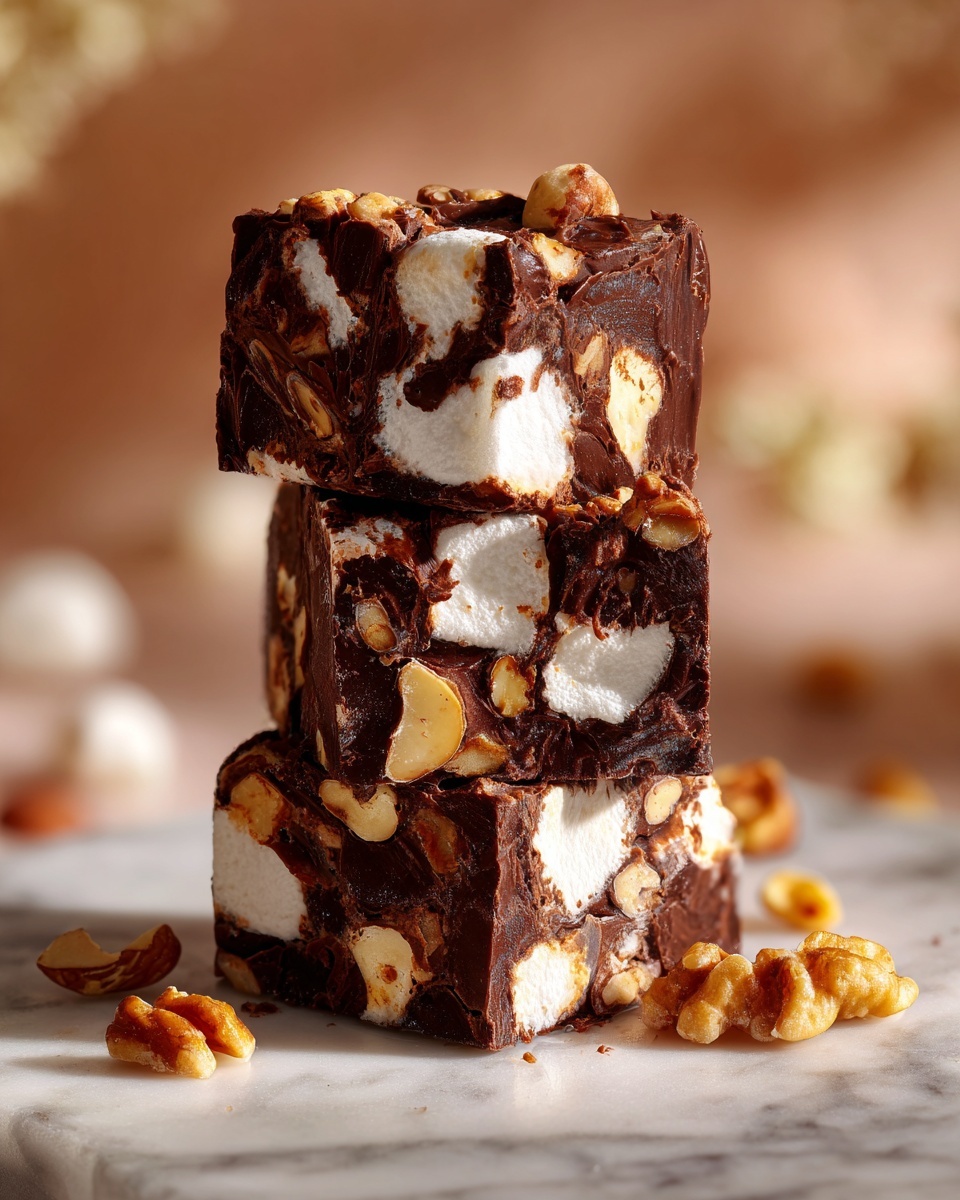
If you have a sweet tooth and crave something both nostalgic and utterly delightful, this Rocky Road Candy Recipe is exactly what you need. Imagine luscious semi-sweet chocolate mingling with creamy peanut butter, tender mini marshmallows, and crunchy nuts—all combining to create the perfect bite-sized treat that’s as fun to make as it is to devour. Whether you’re looking for a quick no-bake dessert or a thoughtful homemade gift, this recipe offers a fantastic balance of flavors and textures that’ll have everyone asking for more.
Ingredients You’ll Need
Gathering these simple yet essential ingredients is the first step toward your Rocky Road Candy recipe success. Each one plays a vital role in building the rich, creamy, and crunchy layers that make this treat so irresistible.
- Semi-sweet chocolate chips (2 cups): Provide a smooth, rich chocolate base that balances sweetness perfectly.
- Unsalted butter (2 tablespoons): Adds velvety richness and helps the chocolate melt smoothly.
- Creamy peanut butter (1/2 cup): Brings a nutty depth and creamy texture to the candy.
- Mini marshmallows (2 cups): Add chewy softness and that classic Rocky Road surprise.
- Roasted salted peanuts (1 cup): Deliver crunchy saltiness that cuts through the sweetness.
- Chopped walnuts or almonds (1/2 cup, optional): Optional for extra crunch and a hint of earthy flavor.
- Vanilla extract (1/2 teaspoon): Enhances the overall flavor with a subtle, warm aroma.
How to Make Rocky Road Candy Recipe
Step 1: Prepare Your Pan
Begin by lining an 8×8-inch baking dish with parchment paper. This simple step will make removing your Rocky Road Candy easy later on and ensures a smooth release after chilling.
Step 2: Melt the Chocolate Mixture
In a large saucepan over low heat, combine the semi-sweet chocolate chips, unsalted butter, and creamy peanut butter. Stir constantly until everything melts together into a luscious, glossy mixture. Constant stirring prevents burning and creates a silky texture that’s crucial for the final candy.
Step 3: Add Vanilla and Cool Slightly
Remove the pan from heat and stir in the vanilla extract. This little touch layers in complexity and warmth you might not expect but will definitely appreciate. Let the mixture cool for 3 to 5 minutes so it thickens just enough to hold the mix-ins without melting them.
Step 4: Fold in the Marshmallows and Nuts
Gently fold in the mini marshmallows, roasted salted peanuts, and if you’re using them, the chopped walnuts or almonds. Folding carefully keeps the marshmallows intact while ensuring every bite is loaded with goodies that create Rocky Road Candy’s signature texture.
Step 5: Set and Chill
Pour the rich mixture into the prepared dish, spreading it evenly with a spatula. Pop it into the refrigerator and chill for at least 2 hours or until firm. This step makes the candy easy to cut and gives all the flavors time to meld.
Step 6: Cut and Enjoy
Once set, lift the parchment paper from the dish and place on a cutting board. Slice into squares, and your Rocky Road Candy is ready to share or savor one piece at a time.
How to Serve Rocky Road Candy Recipe
Garnishes
For an extra-special presentation, sprinkle chopped nuts or mini marshmallows on top just before chilling, or drizzle with melted white chocolate for a pretty contrast. These little touches turn a simple treat into a gift-worthy confection.
Side Dishes
This Rocky Road Candy pairs beautifully with a cold glass of milk or a cup of hot coffee, providing a sweet and satisfying finish to any meal or snack time.
Creative Ways to Present
Try wrapping individual squares in colorful wax paper tied with twine for party favors or arranging them on a festive platter with fresh berries and whipped cream for an eye-catching dessert spread.
Make Ahead and Storage
Storing Leftovers
Keep your Rocky Road Candy in an airtight container in the refrigerator for up to one week. The cool temperature maintains its firmness and keeps the marshmallows chewy and fresh.
Freezing
If you want to save Rocky Road Candy for longer, freezing is a great option. Wrap squares tightly in plastic wrap and store in a freezer-safe container for up to 2 months. Thaw in the refrigerator before serving to maintain the perfect texture.
Reheating
This candy is best enjoyed cold or at room temperature. Reheating is generally not recommended, as the chocolate can lose its texture and the marshmallows may melt, altering the delightful crunch and chewiness.
FAQs
Can I use a different type of nut butter?
Absolutely. Almond butter or sunflower seed butter can be excellent substitutes, especially if you’re looking for a nut-free or different flavor profile. Just keep the peanut butter consistency in mind for melting.
What if I don’t have an 8×8-inch pan?
Feel free to use any similar-sized dish or adjust the thickness accordingly. A slightly larger pan will yield thinner candy squares, while a smaller one will create thicker pieces.
Can I add dried fruit to this recipe?
Yes! Dried cranberries, cherries, or raisins make wonderful additions. They introduce a chewy texture and a burst of tartness that compliments the chocolate and nuts brilliantly.
Is this recipe gluten-free?
On its own, yes—none of the listed ingredients contain gluten. However, if you add extras like crushed graham crackers, make sure to choose gluten-free options if you have dietary restrictions.
How long will the candy last at room temperature?
Because of the marshmallows and peanut butter, it’s best to keep Rocky Road Candy refrigerated. At room temperature, it may become too soft and sticky within a day or two.
Final Thoughts
Making this Rocky Road Candy Recipe is like capturing a little piece of happiness in every bite. Its simple, high-quality ingredients come together quickly to create a treat that’s perfect for sharing with friends and family or treating yourself on a cozy afternoon. I encourage you to give it a try—you might just find yourself reaching for these sweet, nutty, and marshmallow-studded delights over and over again.
Print
Rocky Road Candy Recipe
- Prep Time: 10 minutes
- Cook Time: 5 minutes
- Total Time: 2 hours 15 minutes
- Yield: 16 pieces
- Category: Dessert
- Method: No-Cook
- Cuisine: American
- Diet: Vegetarian
Description
A classic and indulgent Rocky Road Candy recipe combining melted semi-sweet chocolate, creamy peanut butter, mini marshmallows, and crunchy nuts for a delicious no-bake treat perfect for holidays or anytime snacking.
Ingredients
Chocolate Mixture
- 2 cups semi-sweet chocolate chips
- 2 tablespoons unsalted butter
- 1/2 cup creamy peanut butter
- 1/2 teaspoon vanilla extract
Mix-Ins
- 2 cups mini marshmallows
- 1 cup roasted salted peanuts
- 1/2 cup chopped walnuts or almonds (optional)
Instructions
- Prepare Baking Dish: Line an 8×8-inch baking dish with parchment paper to ensure easy removal of the candy once set.
- Melt Chocolate Mixture: In a large saucepan over low heat, combine the semi-sweet chocolate chips, unsalted butter, and creamy peanut butter. Stir constantly until the mixture is smooth and fully melted.
- Add Vanilla: Remove the saucepan from heat and stir in the vanilla extract to enhance the flavor profile.
- Cool Mixture: Allow the chocolate mixture to cool for 3–5 minutes to prevent marshmallows from melting when added.
- Fold in Mix-Ins: Gently fold the mini marshmallows, roasted salted peanuts, and if using, the chopped walnuts or almonds into the cooled chocolate mixture until evenly distributed.
- Transfer and Chill: Pour the combined mixture into the prepared baking dish and spread evenly. Refrigerate for at least 2 hours or until firm and set.
- Cut and Store: Once firm, lift the candy from the baking dish using the parchment paper and cut into 16 squares. Store the Rocky Road candy in an airtight container in the refrigerator to maintain freshness.
Notes
- You can substitute peanut butter with almond butter or sunflower seed butter for a nut-free option.
- For extra texture, mix in crushed graham crackers or dried fruit.


